Snowflake
ToolJet can connect to Snowflake databases to read and write data.
Connection
To establish a connection with the Snowflake data source, you can either click on the + Add new Data source button located on the query panel or navigate to the Data Sources page from the ToolJet dashboard and choose Snowflake as the data source.
Authentication Methods
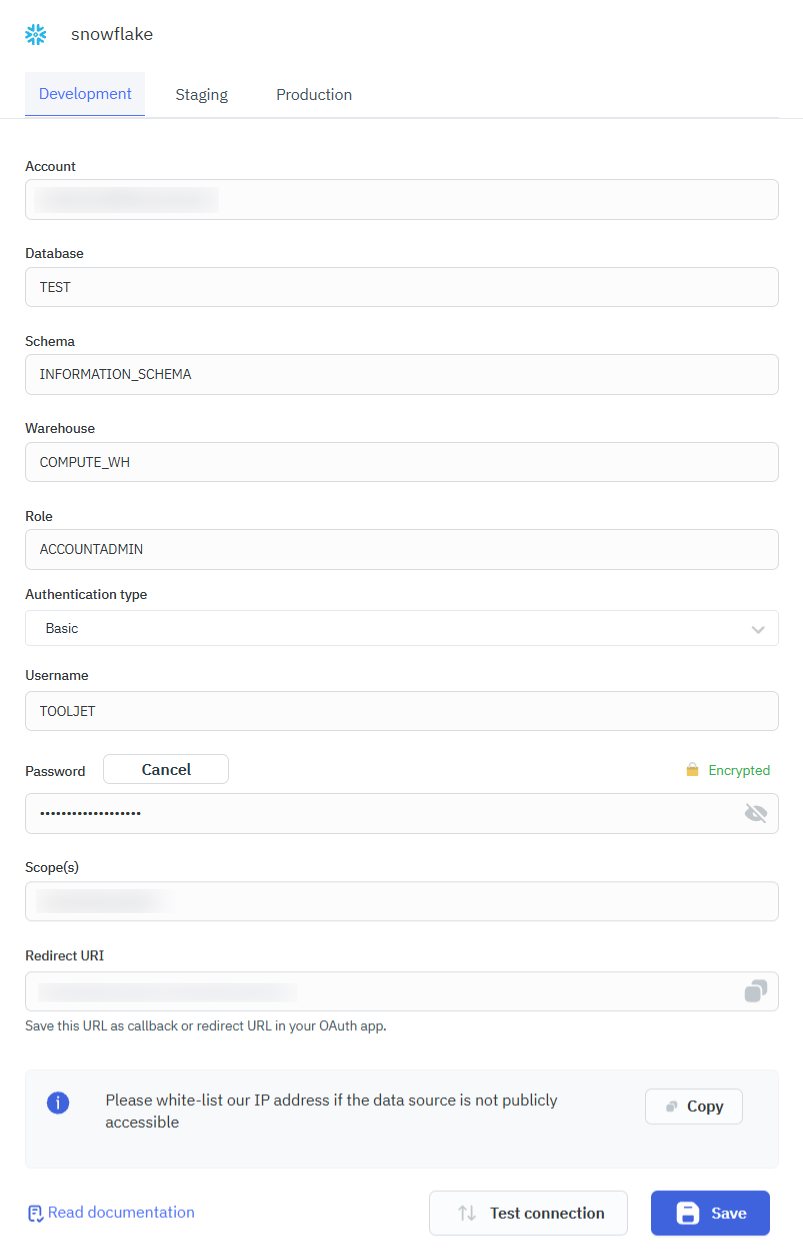
Basic Authentication
Authenticates to Snowflake using a username and password to establish a direct connection with the specified account, role, and warehouse.
Please make sure the Host/IP of the database is accessible from your VPC if you have self-hosted ToolJet. If you are using ToolJet cloud, please whitelist our IP.
You can find snowflake docs on network policies here.
ToolJet requires the following to connect to Snowflake database.
- Account
- Username/Login name
- Password
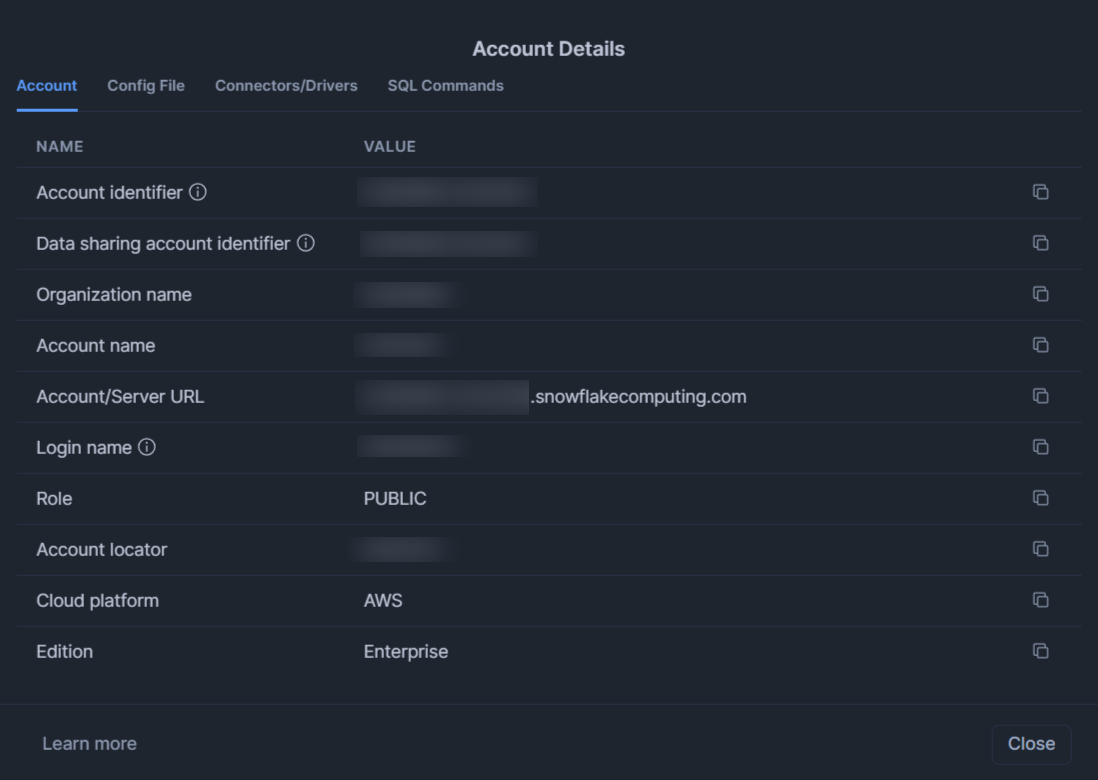
Use your Snowflake Account Identifier as the value for the Account field.
You can also configure additional optional parameters.
OAuth 2.0
Generate OAuth Credentials from Snowflake
Follow the steps below to obtain the required OAuth credentials: Client ID, Client Secret, Authorization URL, and more.
Step 1: Create a Security Integration
Run the following query in a Snowflake worksheet:
USE ROLE ACCOUNTADMIN;

CREATE OR REPLACE SECURITY INTEGRATION tooljet_oauth
TYPE = OAUTH
ENABLED = TRUE
OAUTH_CLIENT = CUSTOM
OAUTH_CLIENT_TYPE = 'CONFIDENTIAL'
OAUTH_REDIRECT_URI = <your-tooljet-instance-redirect-uri>
OAUTH_ISSUE_REFRESH_TOKENS = TRUE
OAUTH_REFRESH_TOKEN_VALIDITY = 7776000;
Replace your-tooljet-instance-redirect-uri with your ToolJet Redirect URI.
Step 2: Get Client Secret
Run the following query:
SELECT SYSTEM$SHOW_OAUTH_CLIENT_SECRETS('TOOLJET_OAUTH');
From the output, copy this : OAUTH_CLIENT_SECRET
Step 3: Get Client ID and OAuth Endpoints
Run the following query:
DESC SECURITY INTEGRATION TOOLJET_OAUTH;
From the output, copy the following values:
OAUTH_CLIENT_ID> Client IDOAUTH_AUTHORIZATION_ENDPOINT> Authorization URLOAUTH_TOKEN_ENDPOINT> Token URL
Note: Please ensure that your role is not included in the BLOCKED_ROLES_LIST. If it is included, you will need to clear it.

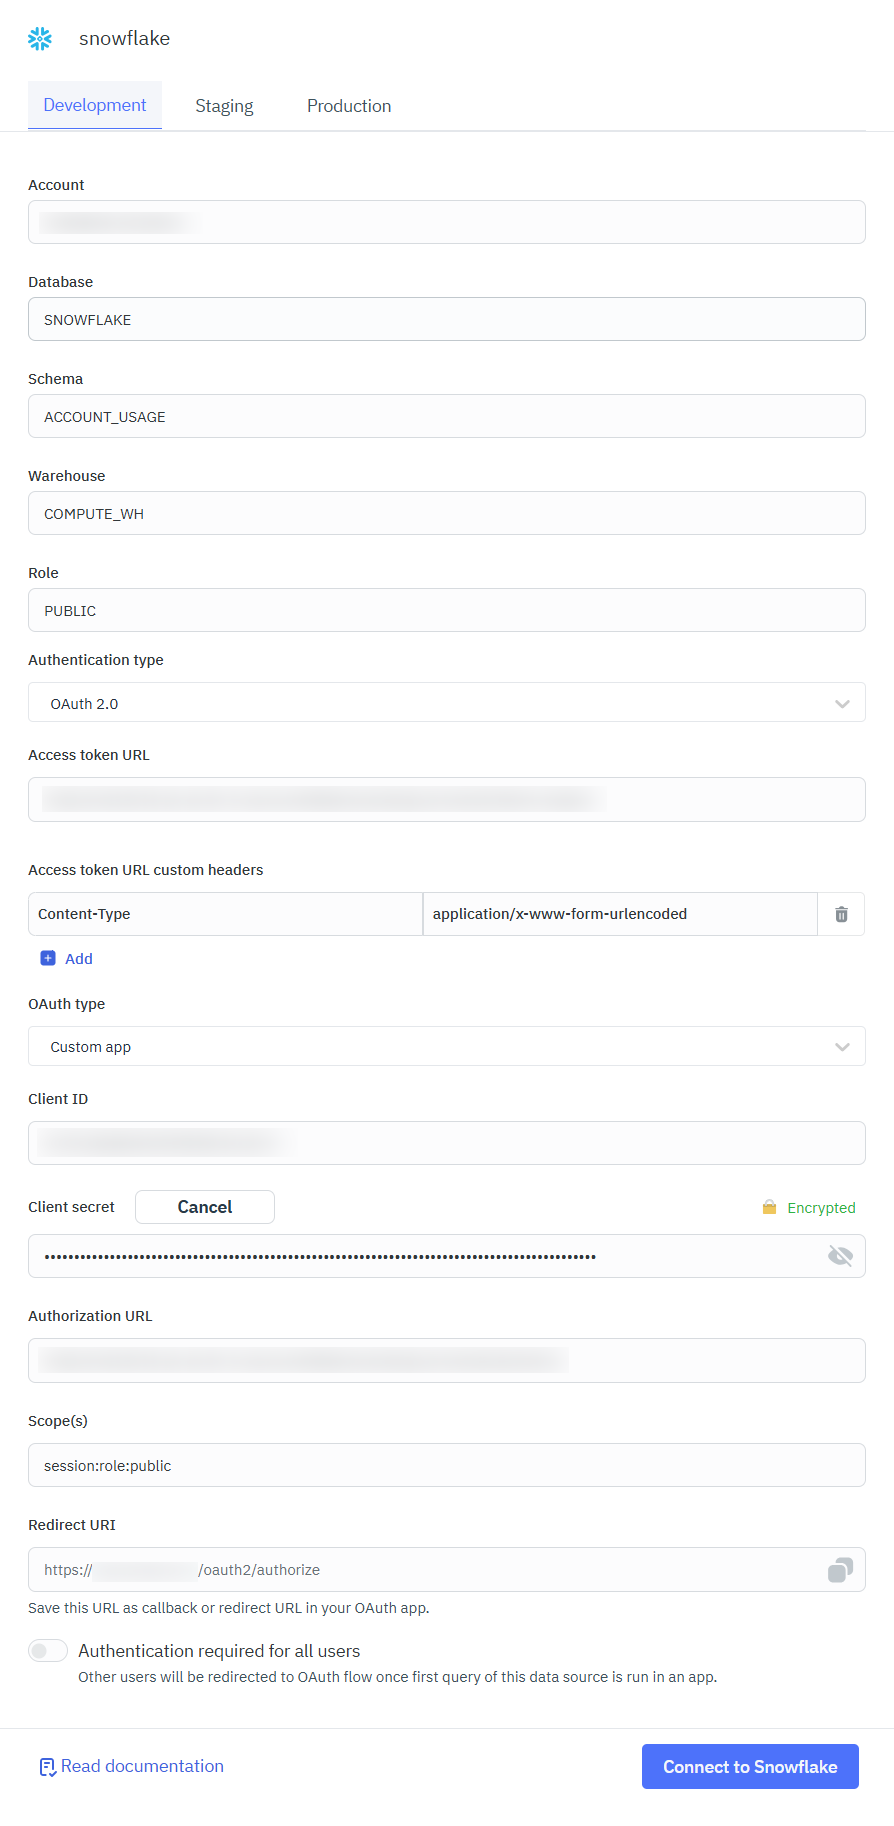
OAuth2.0 - Custom App
Uses credentials from your own OAuth application to authenticate and authorize access via a custom OAuth provider configuration.
You can enable Authentication required for all users in the configuration to enforce user-level authentication. When enabled, users are redirected to the OAuth 2.0 consent screen the first time a query from this data source is executed within an application, ensuring secure, user-specific authorization. ToolJet supports OAuth 2.0 authentication using both Custom App and ToolJet App configurations, allowing flexible integration based on your OAuth provider setup.
Note: After completing the OAuth flow, the query must be triggered again to load the data.
Snowflake provides multiple OAuth endpoint URLs, including account-level and profile-level endpoints.
Ensure that you use at least one valid set of Authorization and Token URLs (preferably from the same source) when configuring the data source. Mixing endpoints from different sources may lead to authentication issues.
OAuth2.0 - ToolJet App
Uses ToolJet’s preconfigured OAuth application to simplify authentication without requiring you to create and manage your own OAuth app.
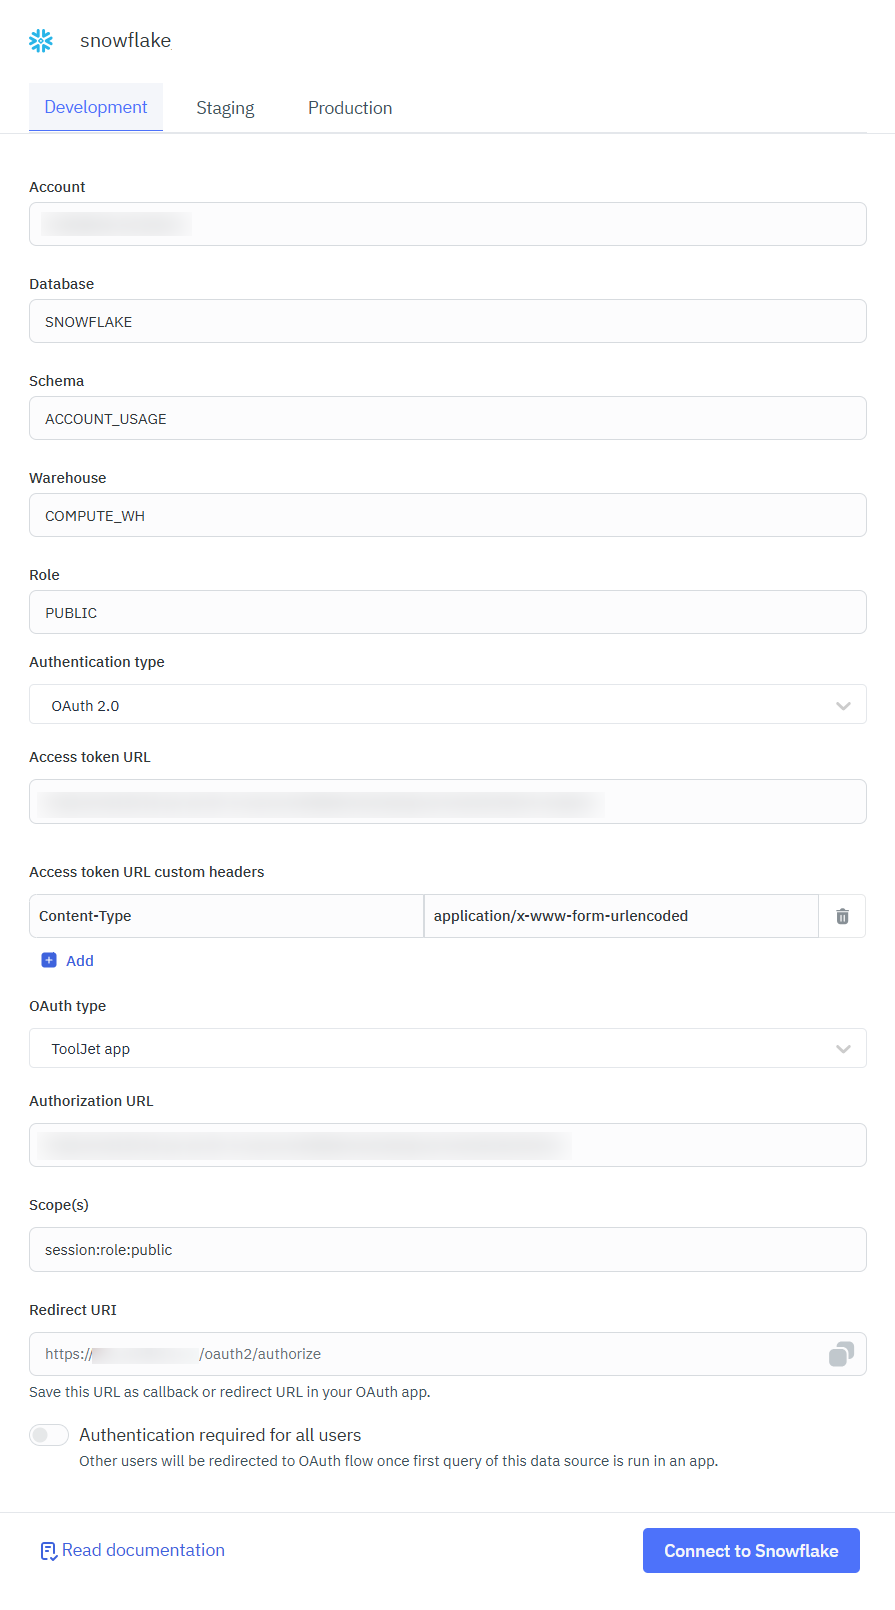
The scope parameter for OAuth token requests can include more than just a role. The format depends on the OAuth flow:
session:role:<role_name> specifies the role (e.g., session:role:public, session:role:analyst)
- You can also leave scope empty to use the user's default role.
- For External OAuth, the scope is configured in the security integration and may map to different Snowflake roles.
For more info, refer here.
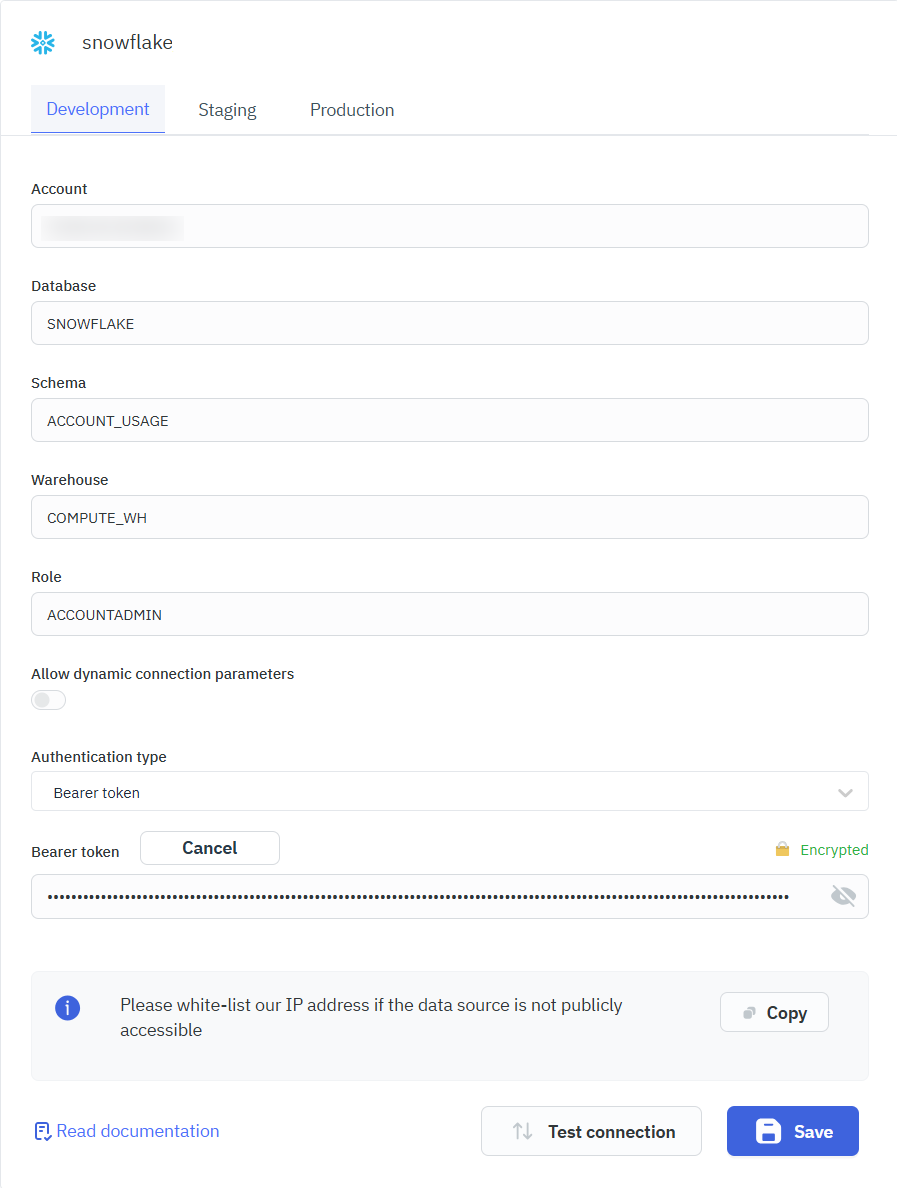
Bearer Token Auth
This authentication method uses a pre-generated bearer token for secure, token-based access to Snowflake, eliminating the need to pass username and password in requests. The Bearer tokens authenticate requests to Snowflake REST APIs via the Authorization header.
-
After completing the configuration and authorization, Snowflake sends an authorization code to ToolJet, which is automatically exchanged for a Bearer Access Token used for subsequent queries.
-
The Bearer token is same as the PAT token key. Refer here on how to generate a token key.
Generate a Programmatic Access Token (PAT) in Snowflake :
Programmatic Access Tokens (PAT) allow secure, token-based authentication to Snowflake without using a password. PAT is useful when MFA is enabled and password-based authentication is blocked.
How to Generate a PAT
- From the Snowflake UI, go to: Settings > Authentication.
- Under Programmatic access tokens, click Generate token.
- Provide required details (name, expiration, etc.)
- Copy and store the token securely.
- To use PAT, a network policy must be configured. For more info, check Snowflake docs.
Example:
CREATE NETWORK POLICY allow_all_policy
ALLOWED_IP_LIST = ('0.0.0.0/0');
- The token is shown only once. Store it securely.
- PAT cannot be used as replacement for password when signing in to Snowflake.
- The IP address in the network policy should be configured based on your system or organization's network setup.
Key Pair Auth
This is an authentication method that uses an RSA key pair (public/private) instead of a username/password. It's ideal for service accounts, automation, and CI/CD pipelines.
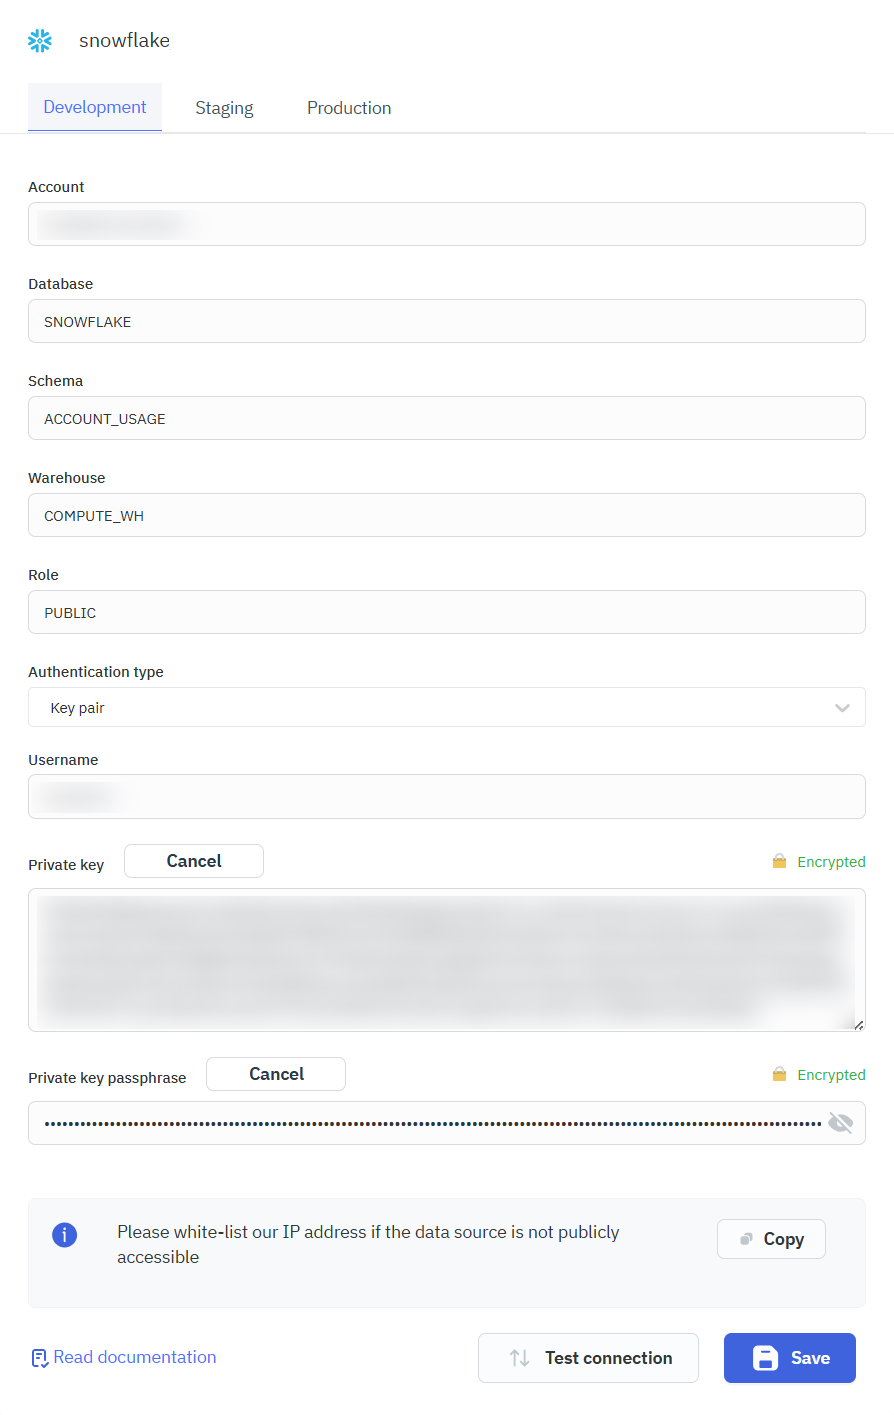
Please refer to Key Pair Auth Docs on how to generate the private key and passphrase.
Dynamic Connection Paramaters
You can enable Allow dynamic connection parameters in the data source configuration page to directly use the values in the query builder.
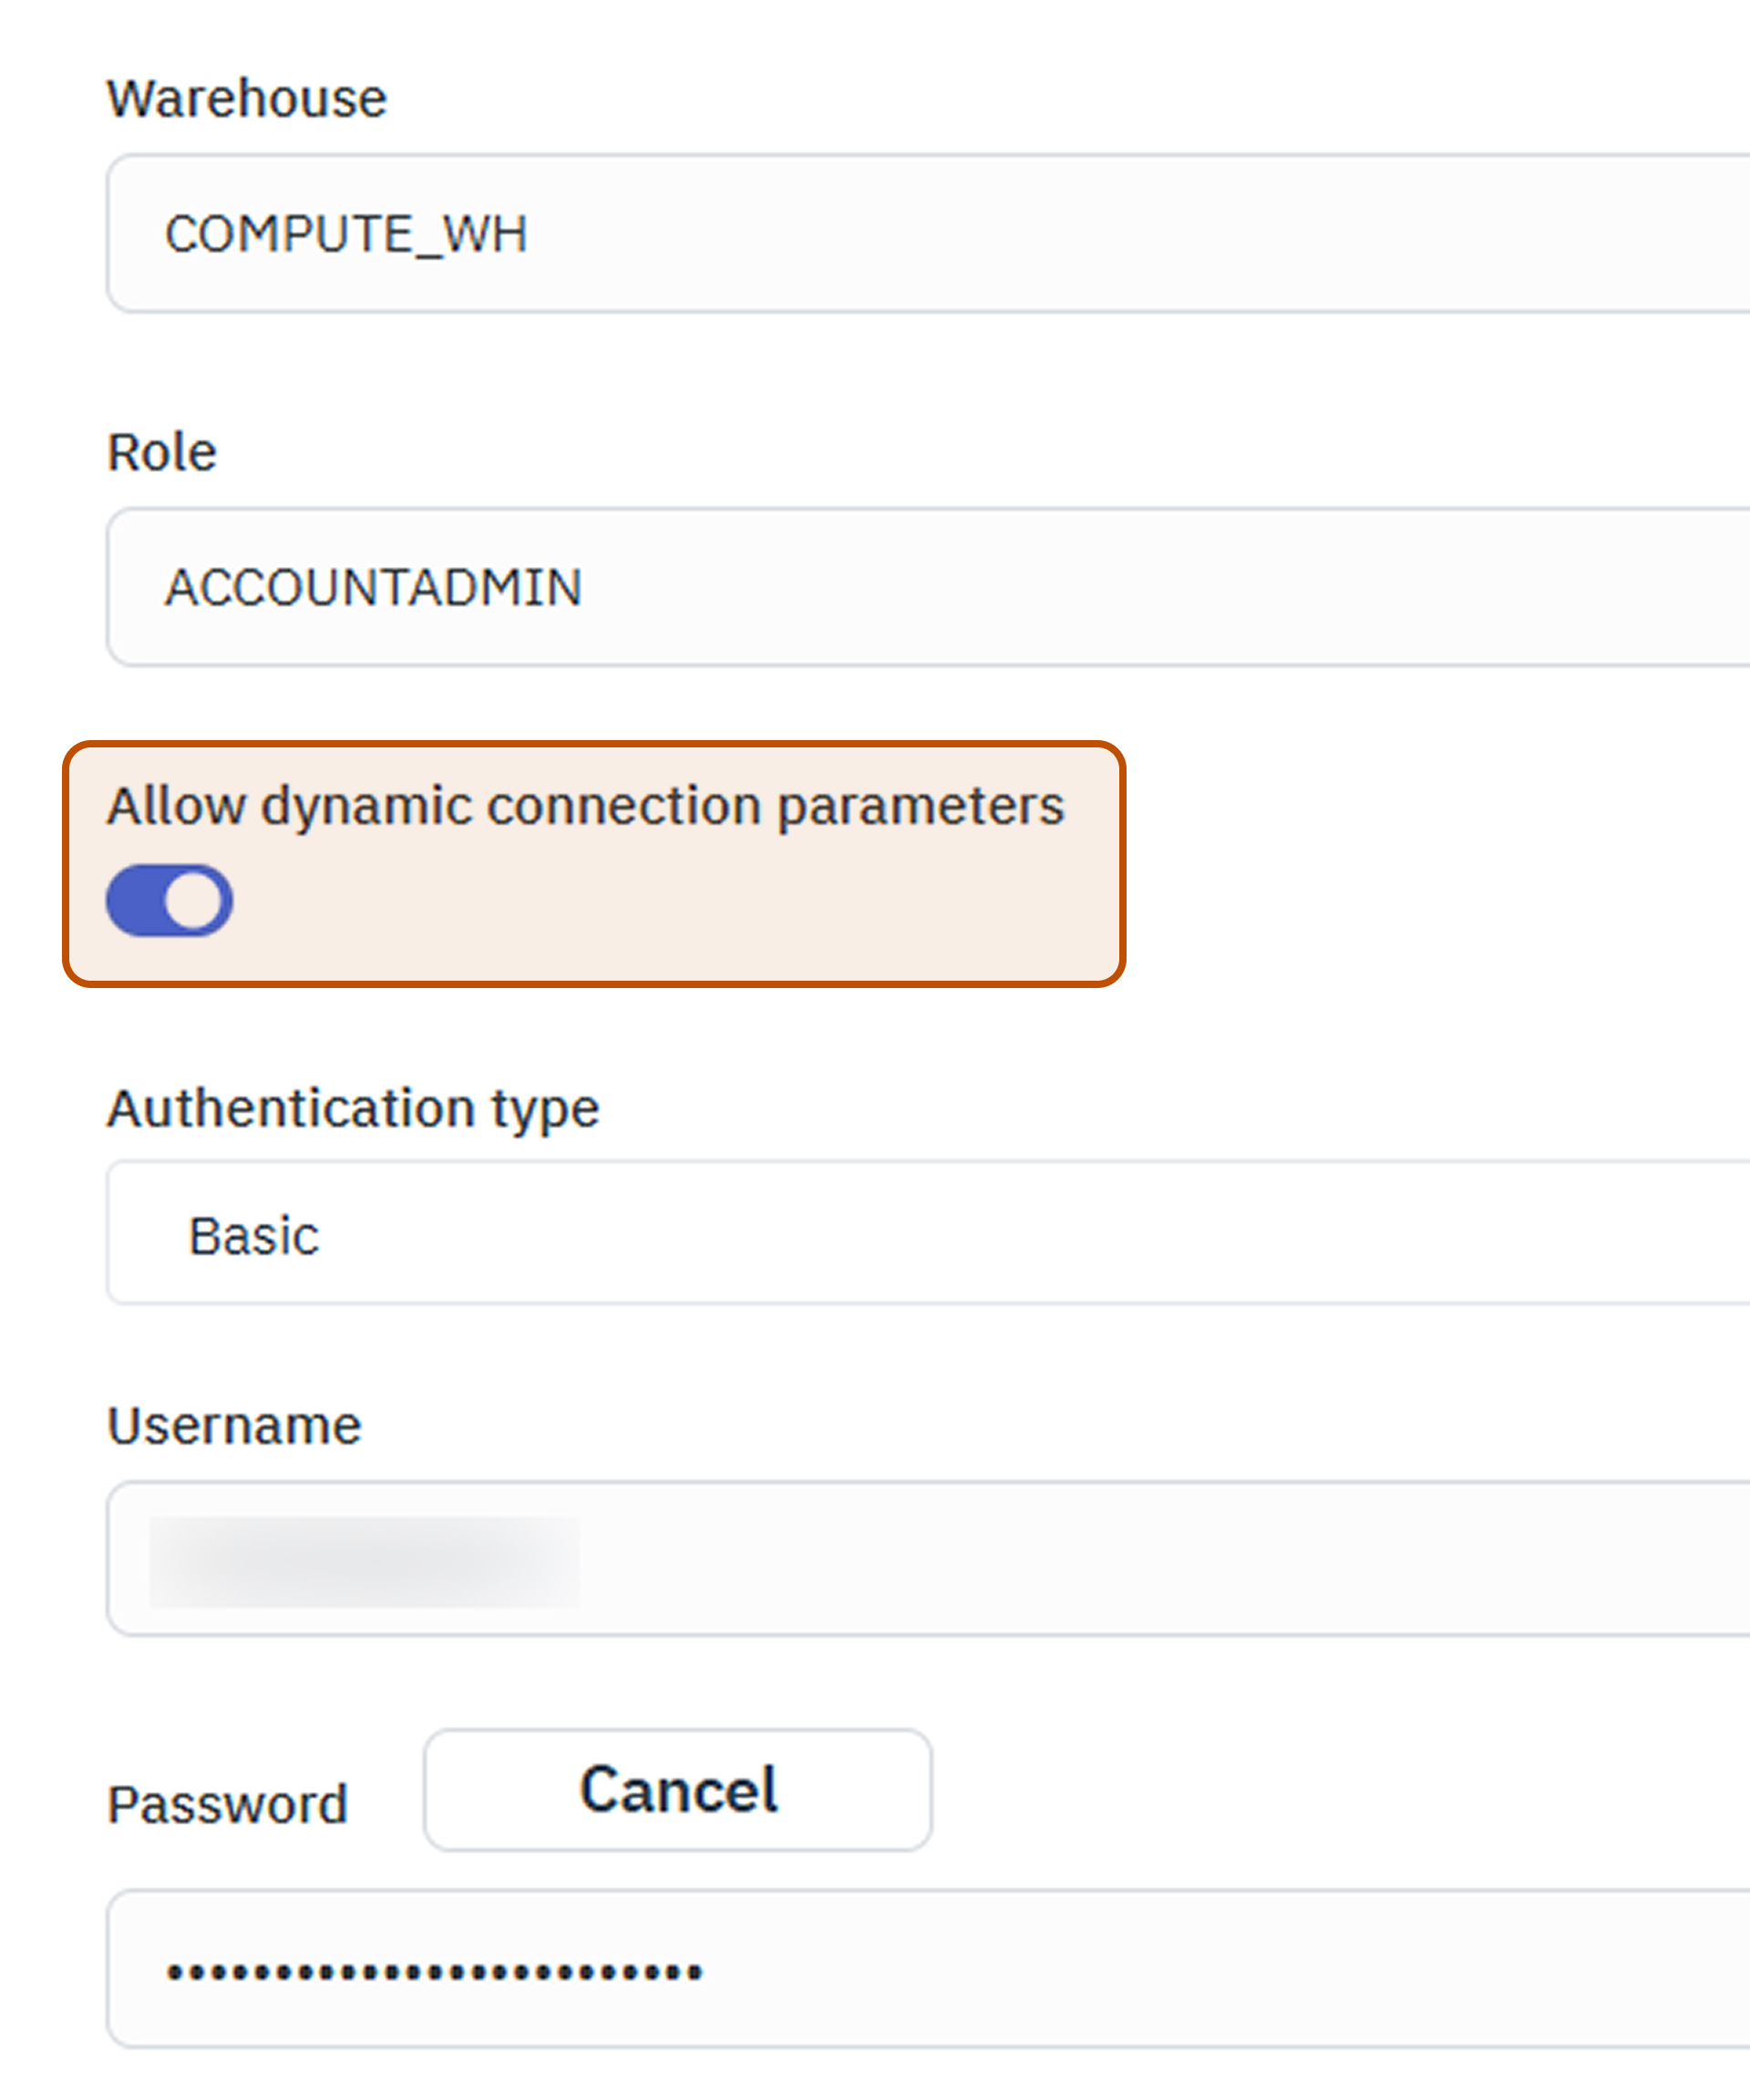
ToolJet allows you to override Snowflake connection parameters such as Database, Warehouse and Role directly at query runtime when dynamic connection parameters are enabled. This enables a single data source to support multiple environments or tenants without requiring separate configurations.
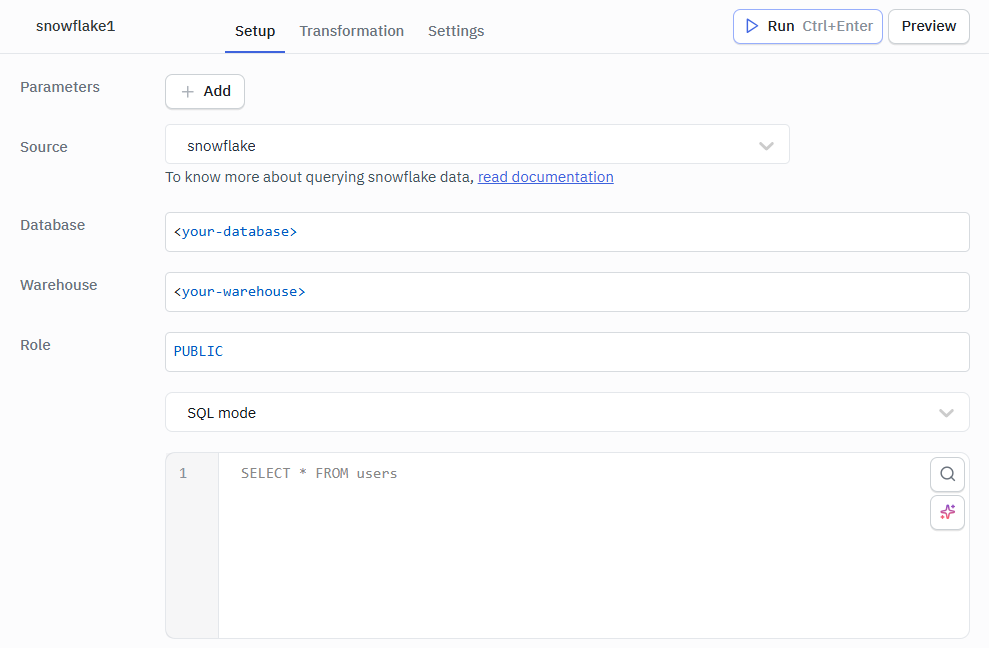
Querying Snowflake
- Click on + Add button of the query manager at the bottom panel of the editor.
- Select the Snowflake datasource added in previous step.
- Select the SQL Mode form the dropdown and enter the query.
- Click on the Preview button to preview the output or Click on the Run button to trigger the query.
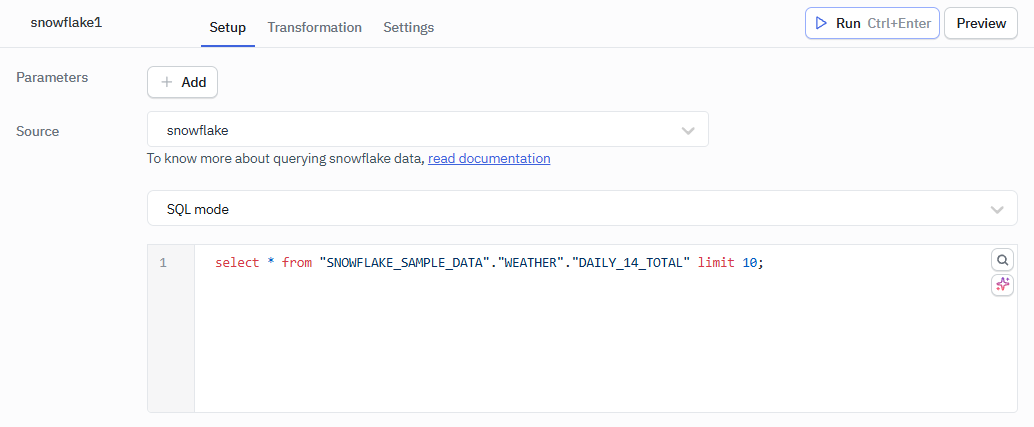
select * from "SNOWFLAKE_SAMPLE_DATA"."WEATHER"."DAILY_14_TOTAL" limit 10;
Querying in GUI Mode
- Create a new query and select the Snowflake data source.
- Select the GUI mode from the dropdown.
- Select the operation you want to perform.
- Fetch and select the Table name.
- Click on the Preview button to preview the output or Click on the Run button to trigger the query.
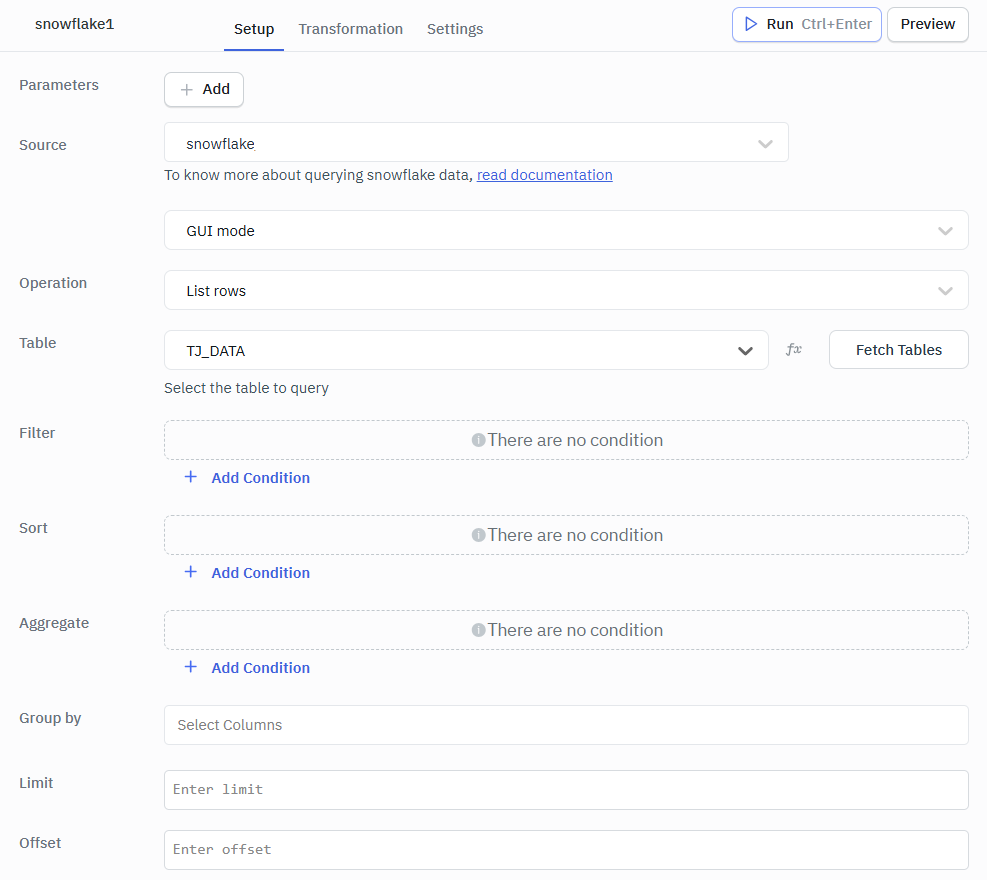
List Rows
Retrieves and displays rows from the selected table based on optional filters, sorting, and limits.
Required Parameter
- Table: Select the table from which rows need to be retrieved.
Optional Parameters
- Filter: Applies conditions to return only rows that match the specified criteria.
- Sort: Orders the returned rows based on one or more selected columns.
- Aggregate: Performs calculations such as count, sum, or average on selected columns.
- Group by: Groups rows that have the same values in specified columns to enable aggregation.
- Limit: Restricts the number of rows returned in the result.
- Offset: Skips a specified number of rows before starting to return results.
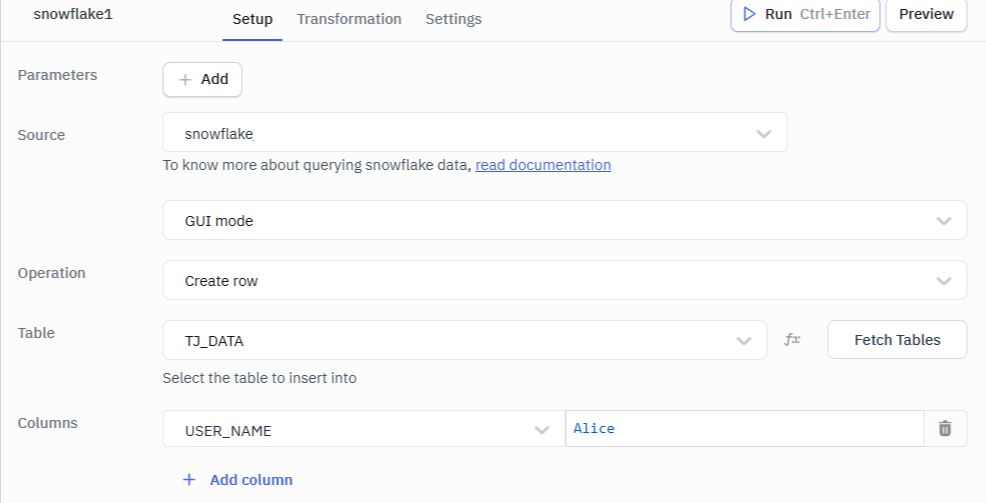
Create Row
Insert a new row into the selected table by providing values for the required columns.
In the editor, ensure the Columns input is provided in string format.
Optional Parameter
- Columns: Specifies the table columns and their corresponding values to be inserted when creating a new row.
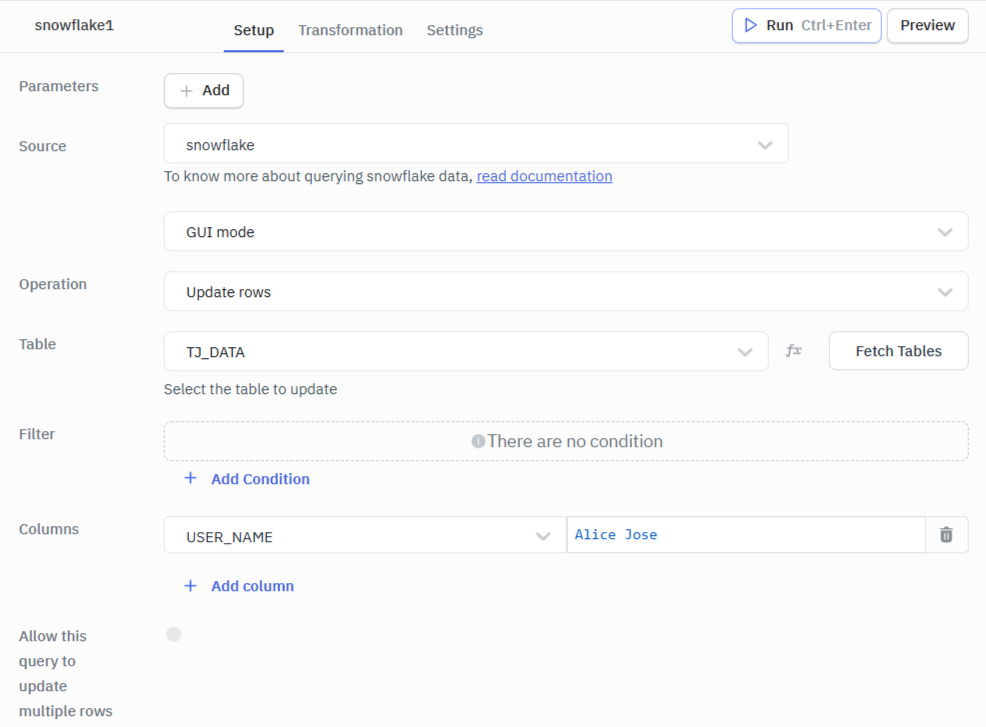
Update Rows
Modify existing row values in the selected table based on the specified conditions or identifiers.
In the editor, ensure the Columns input is provided in string format.
Required Parameter
- Columns: Specify the column names and values to be updated in the selected row(s).
Optional Parameter
- Filter: Apply conditions to identify which row(s) should be updated.
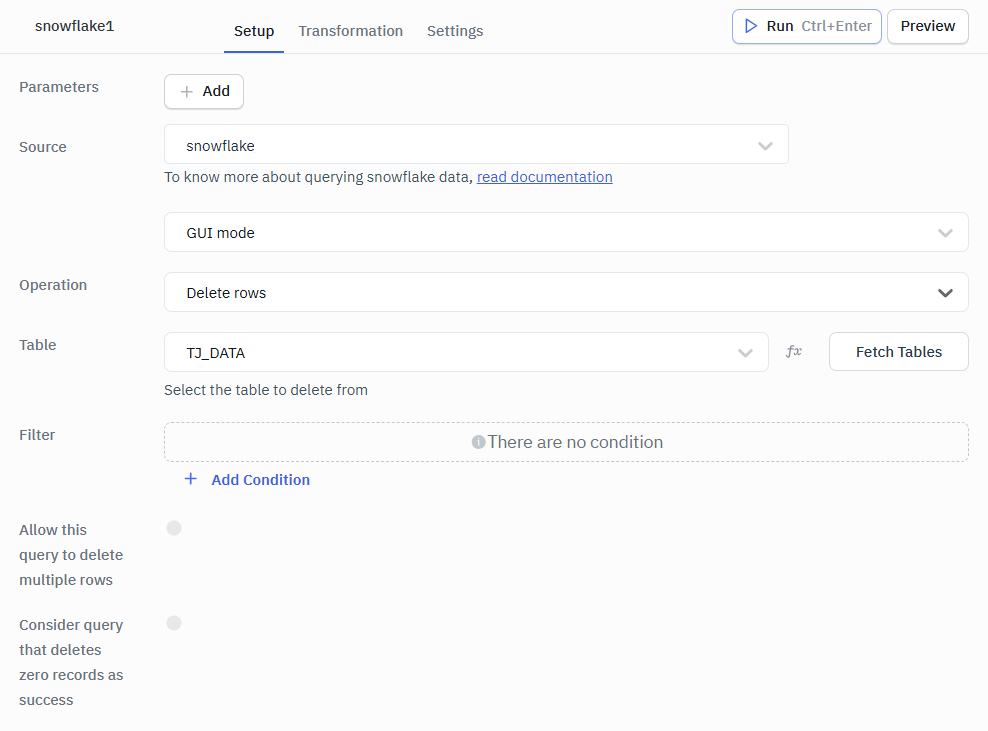
Delete Rows
Removes either all rows from the table or that match the specified filter conditions.
Optional Parameter
- Filter: Specifies conditions to determine which rows should be deleted from the table.
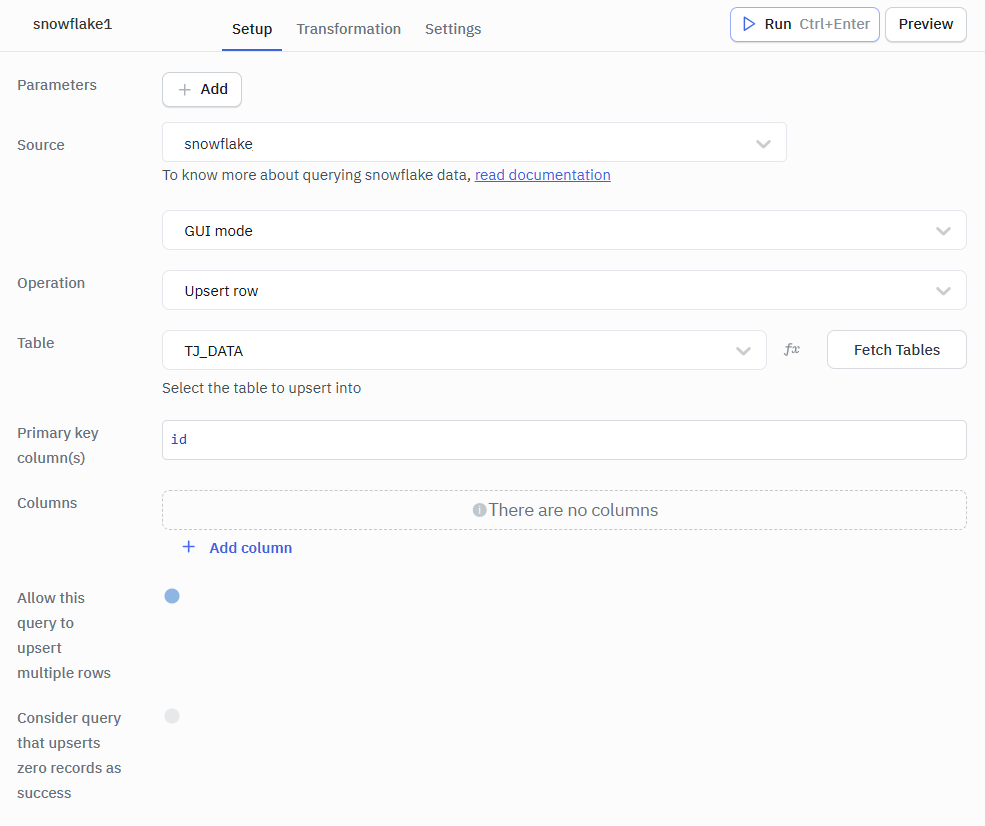
Upsert Row
Inserts a new row or updates an existing row if a matching primary key already exists. In the editor, ensure to the input the Columns in string format.
Required Parameters
- Primary Key column(s): Specifies the column(s) used to identify whether a row already exists for updating or if a new row should be inserted.
- Columns: Defines the column–value pairs that will be inserted or updated in the row.
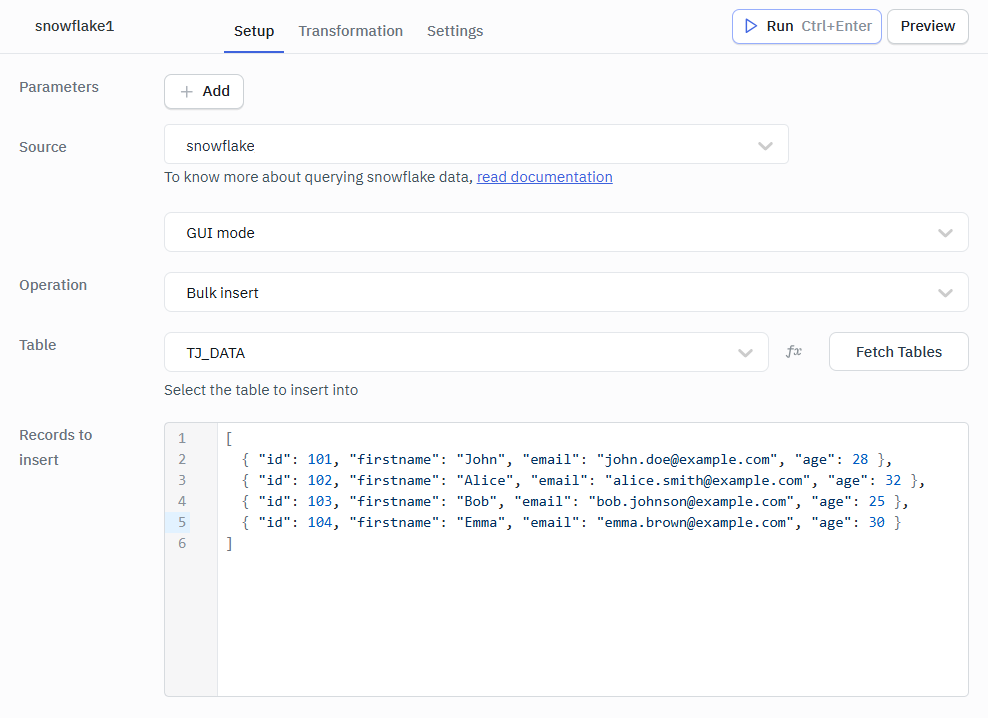
Bulk Insert
Inserts multiple rows into the table in a single operation using an array of records.
Required Parameter
- Records to Insert: An array of objects representing multiple rows to be inserted into the selected table in a single operation.
Example Values
[
  { "id": 101, "firstname": "John", "email": "[email protected]", "age": 28 },
  { "id": 102, "firstname": "Alice", "email": "[email protected]", "age": 32 },
  { "id": 103, "firstname": "Bob", "email": "[email protected]", "age": 25 },
  { "id": 104, "firstname": "Emma", "email": "[email protected]", "age": 30 }
]
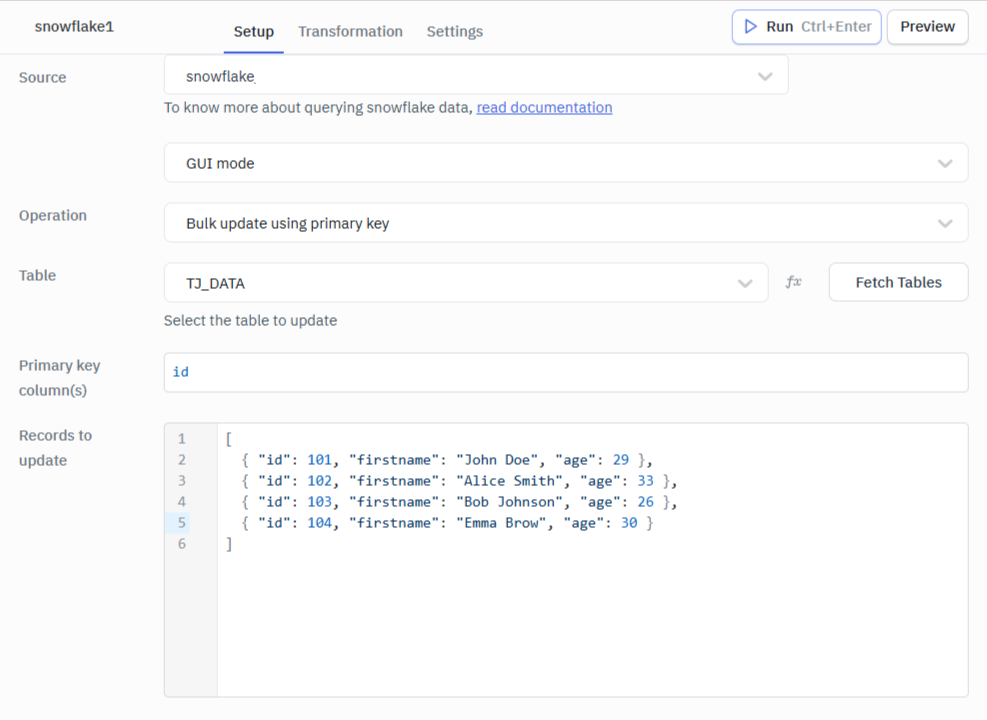
Bulk Update using Primary Key
Updates multiple rows at once by matching each record with its corresponding primary key.
Required Parameters
- Primary Key columns: Specifies the column(s) used to uniquely identify the rows that should be updated.
- Records to Update: An array of objects containing the primary key and the column values to be updated for each row.
Example Values
[
  { "id": 101, "firstname": "John Doe", "age": 29 },
  { "id": 102, "firstname": "Alice Smith", "age": 33 },
  { "id": 103, "firstname": "Bob Johnson", "age": 26 },
  { "id": 104, "firstname": "Emma Brow", "age": 30 }
]
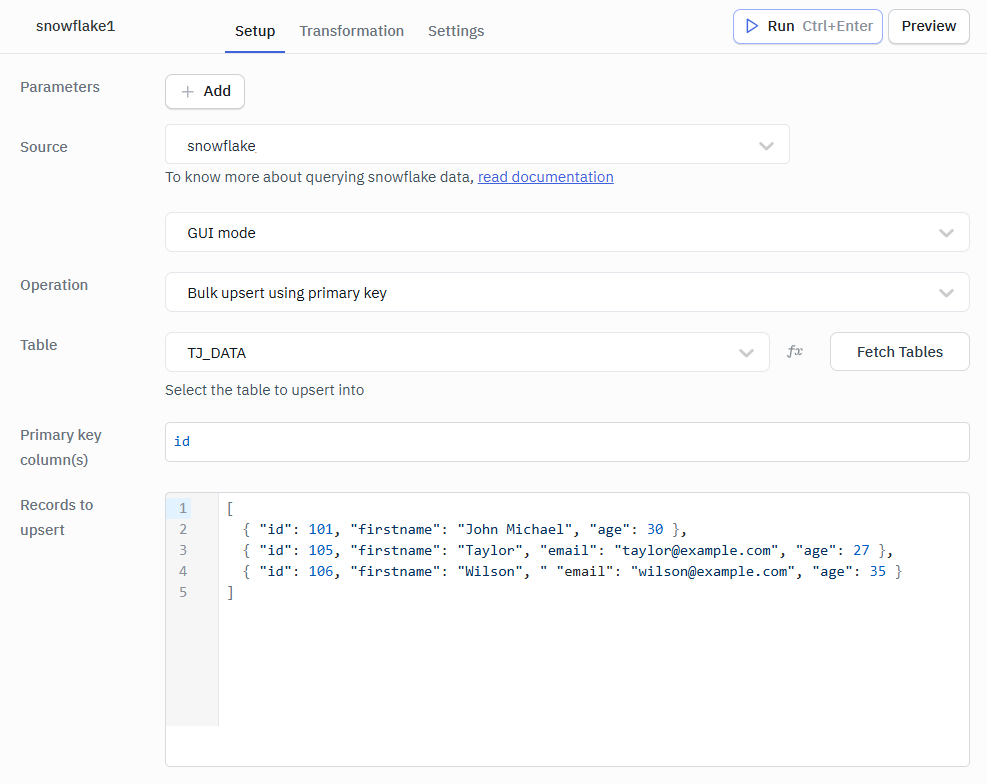
Bulk Upsert using Primary Key
Inserts new rows or updates existing rows in bulk based on matching primary key values.
Required Parameters
- Primary Key columns: Specifies the column(s) used to determine whether a row already exists for updating or if a new row should be inserted.
- Records to Upsert: An array of objects containing primary key values and column data that will be inserted as new rows or used to update existing rows.
This basically means If the row exists then update, if not do insert.
Example Values
[
  { "id": 101, "firstname": "John Michael", "age": 30 },
  { "id": 105, "firstname": "Taylor", "email": "[email protected]", "age": 27 },
  { "id": 106, "firstname": "Wilson", "email": "[email protected]", "age": 35 }
]
Query results can be transformed using transformations. Read our transformations documentation to learn more.