Oracle DB
ToolJet can connect to Oracle databases to read and write data.
Connection
To establish a connection with the Oracle DB Datasource, you can either click on the + Add new Data source button located on the query panel or navigate to the Data sources page through the ToolJet dashboard.
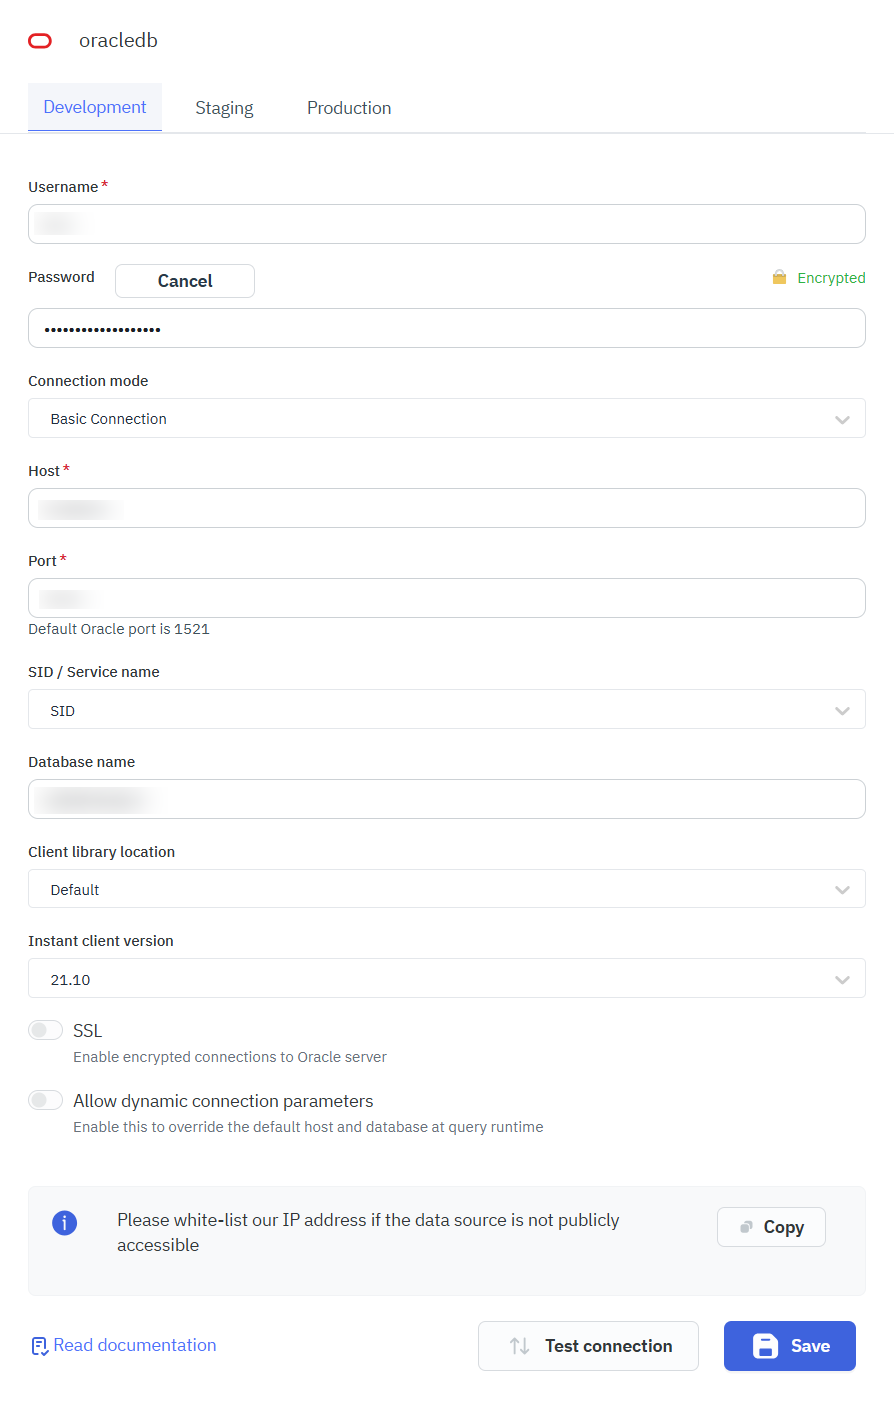
Basic Connection
ToolJet requires the following to connect to an Oracle DB datasource:
- Username
- Password
- Host
- Port
- SID / Service Name
- Database Name
- Client Library Location
- Instant Client Version
Enter either a SID or a Service Name depending on your Oracle configuration. A SID identifies a specific database instance, while a Service Name identifies a database service and is commonly used in modern Oracle deployments.
Client Versions and Compatibility
ToolJet uses Oracle DB connections in thick mode and includes the following Oracle Instant Client versions by default:
- Oracle Instant Client 21.10 – Supports Oracle Database 11.2 and later.
- Oracle Instant Client 11.2 – Supports Oracle Database 10.2 and later.
If your environment requires a different Oracle Instant Client version, you can configure ToolJet to use a custom client library by providing its path or mounting it into the deployment.
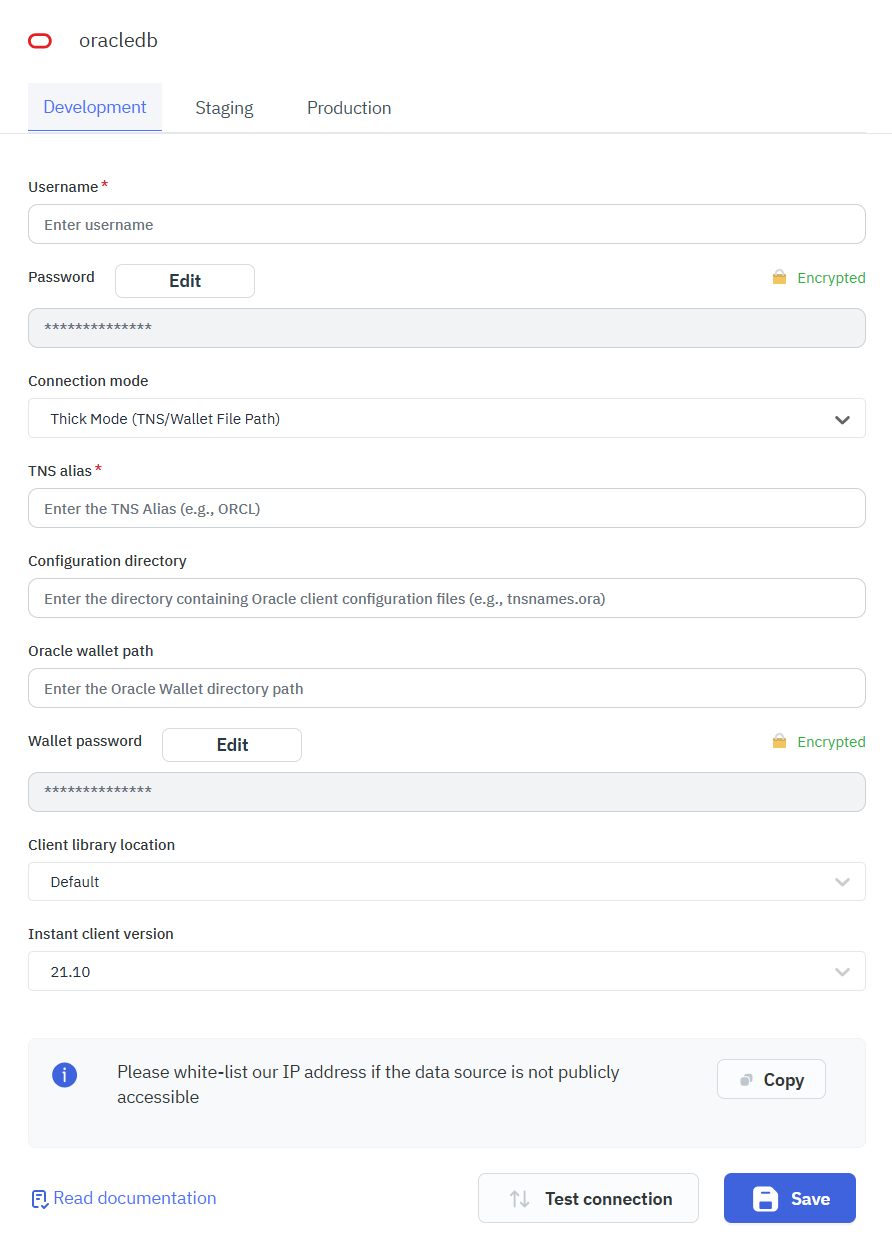
Thick Mode ( TNS/Wallet File Path)
The following are required to make a Thick Mode Connection with Oracle DB.
- Username
- Password
- TNS alias
- Configuration directory
- Oracle wallet path
- Wallet password
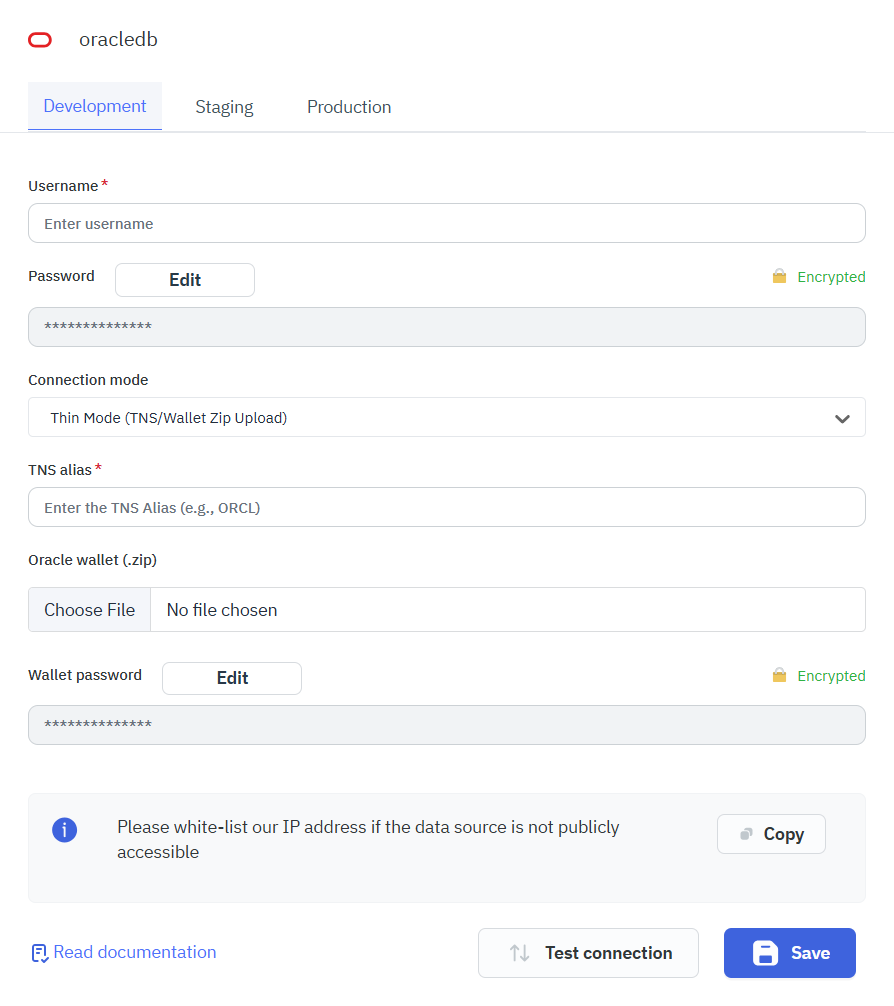
Thin Mode ( TNS/Wallet Zip Upload)
The following are required to make a Thin Mode Connection with Oracle DB.
- Username
- Password
- TNS alias
- Oracle wallet (.zip)
- Wallet password
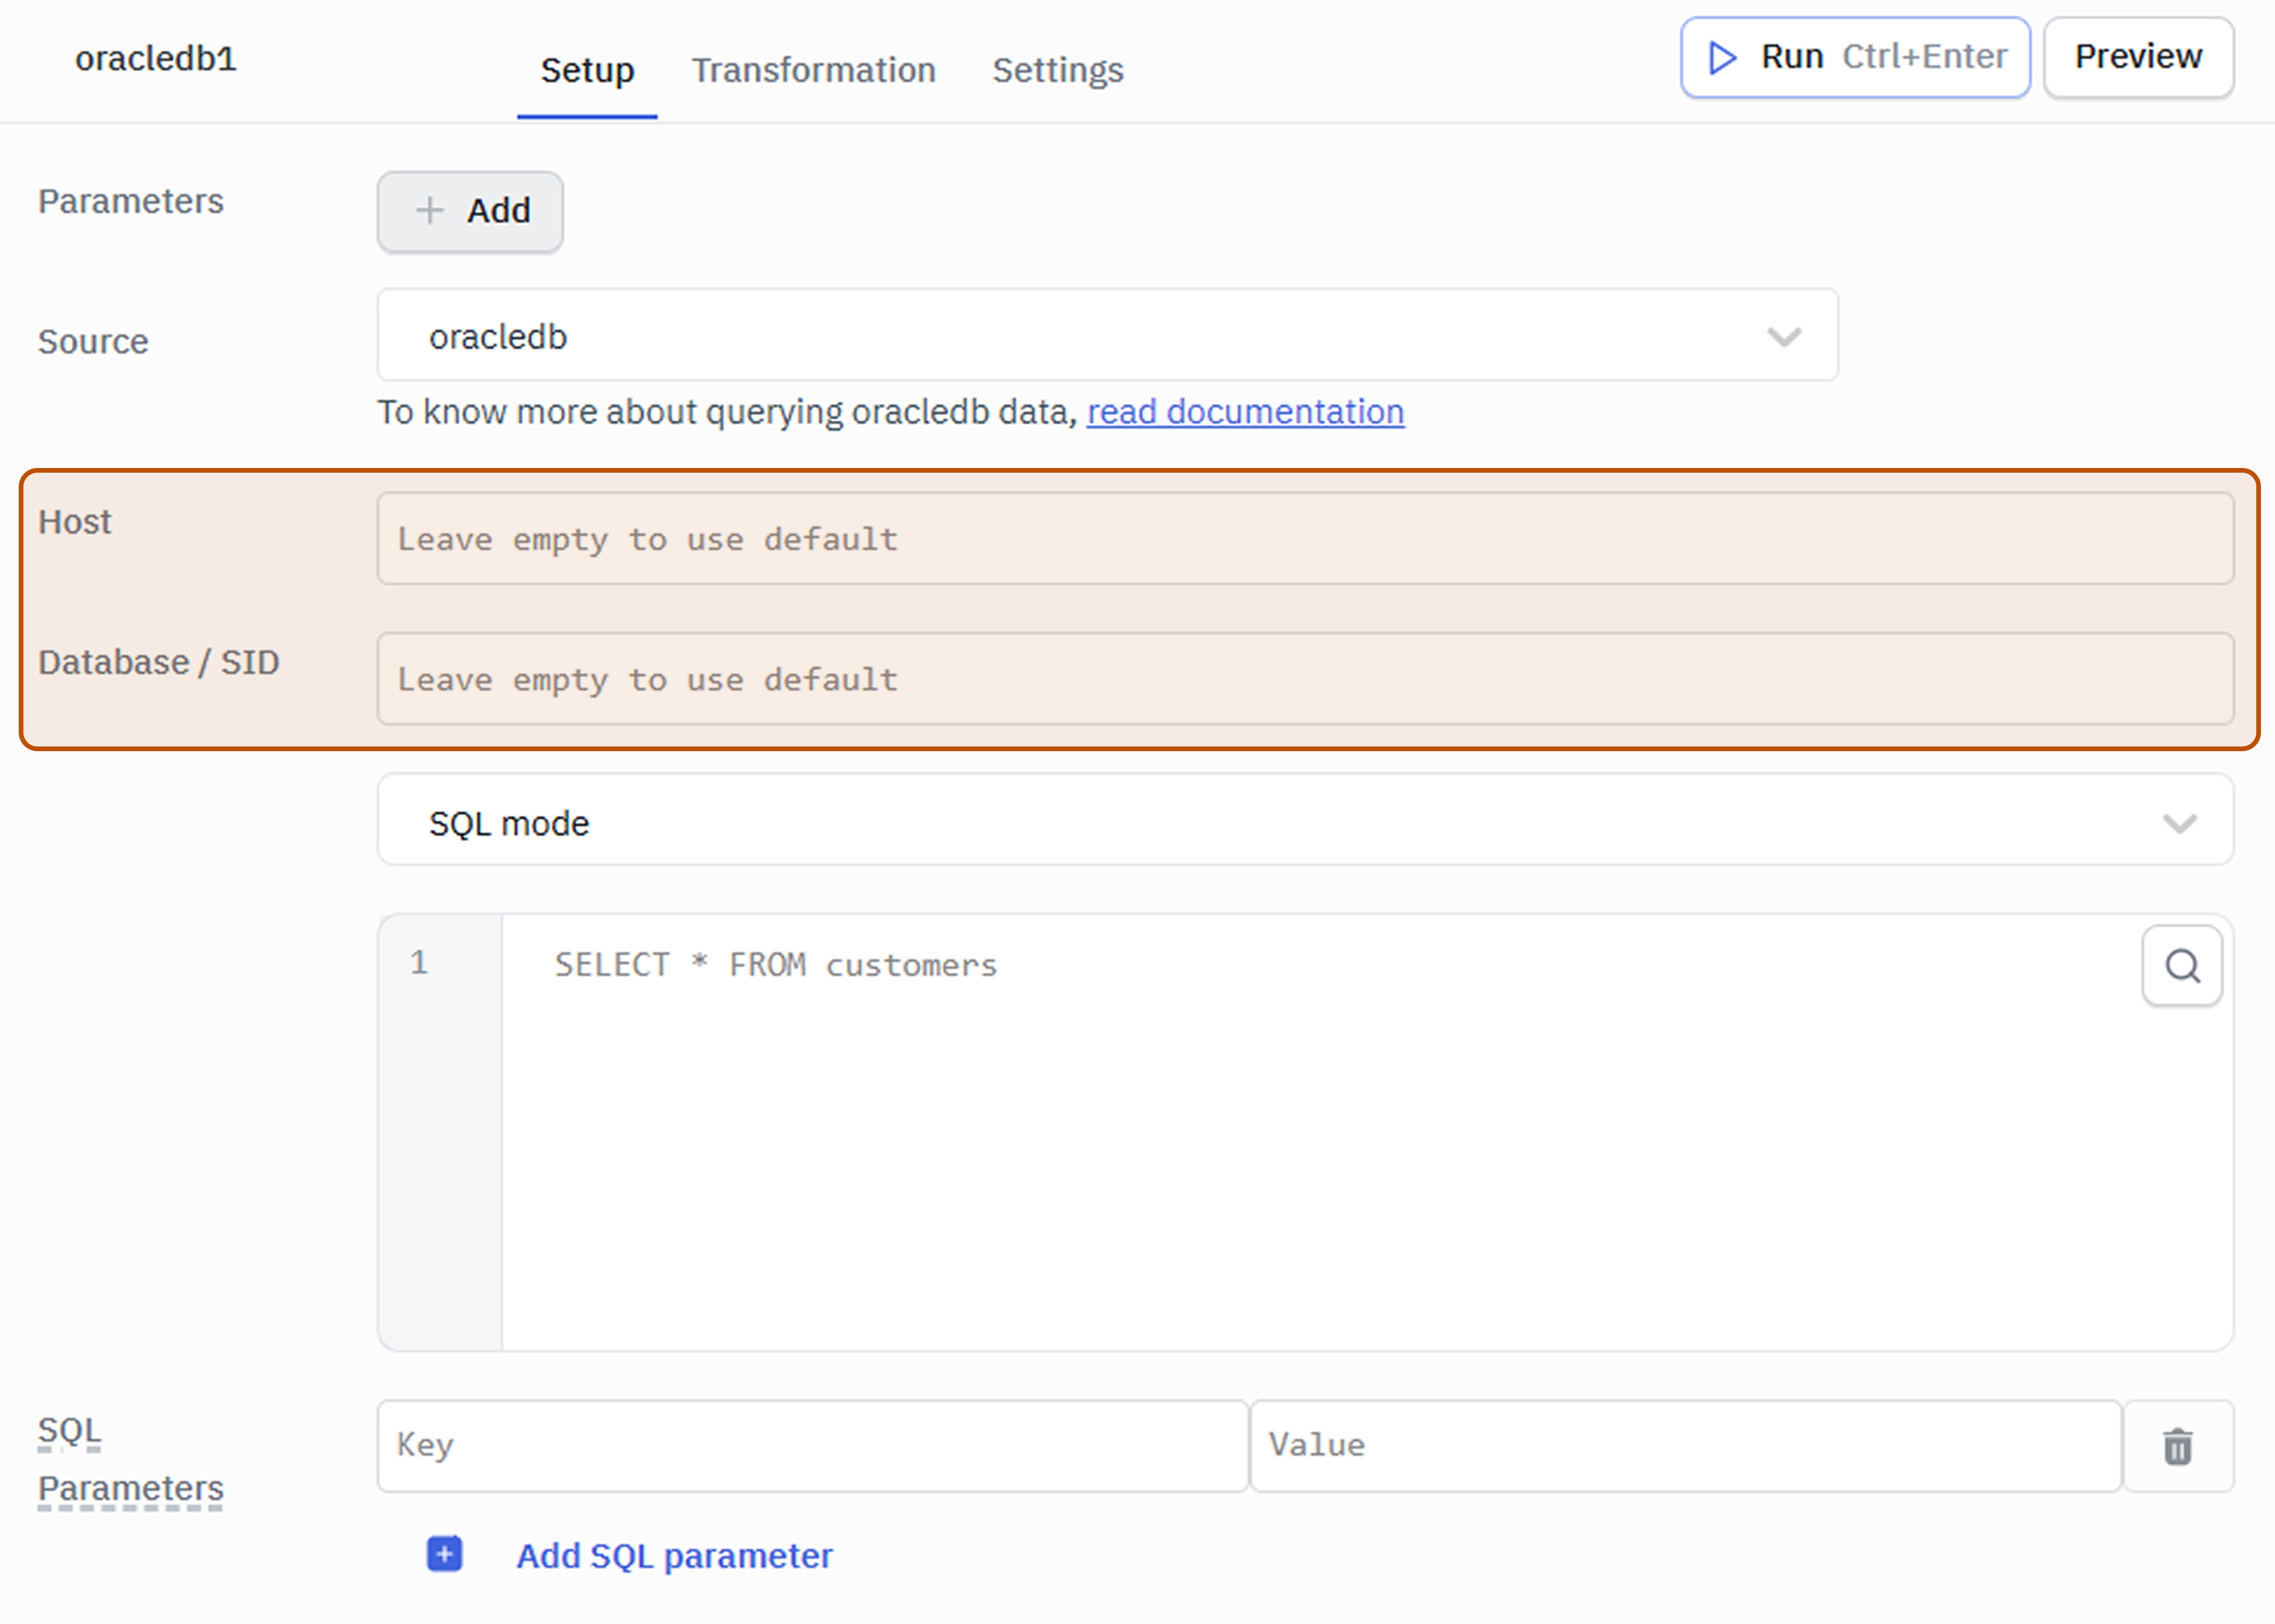
Dynamic Connection
ToolJet allows overriding Oracle DB connection parameters such as host and database directly at query runtime when dynamic connection parameters are enabled in the Datasource configuration page. This enables a single data source to support multiple environments or tenants without requiring separate configurations.
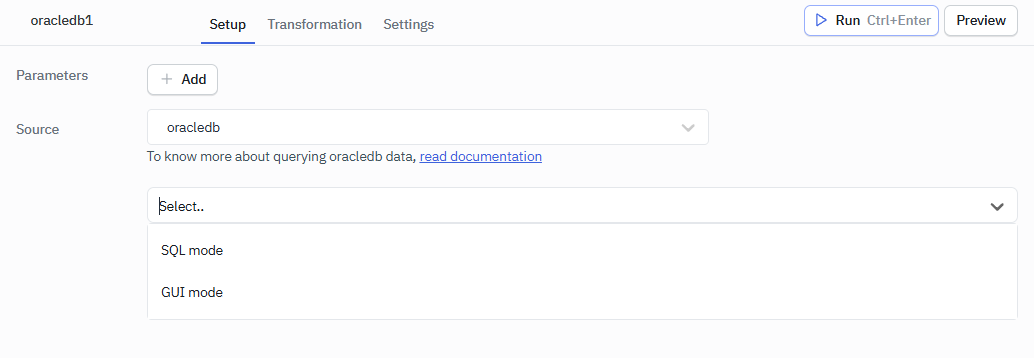
Querying Oracle DB
- Click on + Add button of the query manager at the bottom panel of the editor.
- Select the OracleDB Datasource added in previous step.
- Select the desired query mode.
- Click on the Preview button to preview the output or Click on the Run button to trigger the query.
Supported Operations
SQL mode
SQL mode can be used to write raw SQL queries.
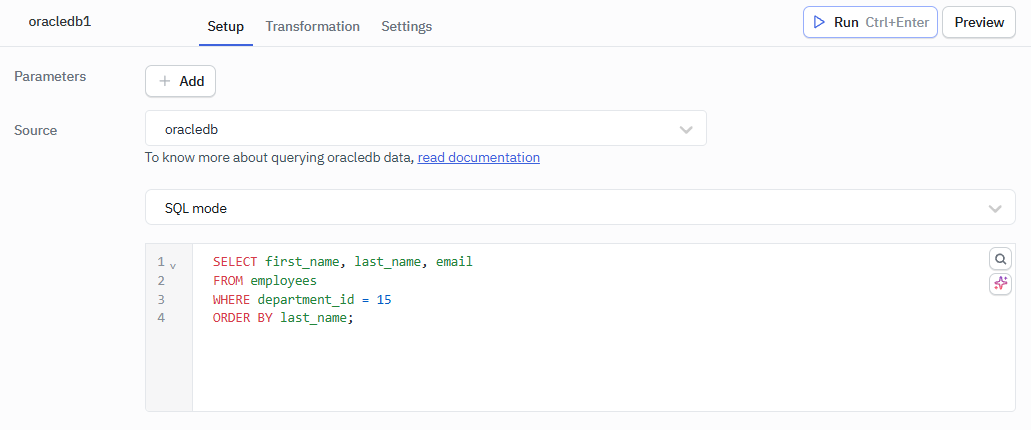
SELECT first_name, last_name, email
FROM employees
WHERE department_id = 15
ORDER BY last_name;
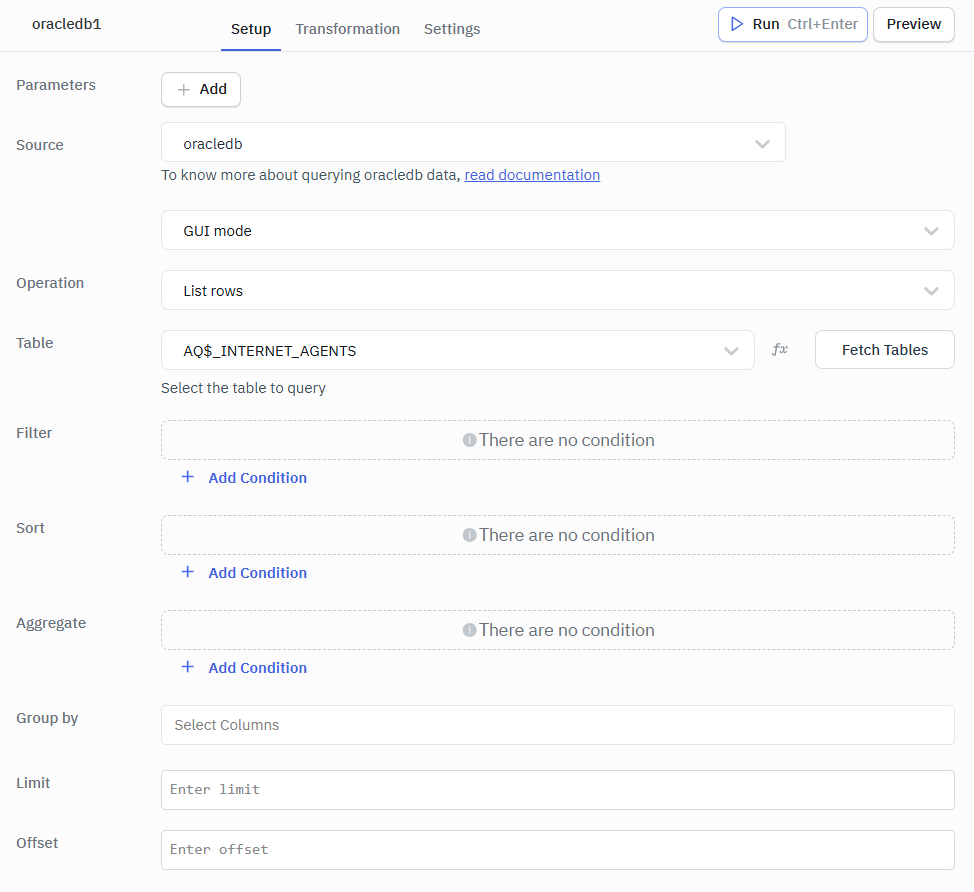
GUI mode
GUI mode can be used to query Oracle database without writing queries.
- Create a new query and select the Oracle DB Datasource.
- Select GUI mode from the dropdown.
- Choose the operation you want to perform.
- Fetch and select the Table name.
- Click on the Preview button to view the output or click on Run button to trigger the query.
List Rows
Retrieve rows from a table with support for filtering, sorting, and pagination.
Required Parameter
- Table: Select the table from which rows need to be retrieved.
Optional Parameters
- Filter: Apply conditions to return only rows that match specific criteria.
- Sort: Arrange the returned rows in ascending or descending order based on selected columns.
- Aggregate: Apply aggregate functions such as count, sum, average, minimum, or maximum on selected columns.
- Group by: Group rows that share the same values in selected columns into summarized results.
- Limit: Restricts the number of rows returned in the result.
- Offset: Skips a specified number of rows before starting to return results.
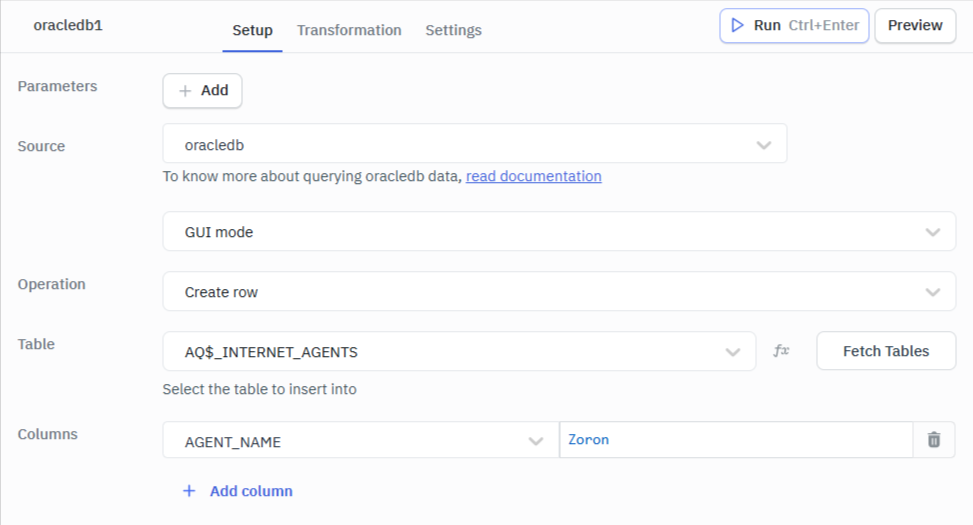
Create Rows
Insert a new row into the selected table by providing values for the required columns.
In the editor, ensure the Columns input is provided in string format.
Required Parameter
- Columns: Specifies the table columns and their corresponding values to be inserted when creating a new row.
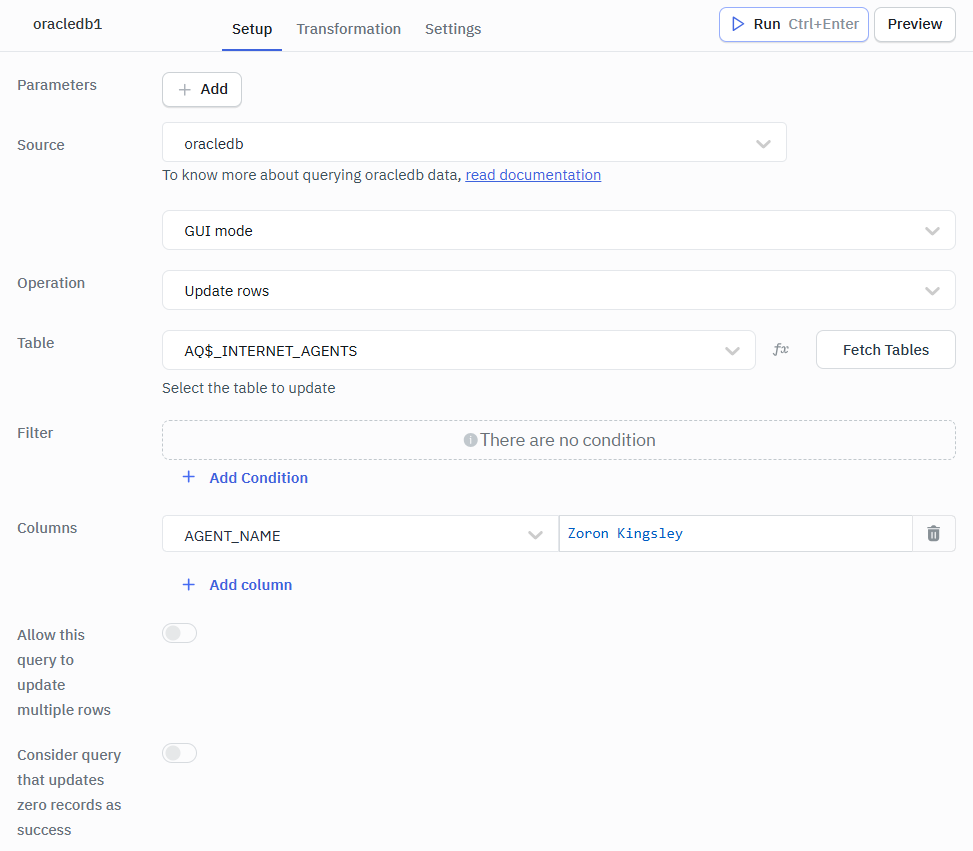
Update Rows
Modify existing row values in the selected table based on the specified conditions or identifiers.
In the editor, ensure the Columns input is provided in string format.
Required Parameter
- Columns: Specify the column names and values to be updated in the selected row(s).
Optional Parameter
- Filter: Apply conditions to identify which row(s) should be updated.
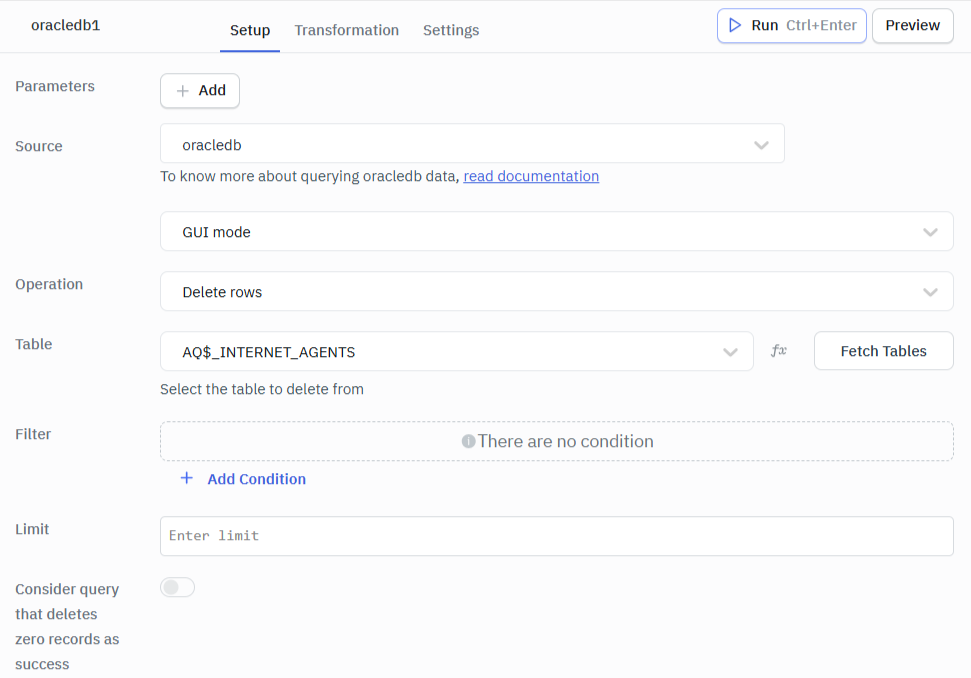
Delete Rows
Remove one or more rows from the selected table that match the given conditions.
Optional Parameters
- Filter: Apply conditions to specify which row(s) should be deleted.
- Limit: Specify the maximum number of rows to delete.
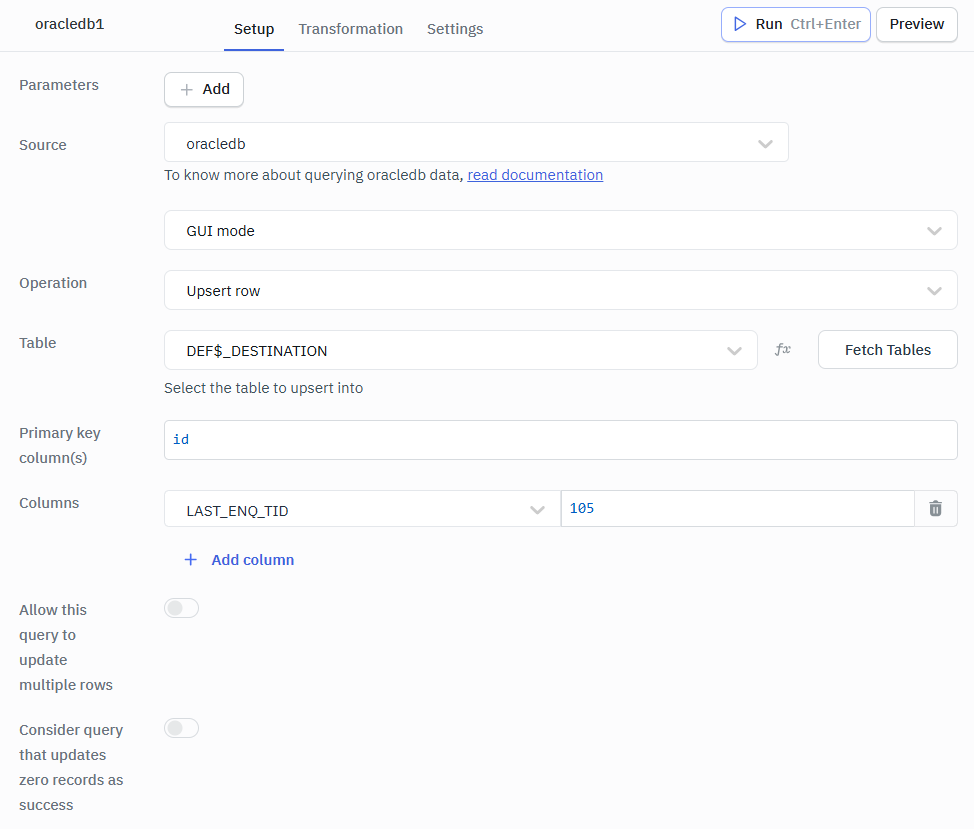
Upsert Rows
Insert a new row or update an existing row if a matching primary or unique key already exists.
In the editor, ensure the Columns input is provided in string format.
Required Parameters
- Primary key column(s): Specifies the column(s) used to identify whether a row already exists for updating or if a new row should be inserted.
- Columns: Provide the column names and values to be inserted or updated.
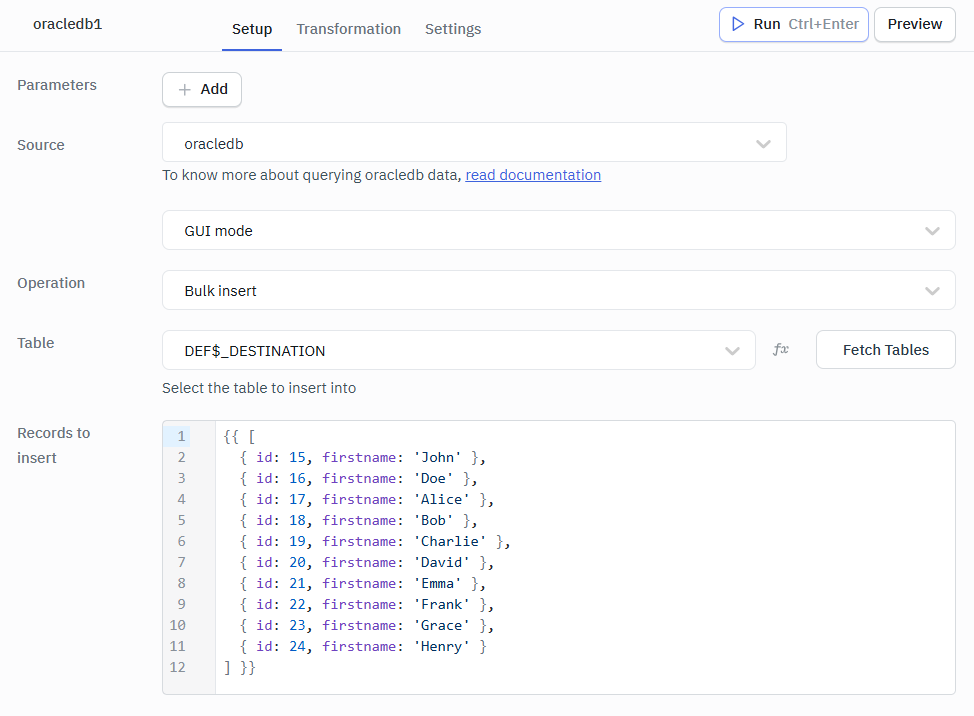
Bulk Insert
Inserts multiple rows into the table in a single operation using an array of records.
Required Parameters
- Table : Select the table into which multiple rows need to be inserted.
- Records to insert: Provide the set of rows and corresponding column values to be inserted in a single operation.
Example Values
{{ [
  { id: 15, firstname: 'John' },
  { id: 16, firstname: 'Doe' },
  { id: 17, firstname: 'Alice' },
  { id: 18, firstname: 'Bob' },
  { id: 19, firstname: 'Charlie' },
  { id: 20, firstname: 'David' },
  { id: 21, firstname: 'Emma' },
  { id: 22, firstname: 'Frank' },
  { id: 23, firstname: 'Grace' },
  { id: 24, firstname: 'Henry' }
] }}
Bulk Update using Primary Key
Update multiple existing rows at once by matching records using their primary key values.
Required Parameters
- Primary key column(s): Specify the primary key column(s) used to identify the rows that need to be updated.
- Records to update: Provide multiple records with updated column values for the matching primary key rows.
Example Values
{{ [
  { id: 15, firstname: 'John Doe' },
  { id: 16, firstname: 'Alice Bob' },
  { id: 17, firstname: 'Emma Frank' },
  { id: 18, firstname: 'Grace Henry' }
] }}

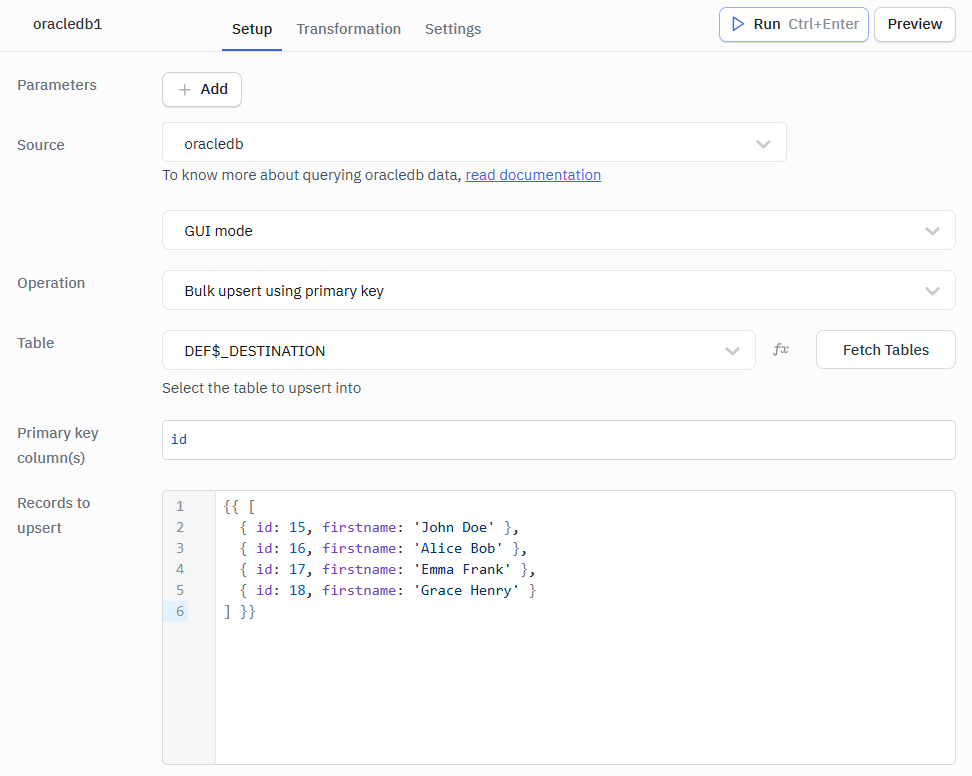
Bulk Upsert using Primary Key
Insert multiple new rows or update existing ones by matching rows using primary key values.
Required Parameters
- Primary key column(s): Specify the primary key column(s) used to determine whether each record should be updated or inserted.
- Records to upsert: Provide multiple records that will be inserted as new rows or updated if matching primary key values already exist.
In this operation, if a row with the matching primary key exists, it is updated; otherwise, a new row is inserted.
Query results can be transformed using transformations. Read our transformation documentation to see how: link