Configure GitSync
In this guide, we will explore how to configure GitSync using GitHub as the repository manager. By default GitSync is configured for the main branch, but this can be configured to a different branch as well, refer to Configuring GitSync on a Different Branch section for more information.
For more information on using other repository managers, such as GitLab or Gitea, refer to the SSH Configuration for Git Repo Manager guide.
Setting up GitSync in ToolJet
Role Required: Admin
-
Create a New Repository
Create a new repository on your GitHub. The repository can be public or private. You can also use an existing repository. Make sure that the repository is empty.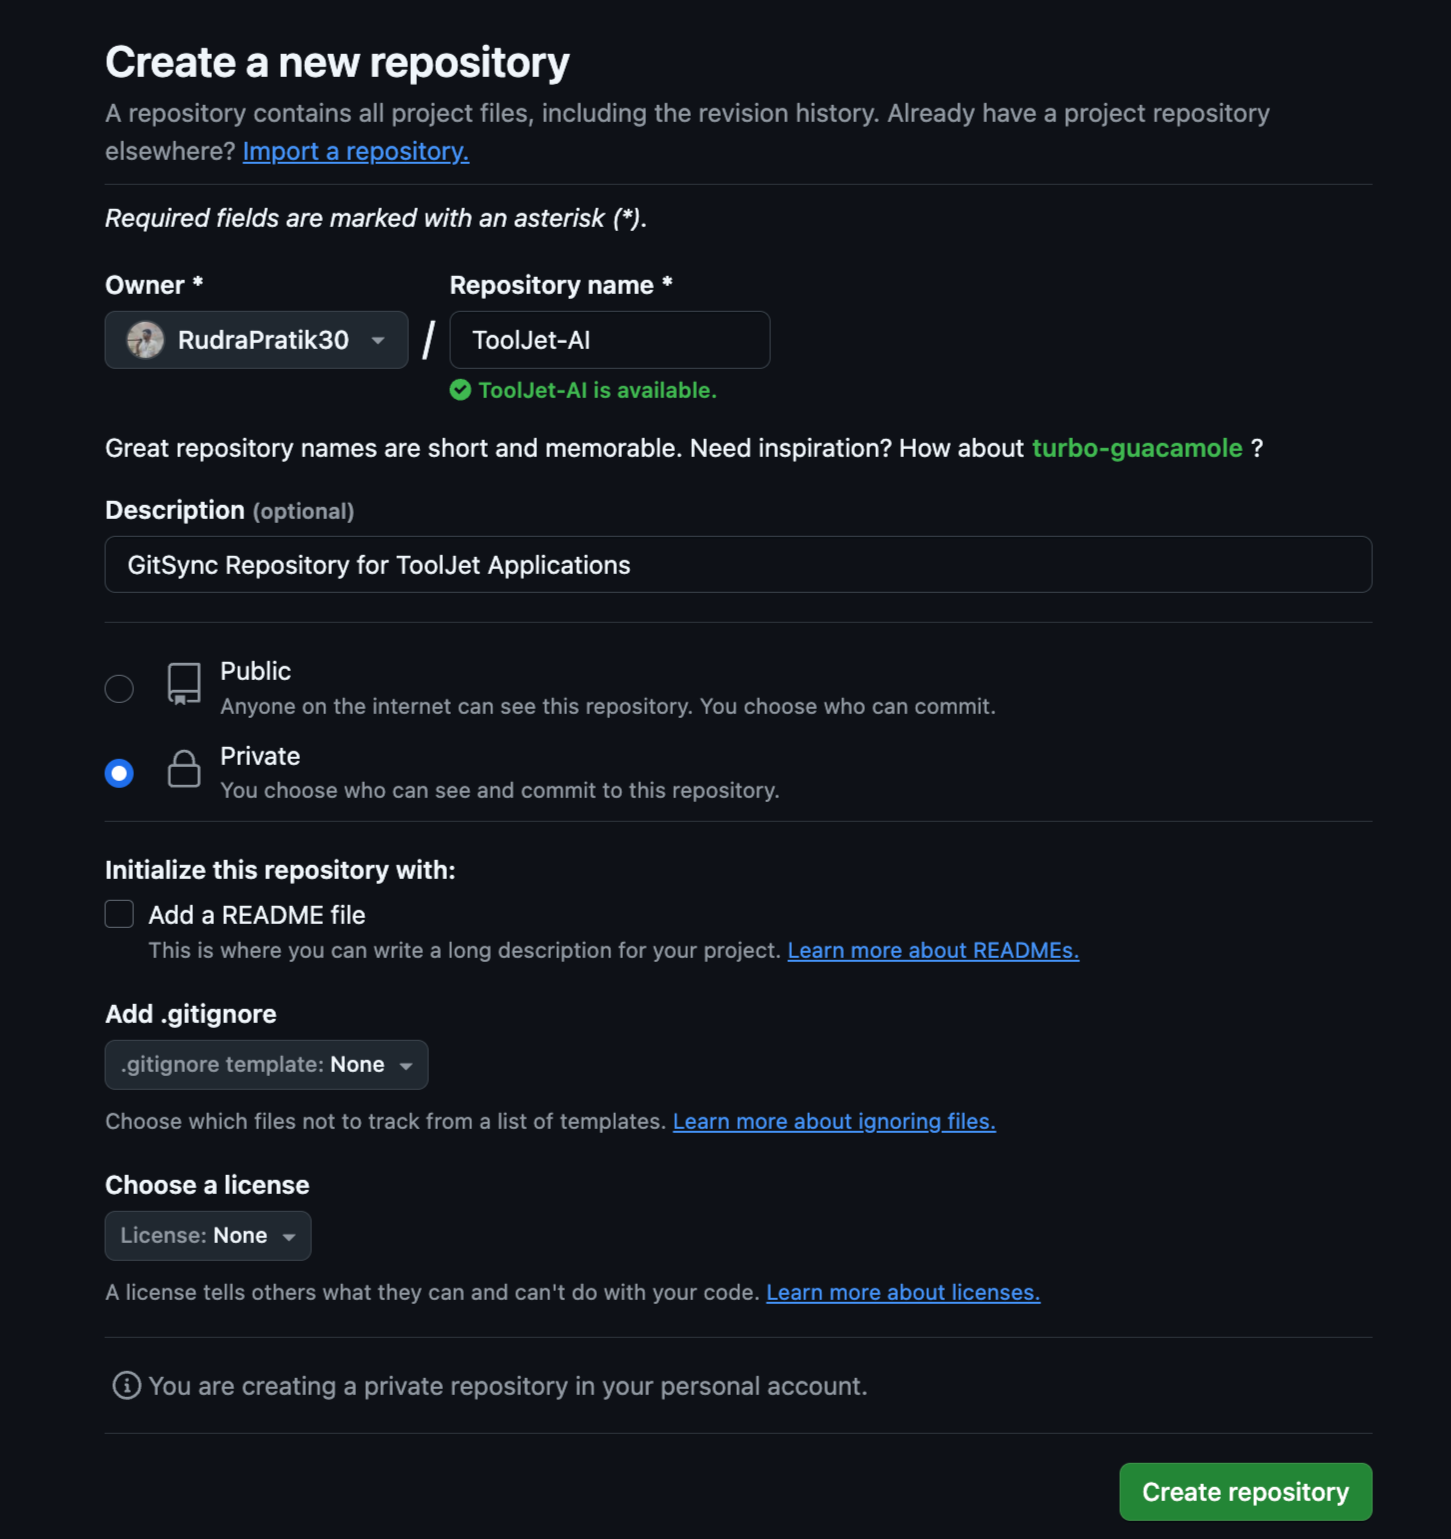
-
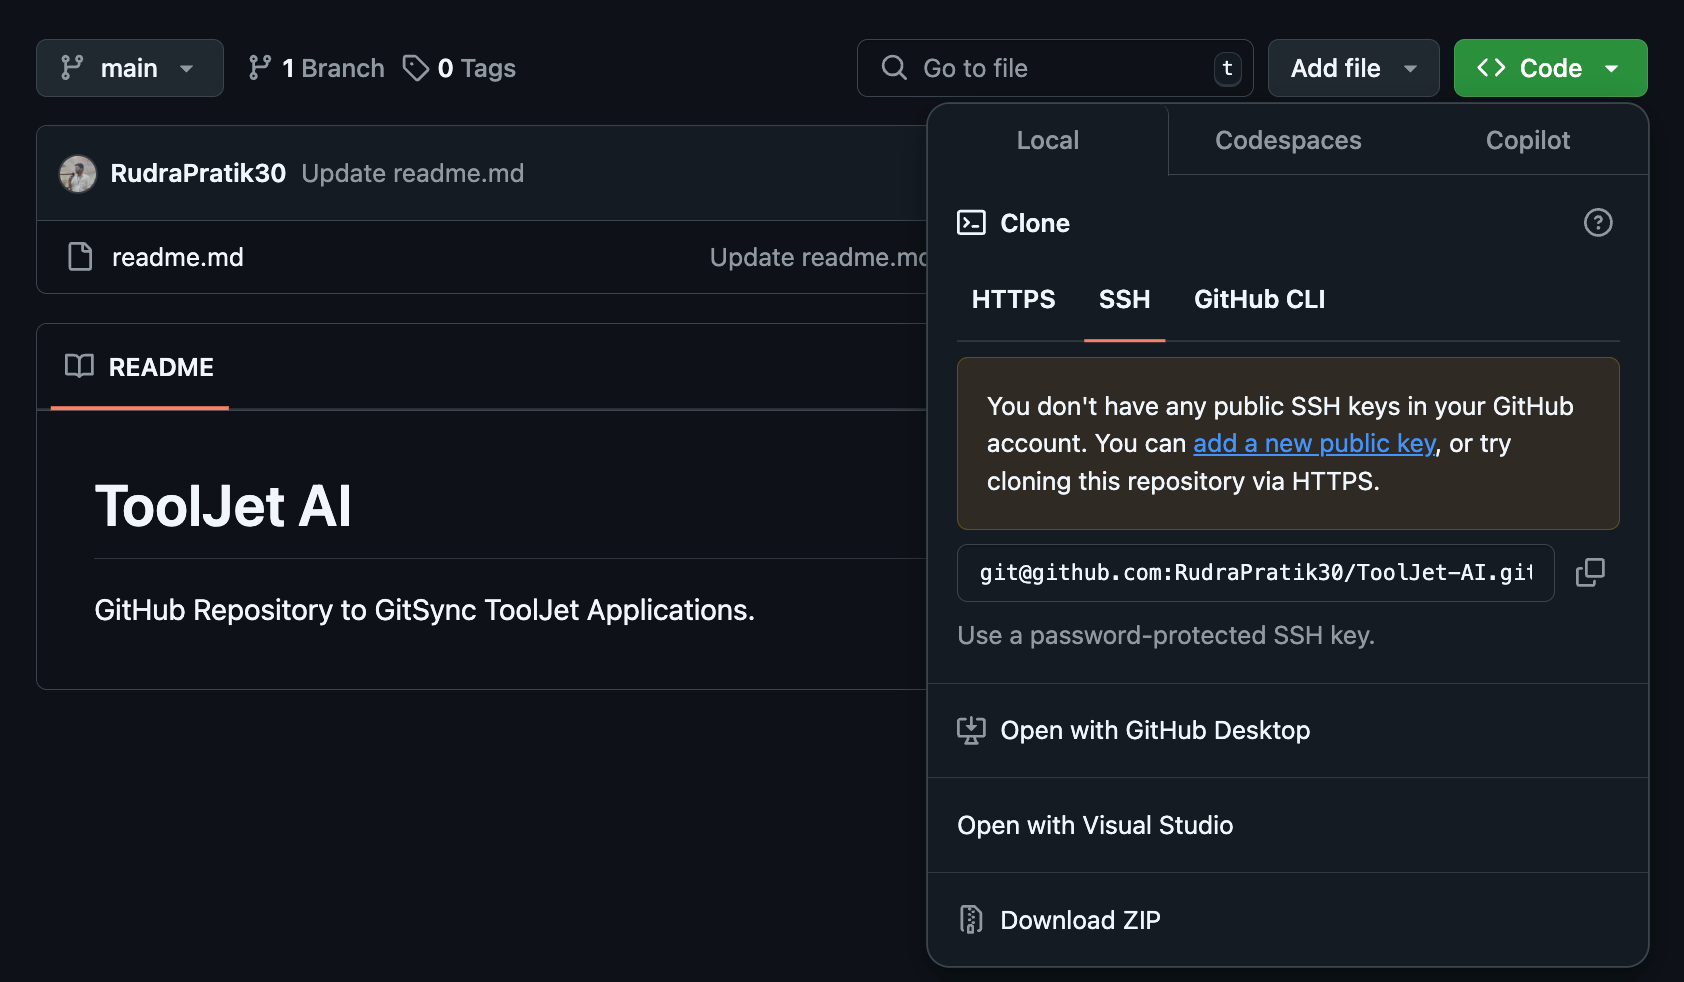
Obtain the SSH URL
When a repository is created, GitHub shows a screen with the SSH URL.
OR
If you are using an existing repository, then you can obtain the URL by clicking on the Code button.
To generate the SSH URL for other git repository manager, such as GitLab and Gitea, follow the SSH Configuration guide.
-
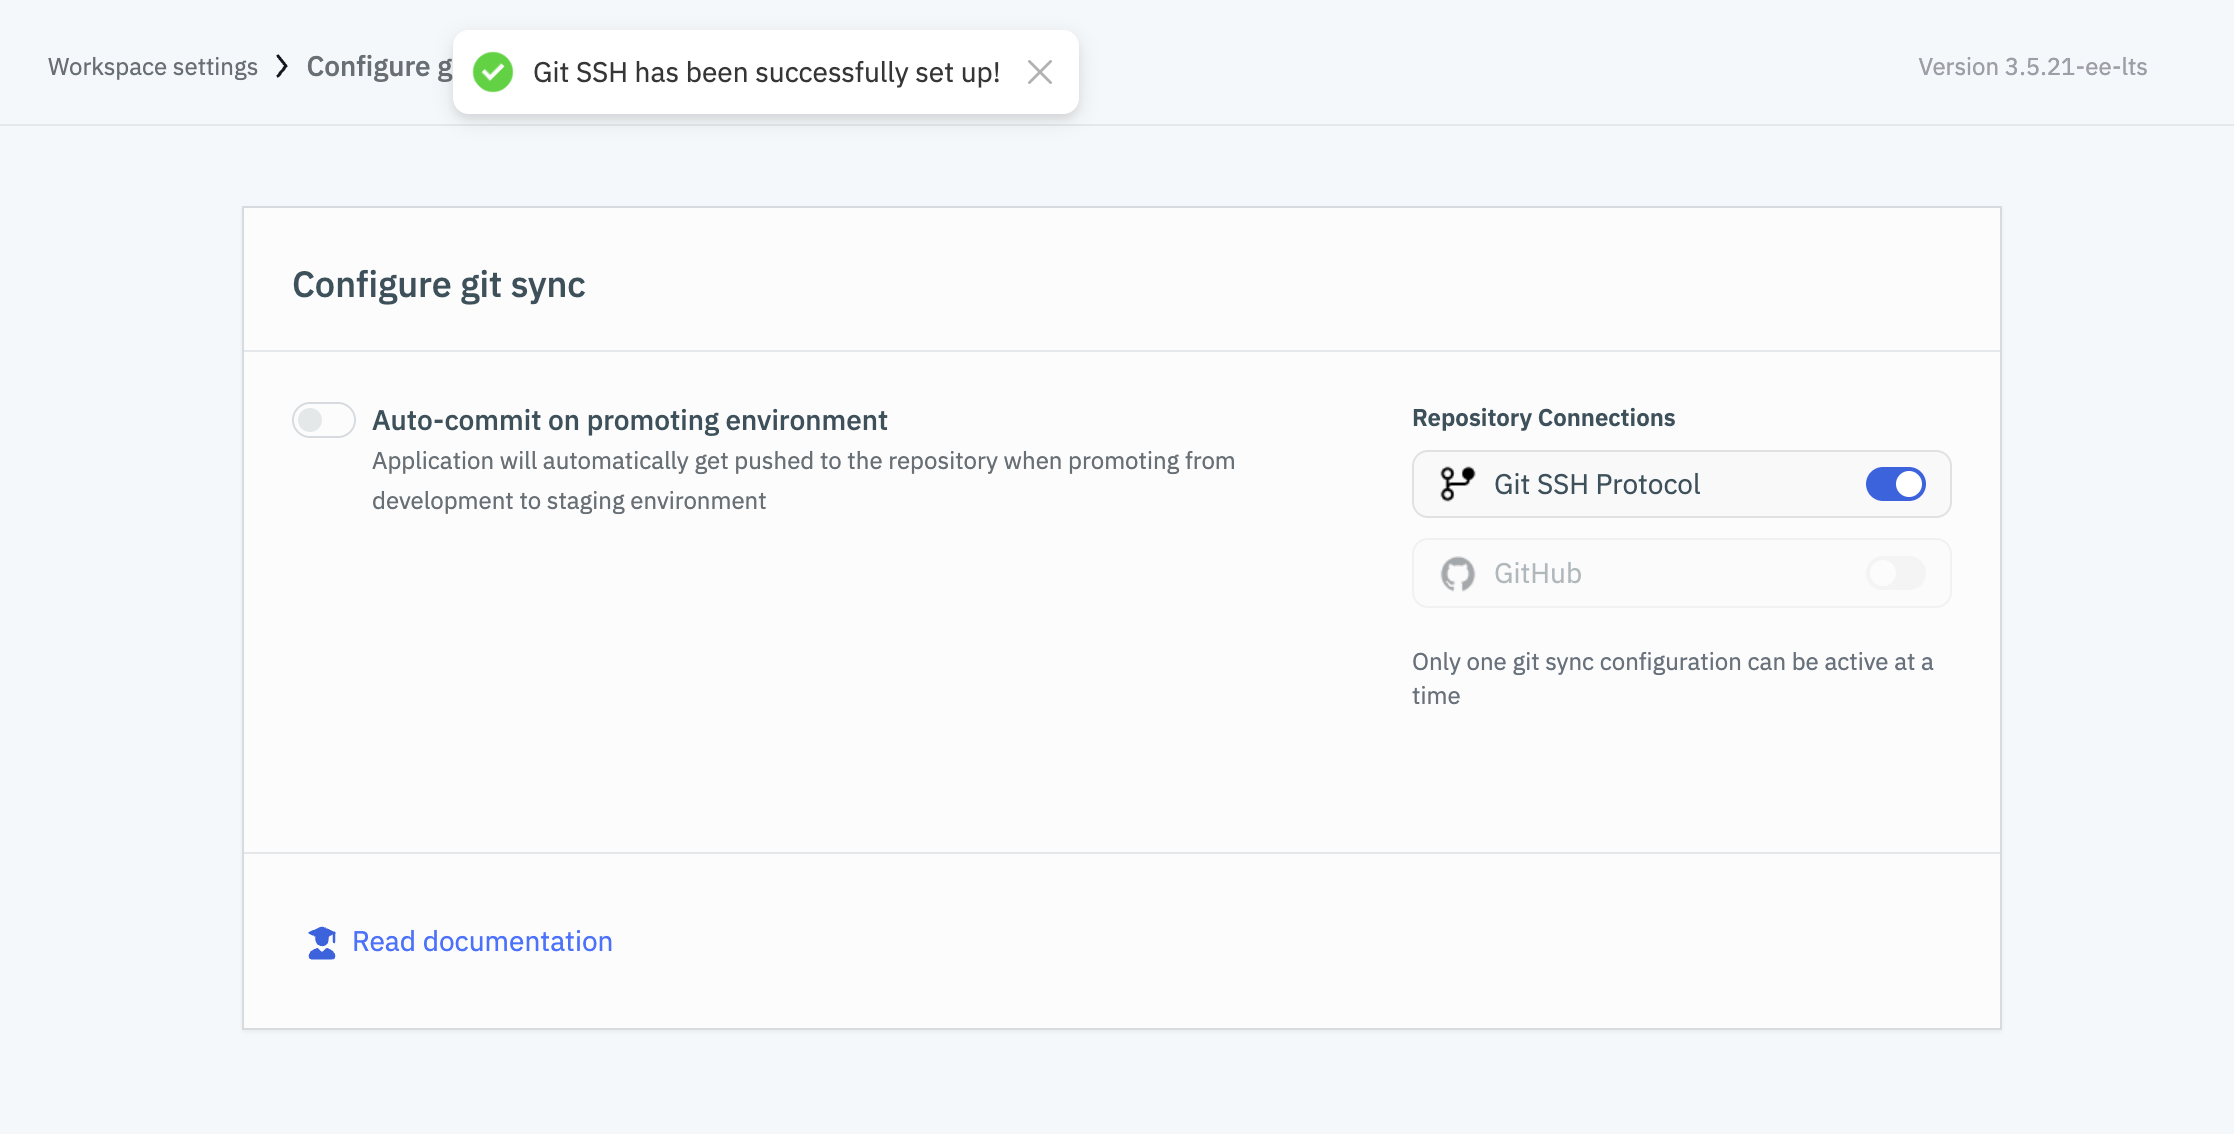
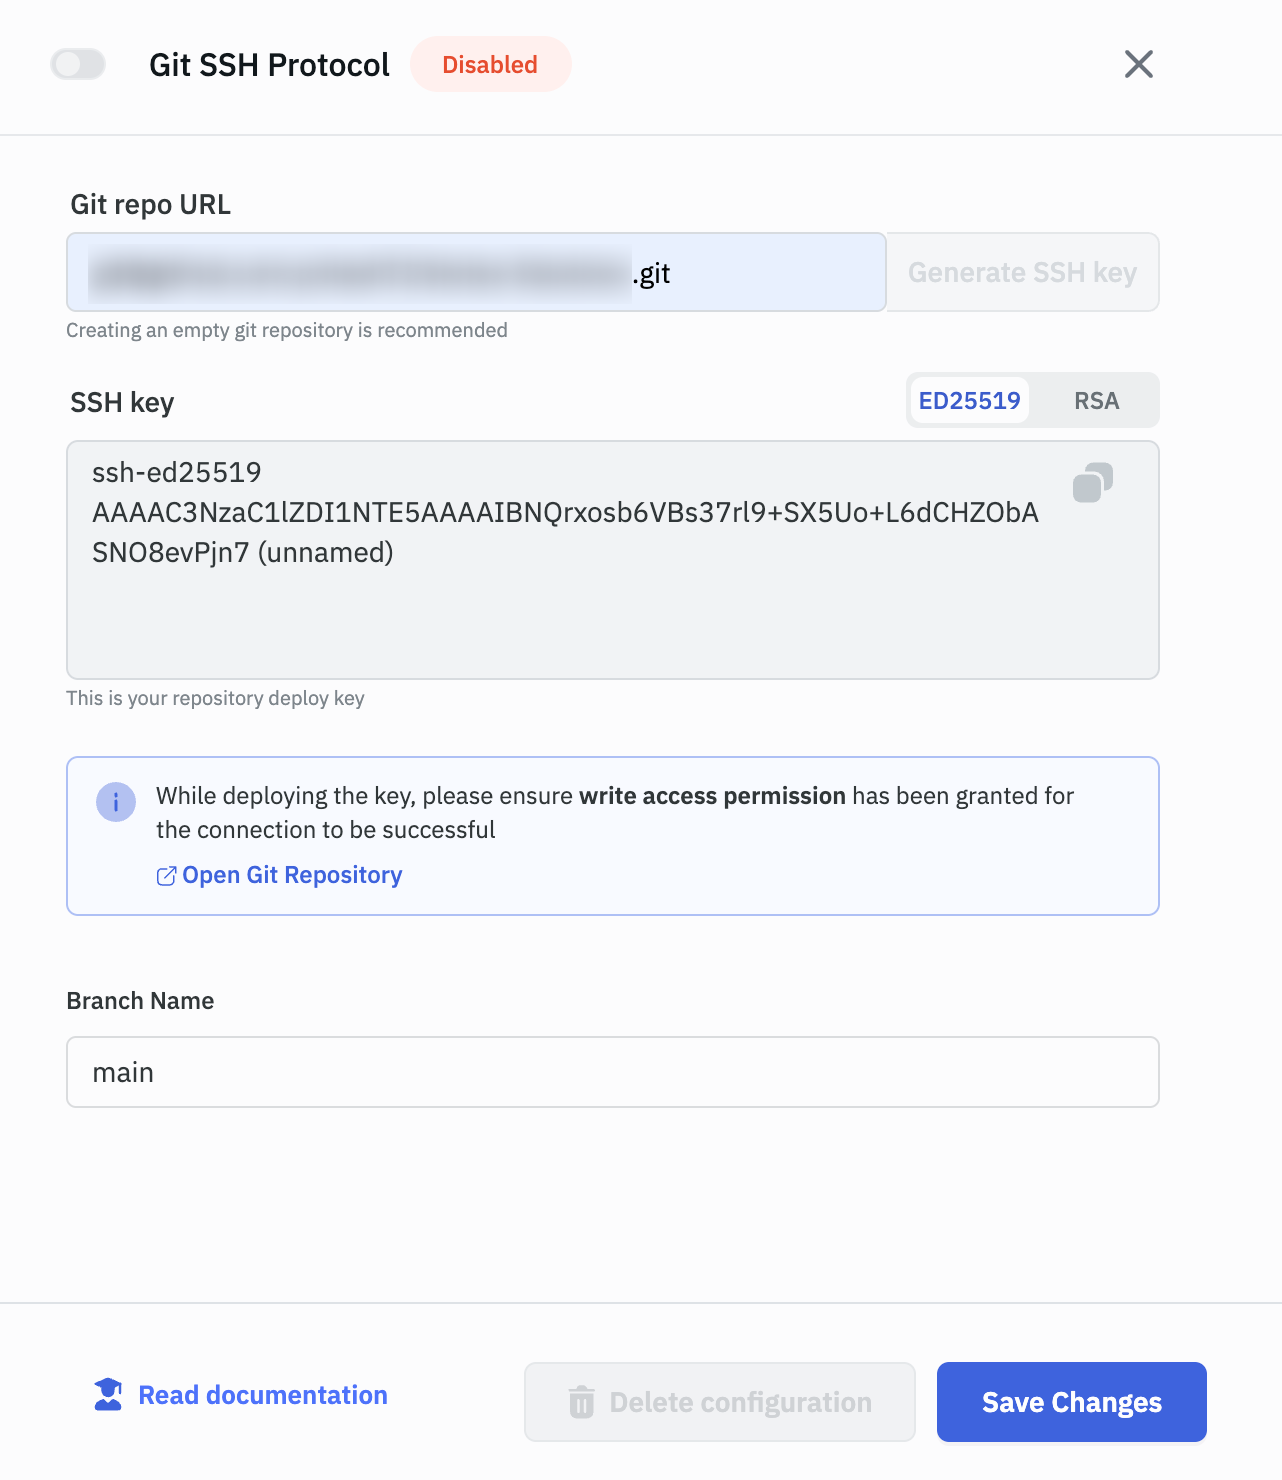
Go to the Workspace settings, and click on the Configure git sync tab. Select Git SSH Protocol as your Repository Connection.
(Example URL -https://app.corp.com/nexus/workspace-settings/configure-git)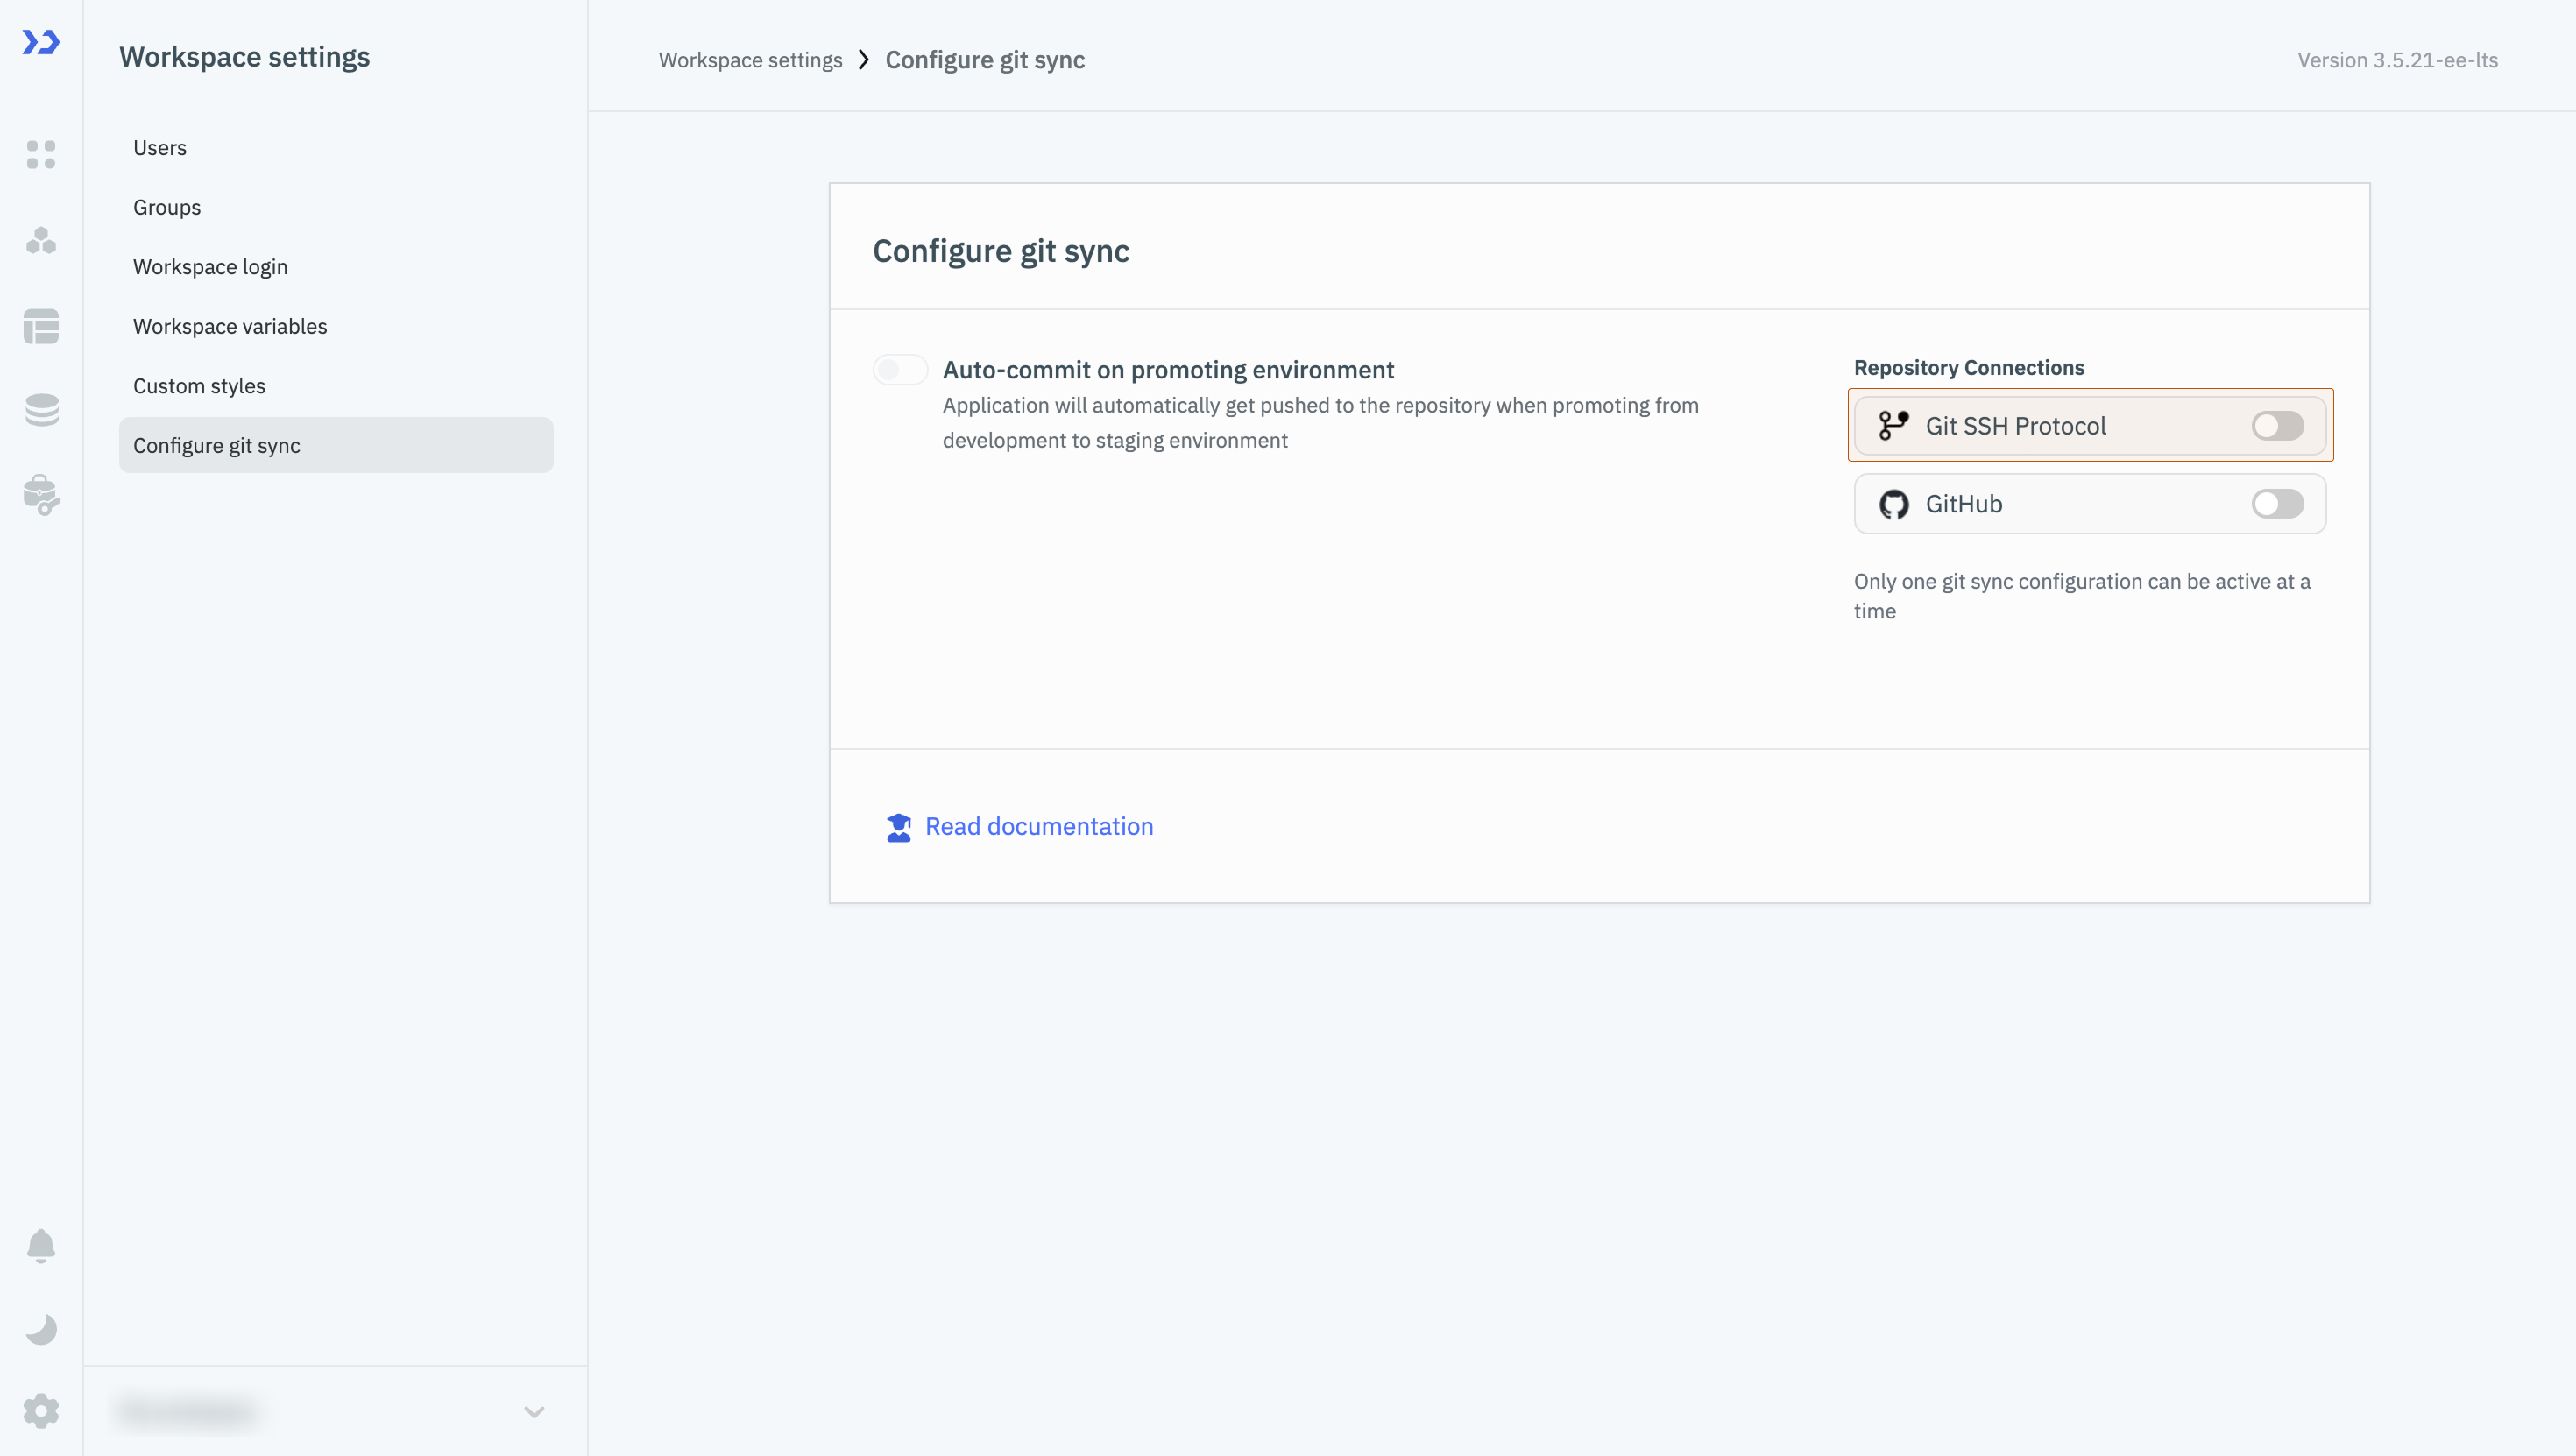
-
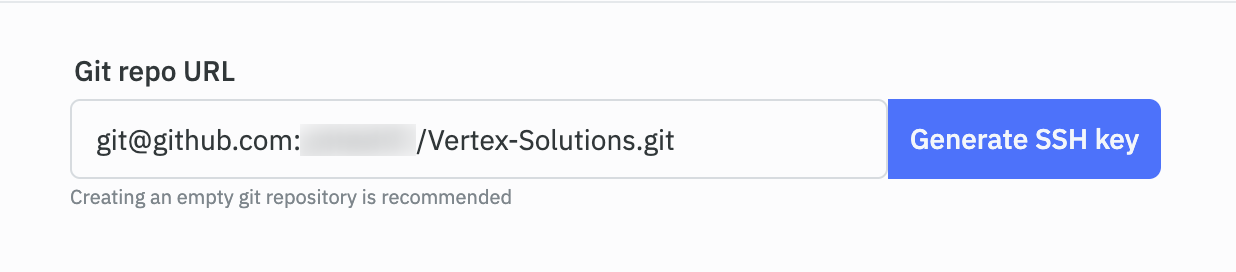
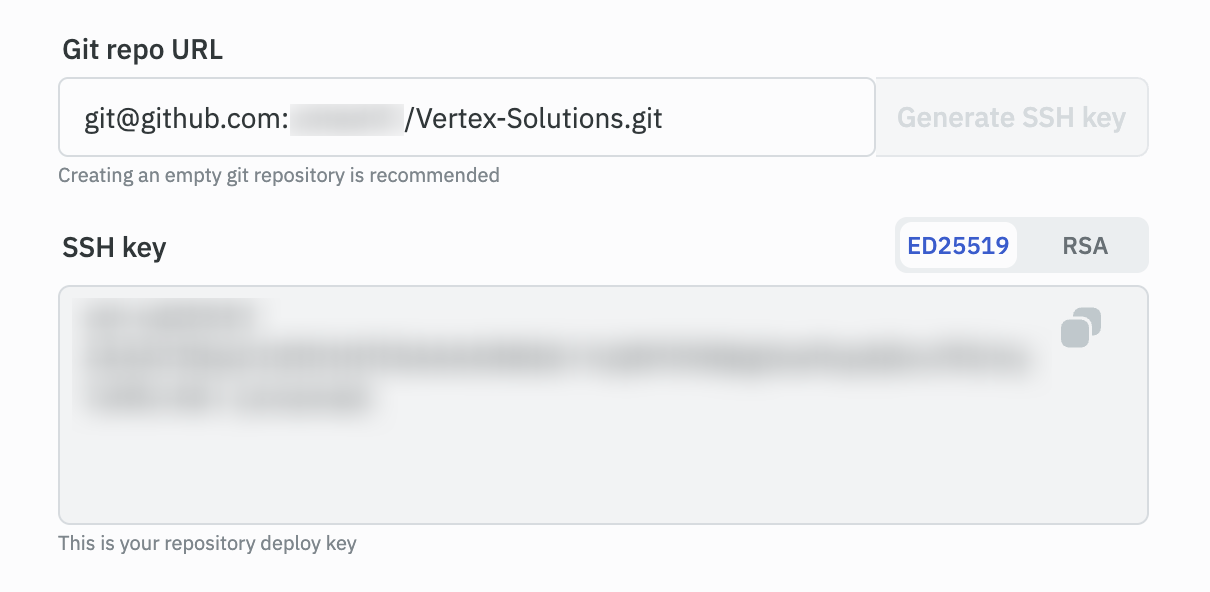
Enter the SSH URL of the repository in the Git repo URL field.
-
Click on the Generate SSH key button, and copy the SSH key that is generated. The SSH key is used to authenticate ToolJet with the repository.
There are two types of generated SSH keys:
- ED25519: This is a secure and efficient algorithm that is used for generating SSH keys. It is recommended to use this key type. VCS providers like GitHub and GitLab recommend using this key type
- RSA: This is an older algorithm that is used for generating SSH keys. It is not recommended to use this key type. Providers like Bitbucket recommend using this key type.
-
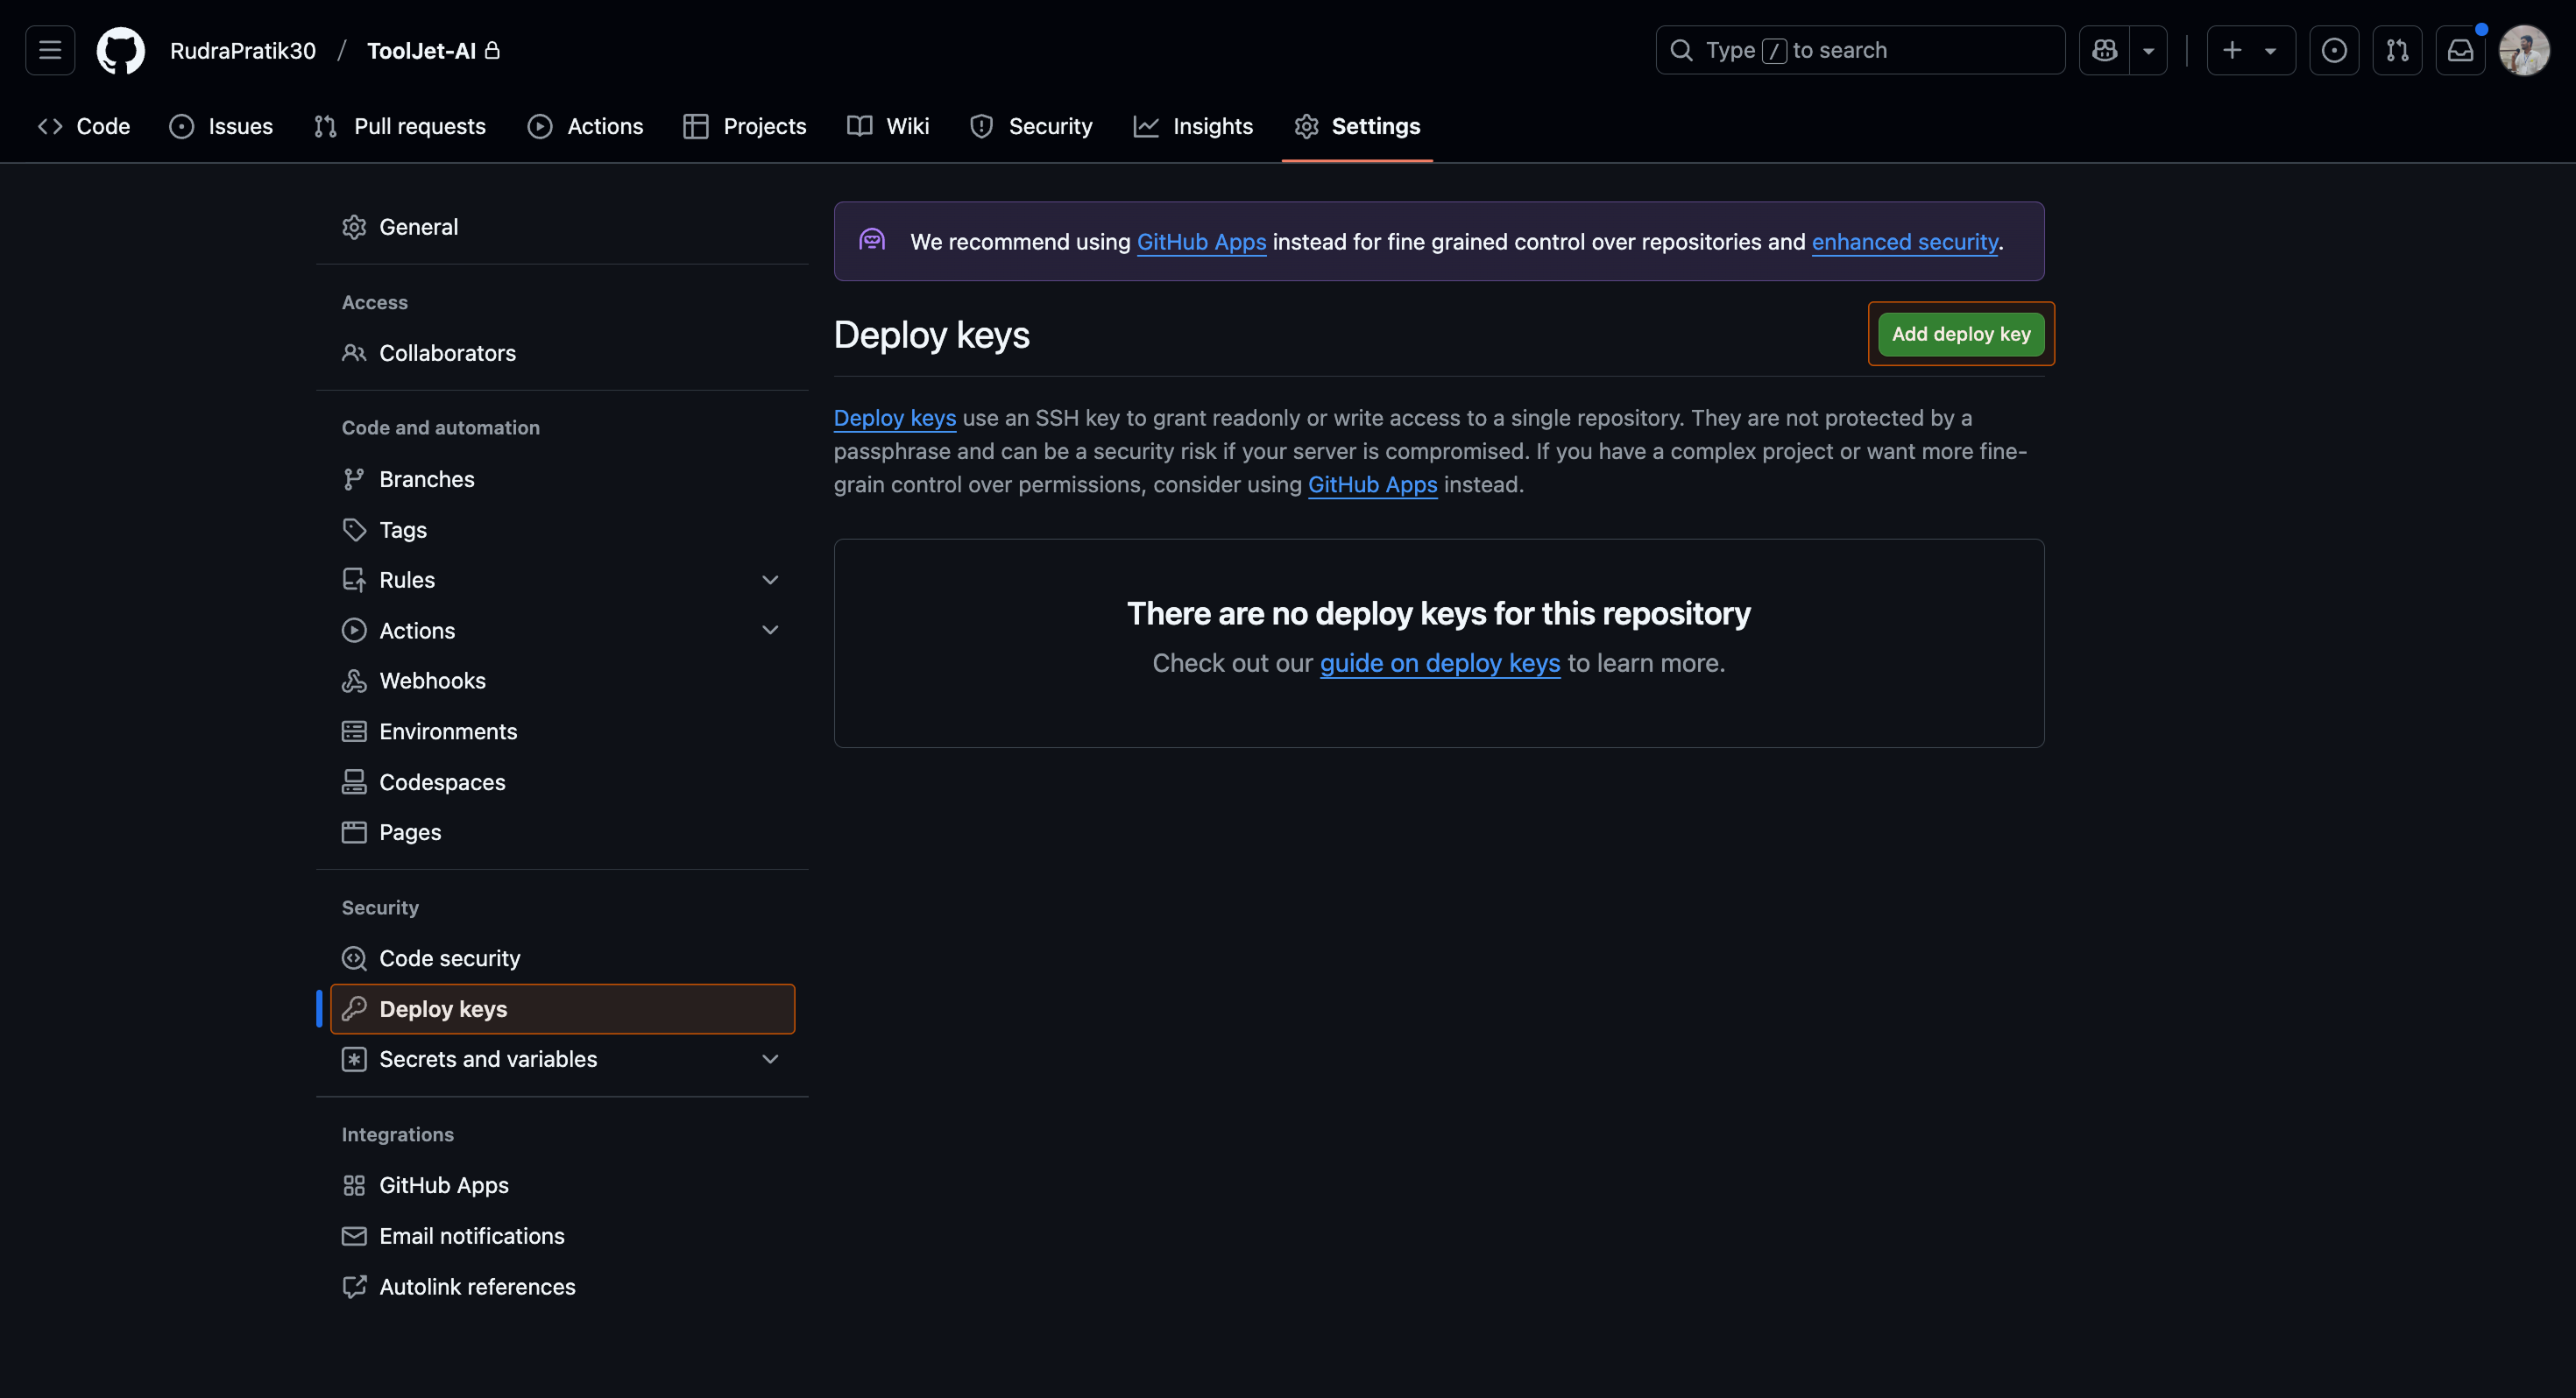
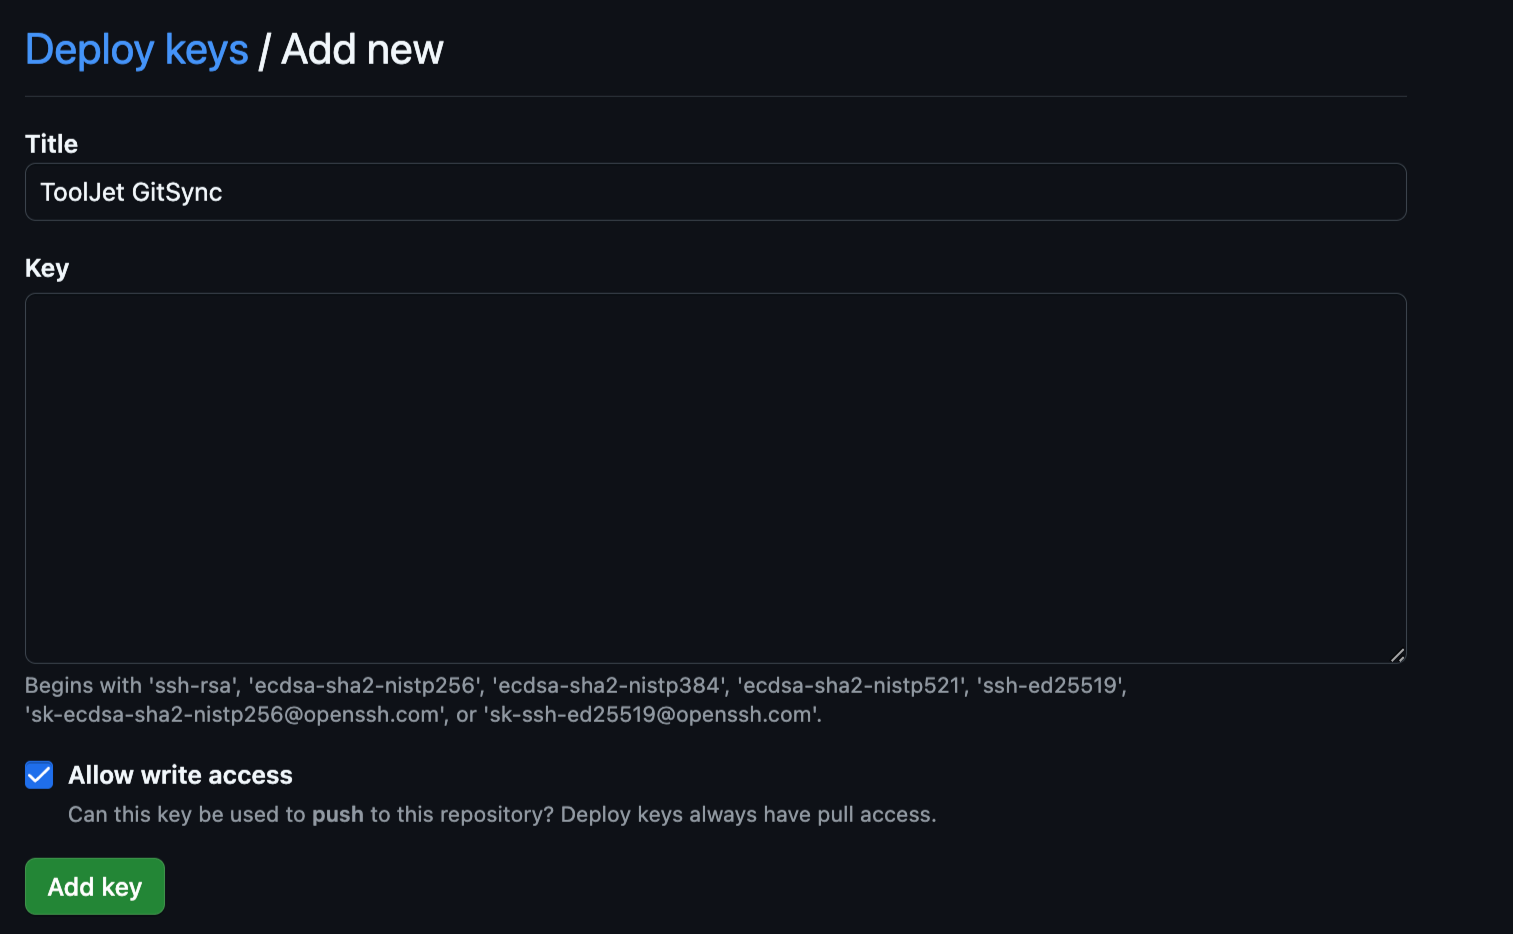
Go to the Settings tab of the GitHub repository, and click on the Deploy keys tab. Click on the Add deploy key button. Enter a title for the SSH key in the Title field. Paste the SSH key generated from the ToolJet.
-
Make sure that the Allow write access checkbox is checked, especially when configuring the GitSync feature to push changes to Git. However, it is not mandatory to check this option when setting up the GitSync feature for pulling changes from Git. Finally, click on the Add key button.
To deploy the SSH key for other git repository manager, such as GitLab and Gitea, follow the SSH Configuration guide.
-
After deploying the SSH Key, go to the Configure git tab on ToolJet, and click on the Finalize setup button. If the SSH key is configured correctly, you will see a success message.
Configuring GitSync on a Different Branch
ToolJet GitSync allows you to sync your applications with a Git repository to enable version control and team collaboration. By default, GitSync operates on the main branch, but in multi-environment setups (like staging, production, or feature development), teams often need to sync with custom branches. ToolJet supports this by allowing you to configure a custom Git branch for syncing.
ToolJet supports setting the Git branch directly through the UI when configuring GitSync for a workspace.
- You’ll find an optional Target Branch input while setting up GitSync.
- Simply enter the desired branch name (e.g., develop, release/v1, etc.).
- If left empty:
- For new users, the default branch will be main.
- For existing users, the default will be master to maintain backward compatibility.
This is the preferred way to set the target branch going forward.
Existing GitSync users, who want to use a custom Git branch must first create a new custom branch from the main branch in the Git repository manager.