You can configure Google SSO in ToolJet at both instance and workspace level for seamless authentication and enanched security.
Configure Google SSO
To enable GitHub Single Sign-on (SSO) for your ToolJet, follow these steps:
Role Required:
For Instance Level: Super Admin
For Workspace Level: Admin
-
Click on the settings icon (⚙️) on the bottom left of your dashboard.
-
For Instance Level:
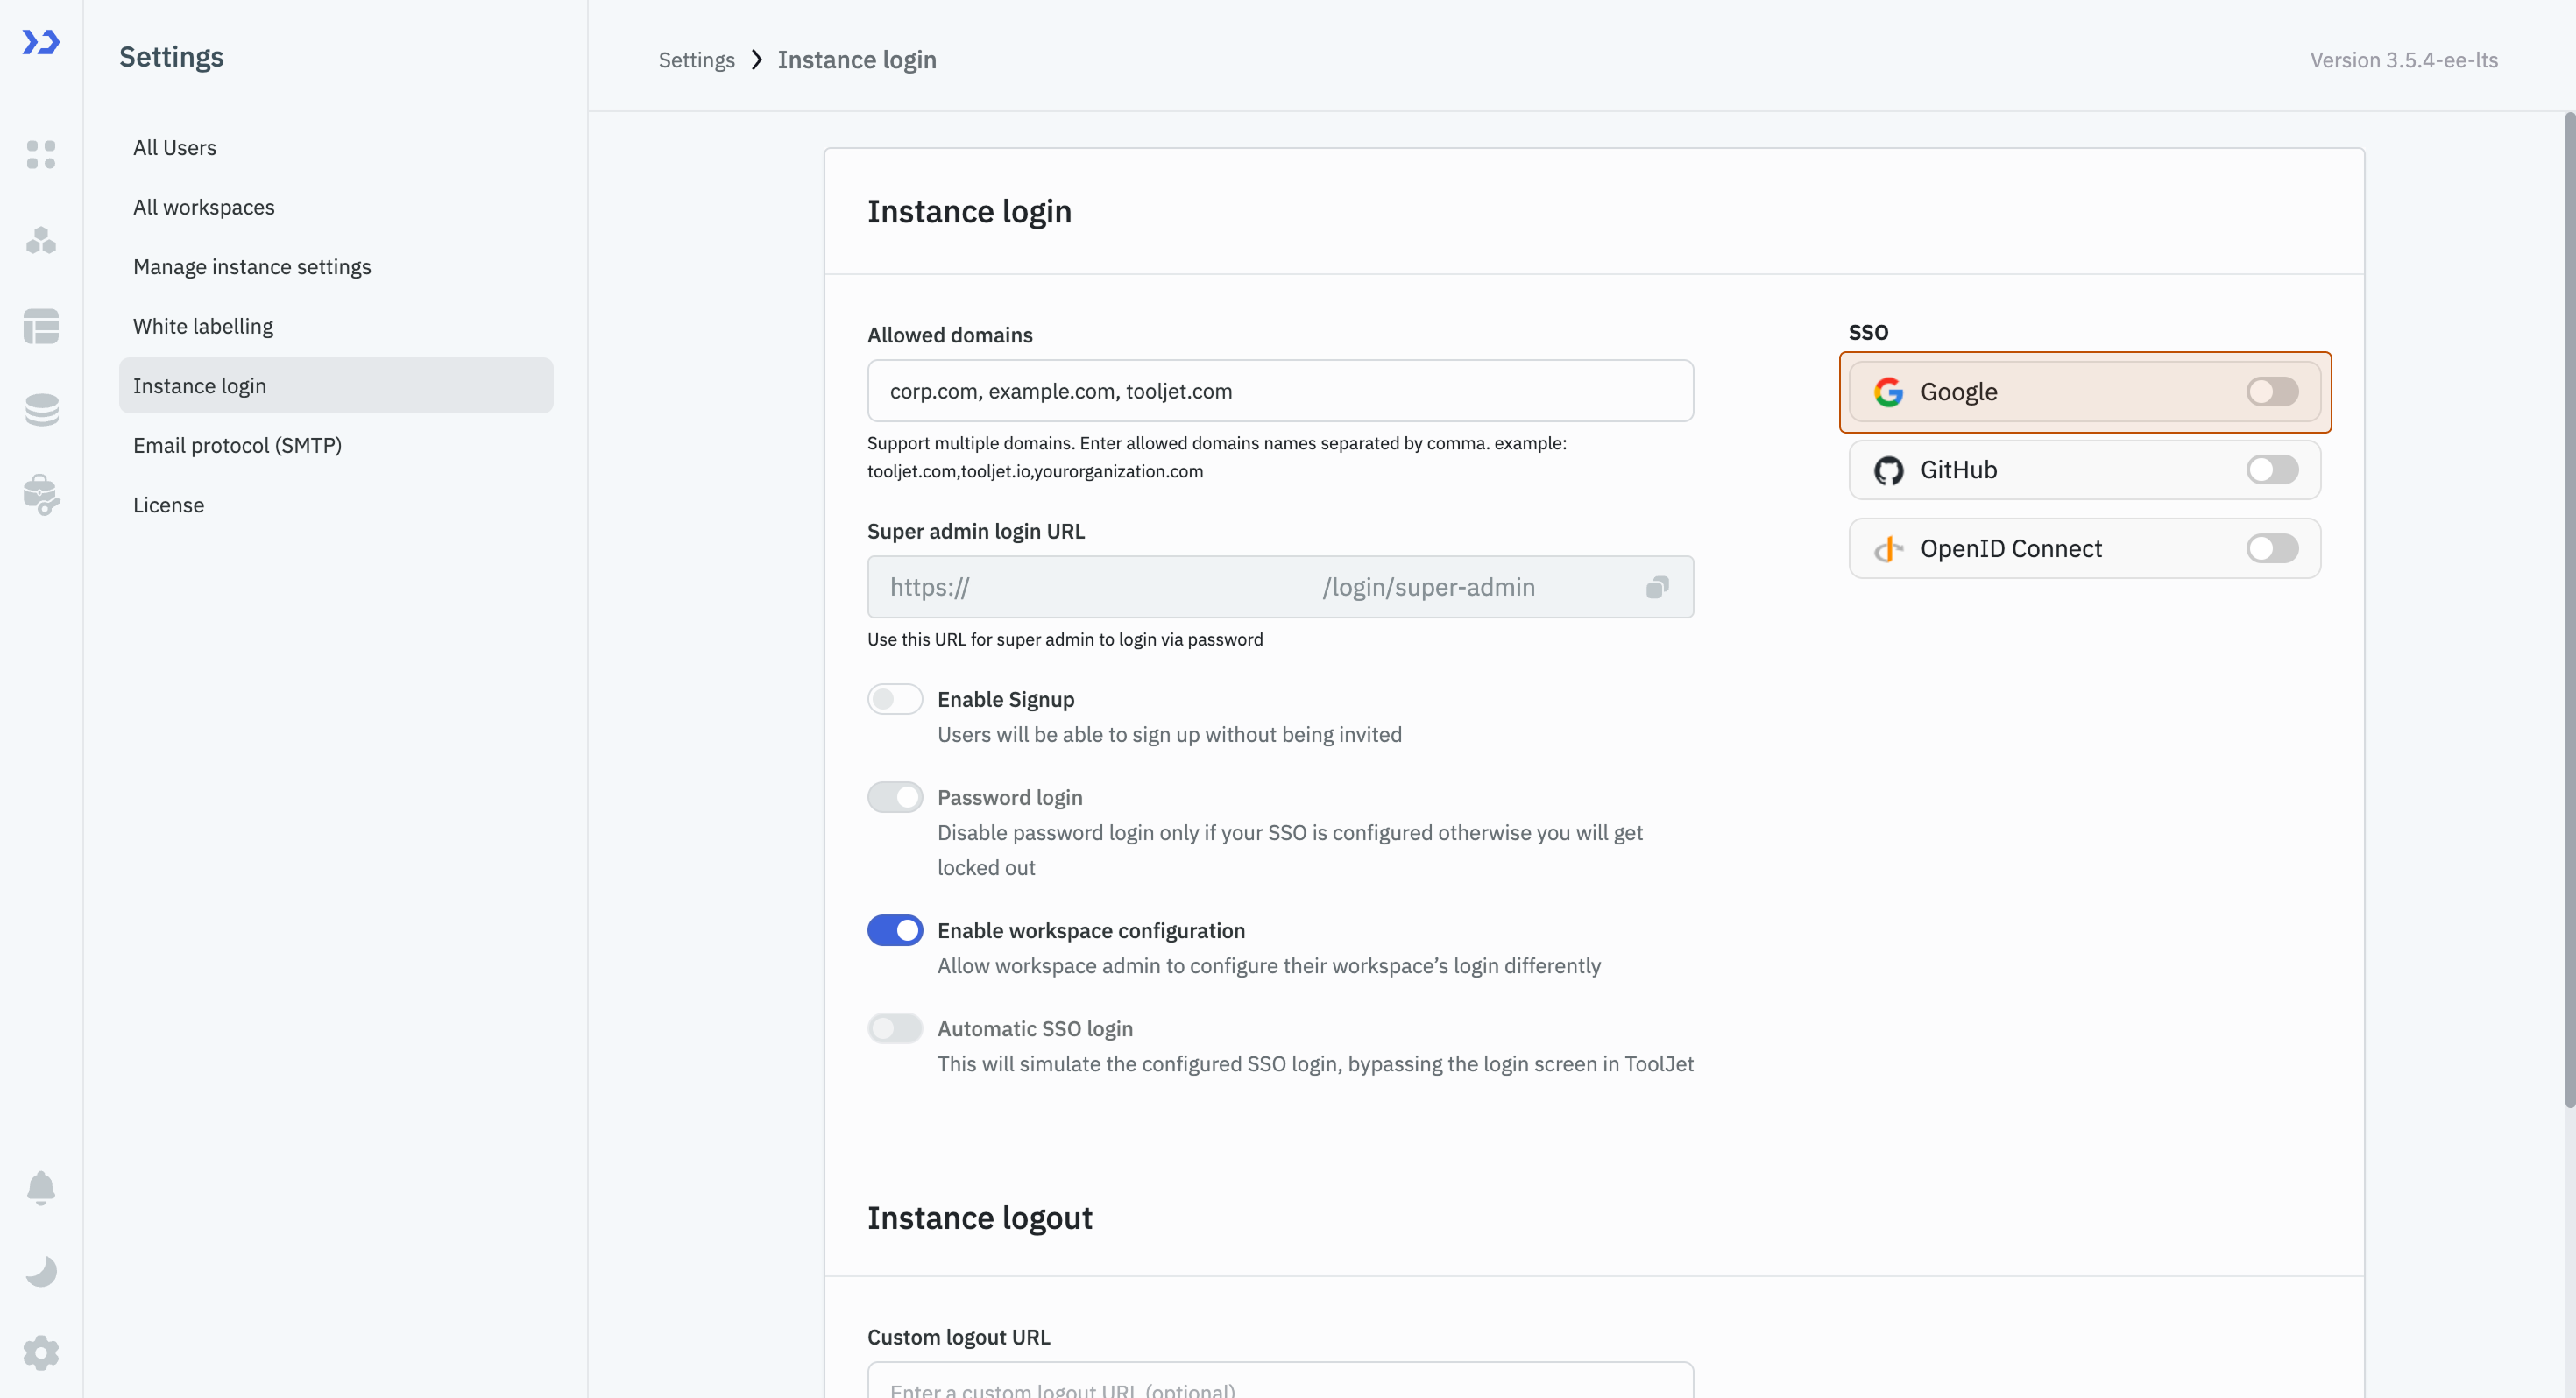
Go to Settings > Instance login.
(Example URL -https://app.corp.com/instance-settings/instance-login)For Workspace Level:
Go to Workspace Settings > Workspace login.
(Example URL -https://app.corp.com/nexus/workspace-settings/workspace-login) -
On the right, you'll see toggles to enable SSO via different clients. All the client toggles are disabled by default. Turn on the toggle in front of Google.
-
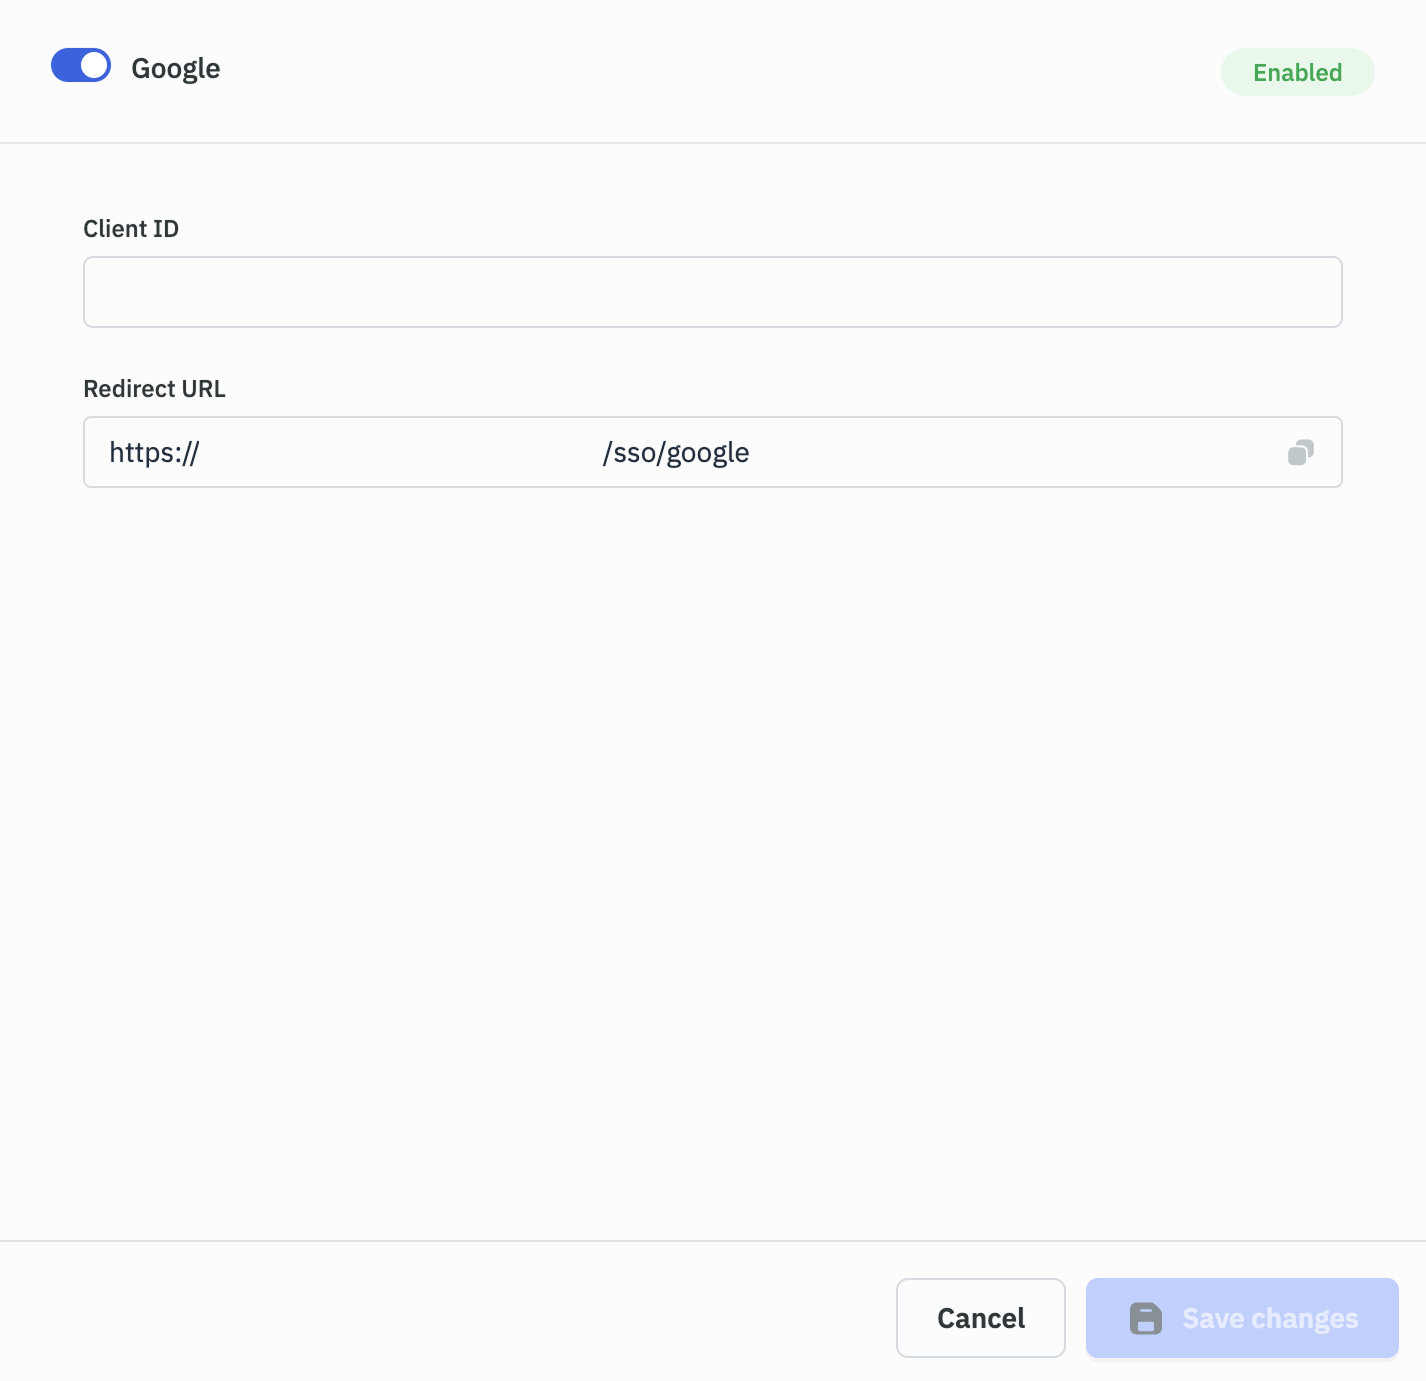
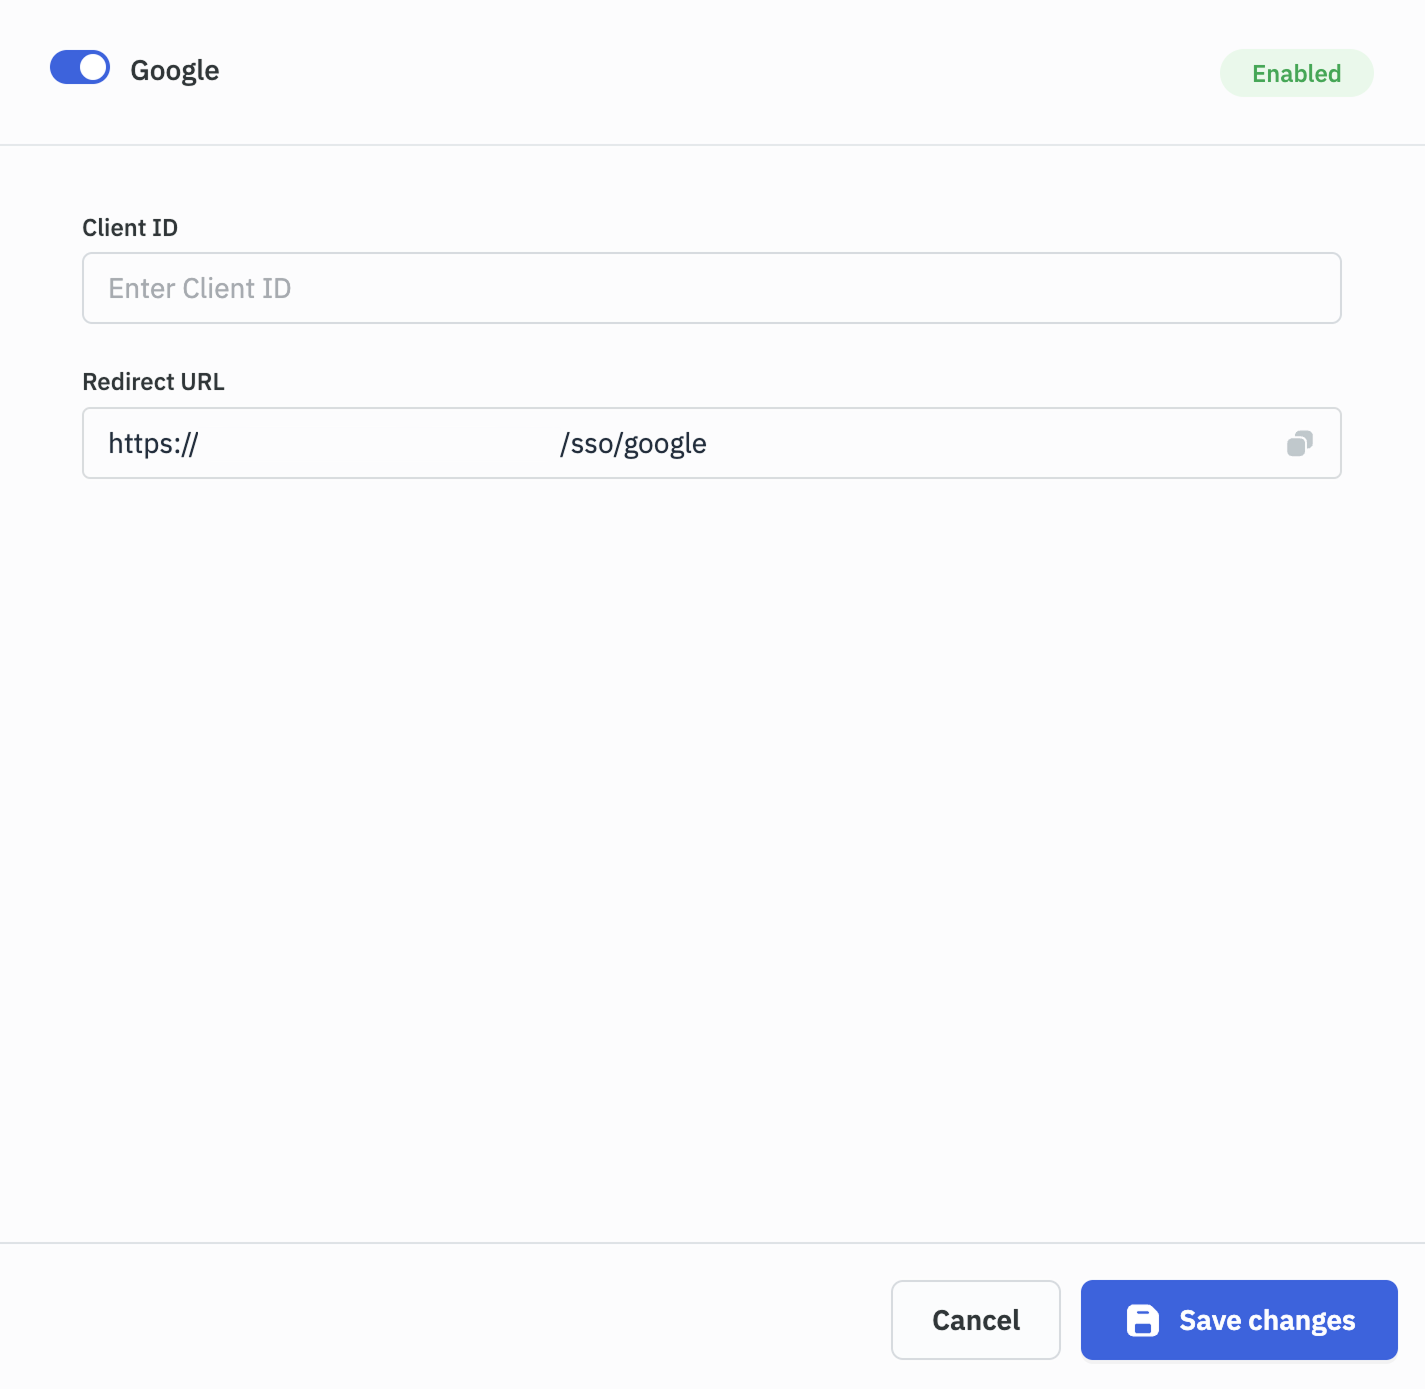
After turning it on, a modal will appear with input fields for parameters such as Host name, Client ID, and Client secret. At the top left of the modal, there is a toggle to enable this modal. Turn it on, and then, without entering any parameters, click on the Save changes button. This will generate a Redirect URL that you will need to utilize in the Google Cloud Console.
-
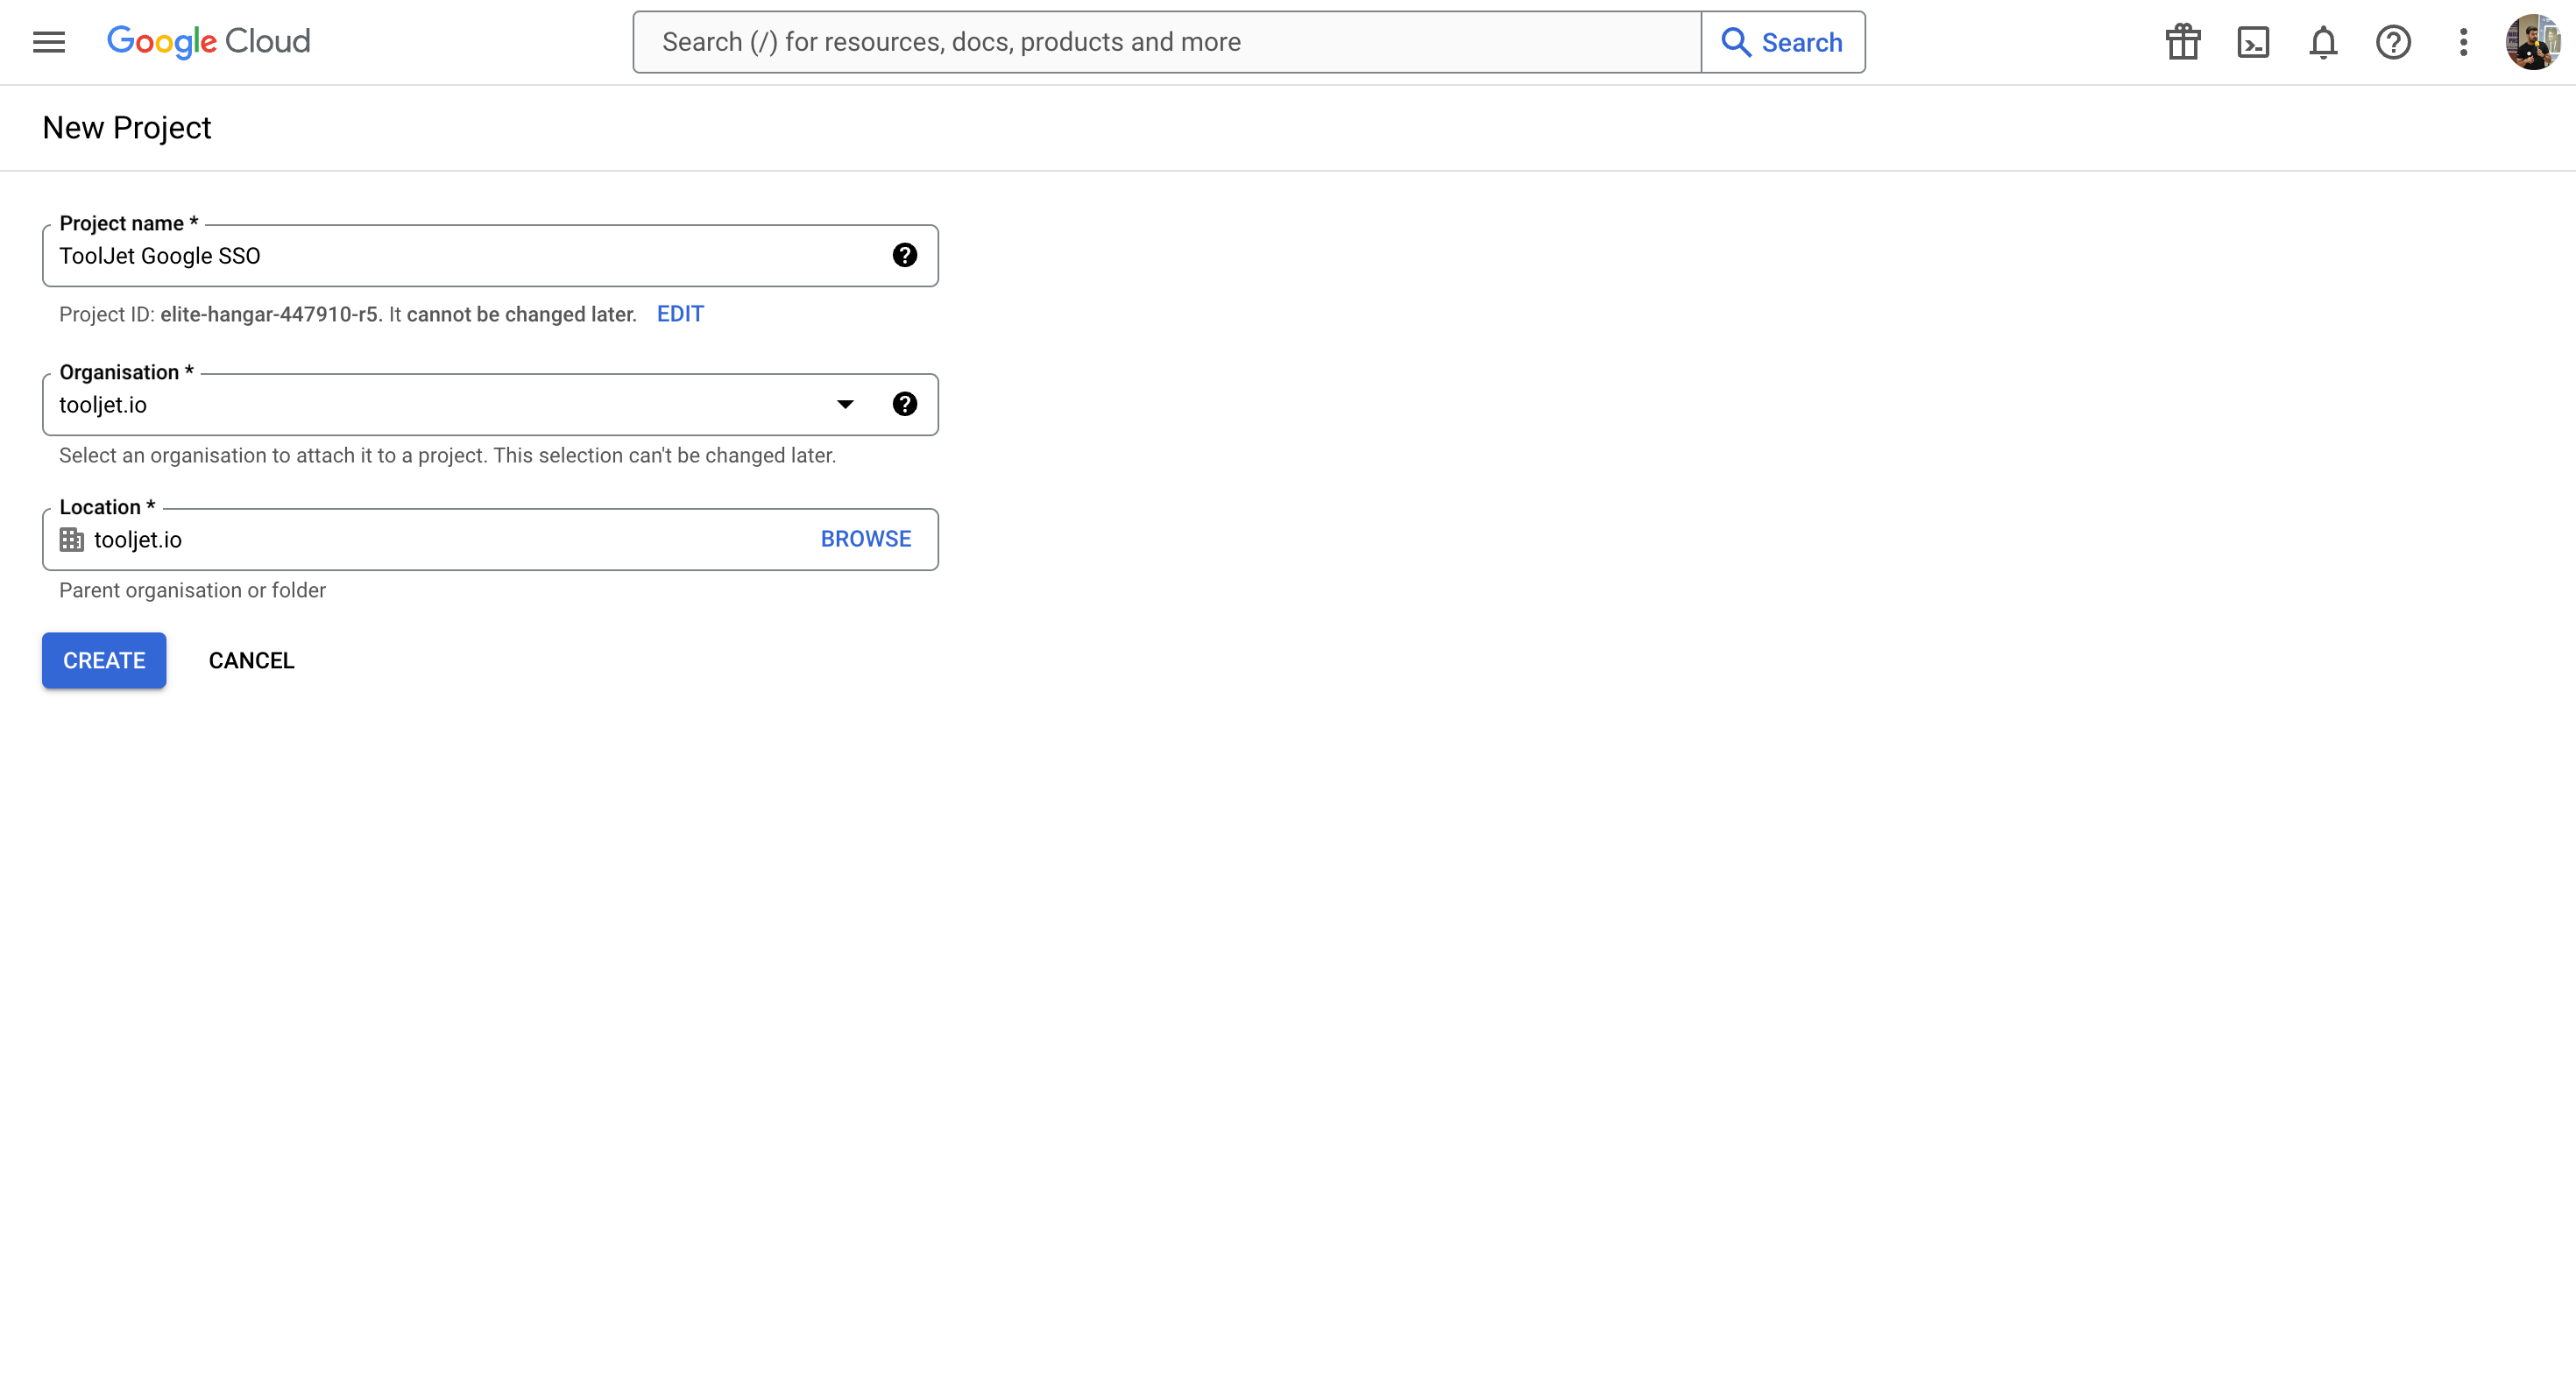
Go to Google Cloud console and create a project.
-
Go to the Google Cloud console credentials page, and create an OAuth client ID.
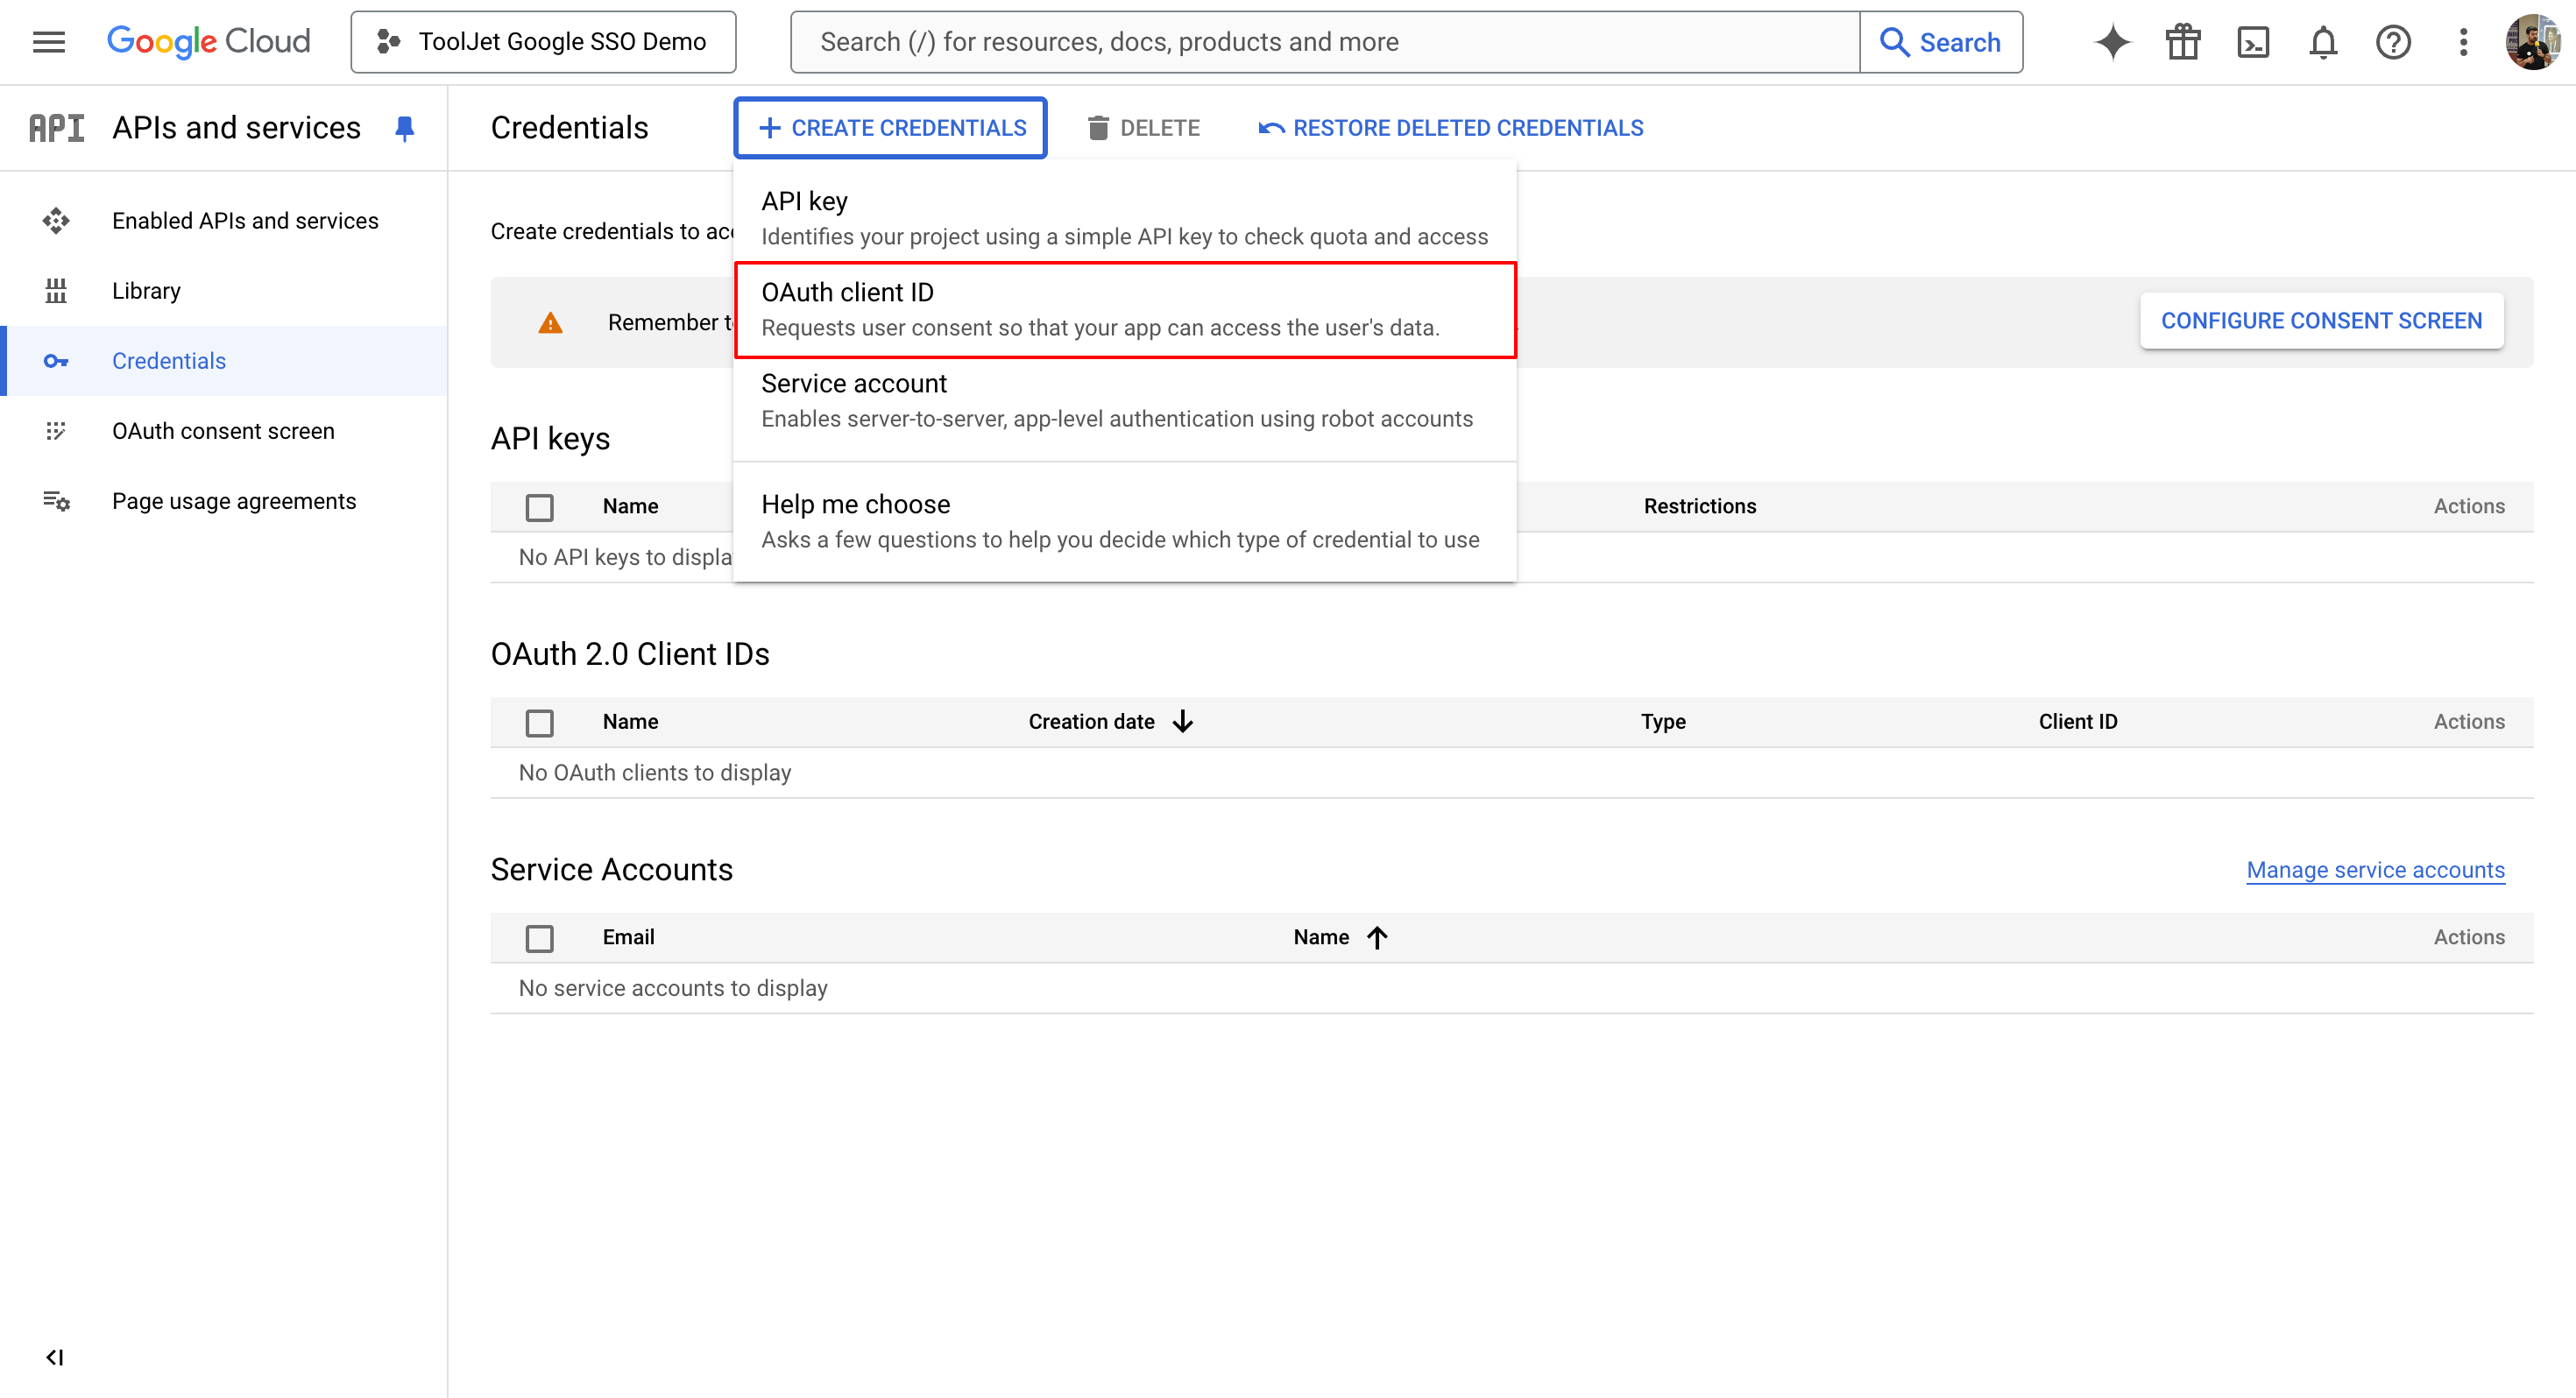
-
You'll be asked to select user type in consent screen. To allow only users within your workspace, select 'Internal', otherwise, select 'External'.
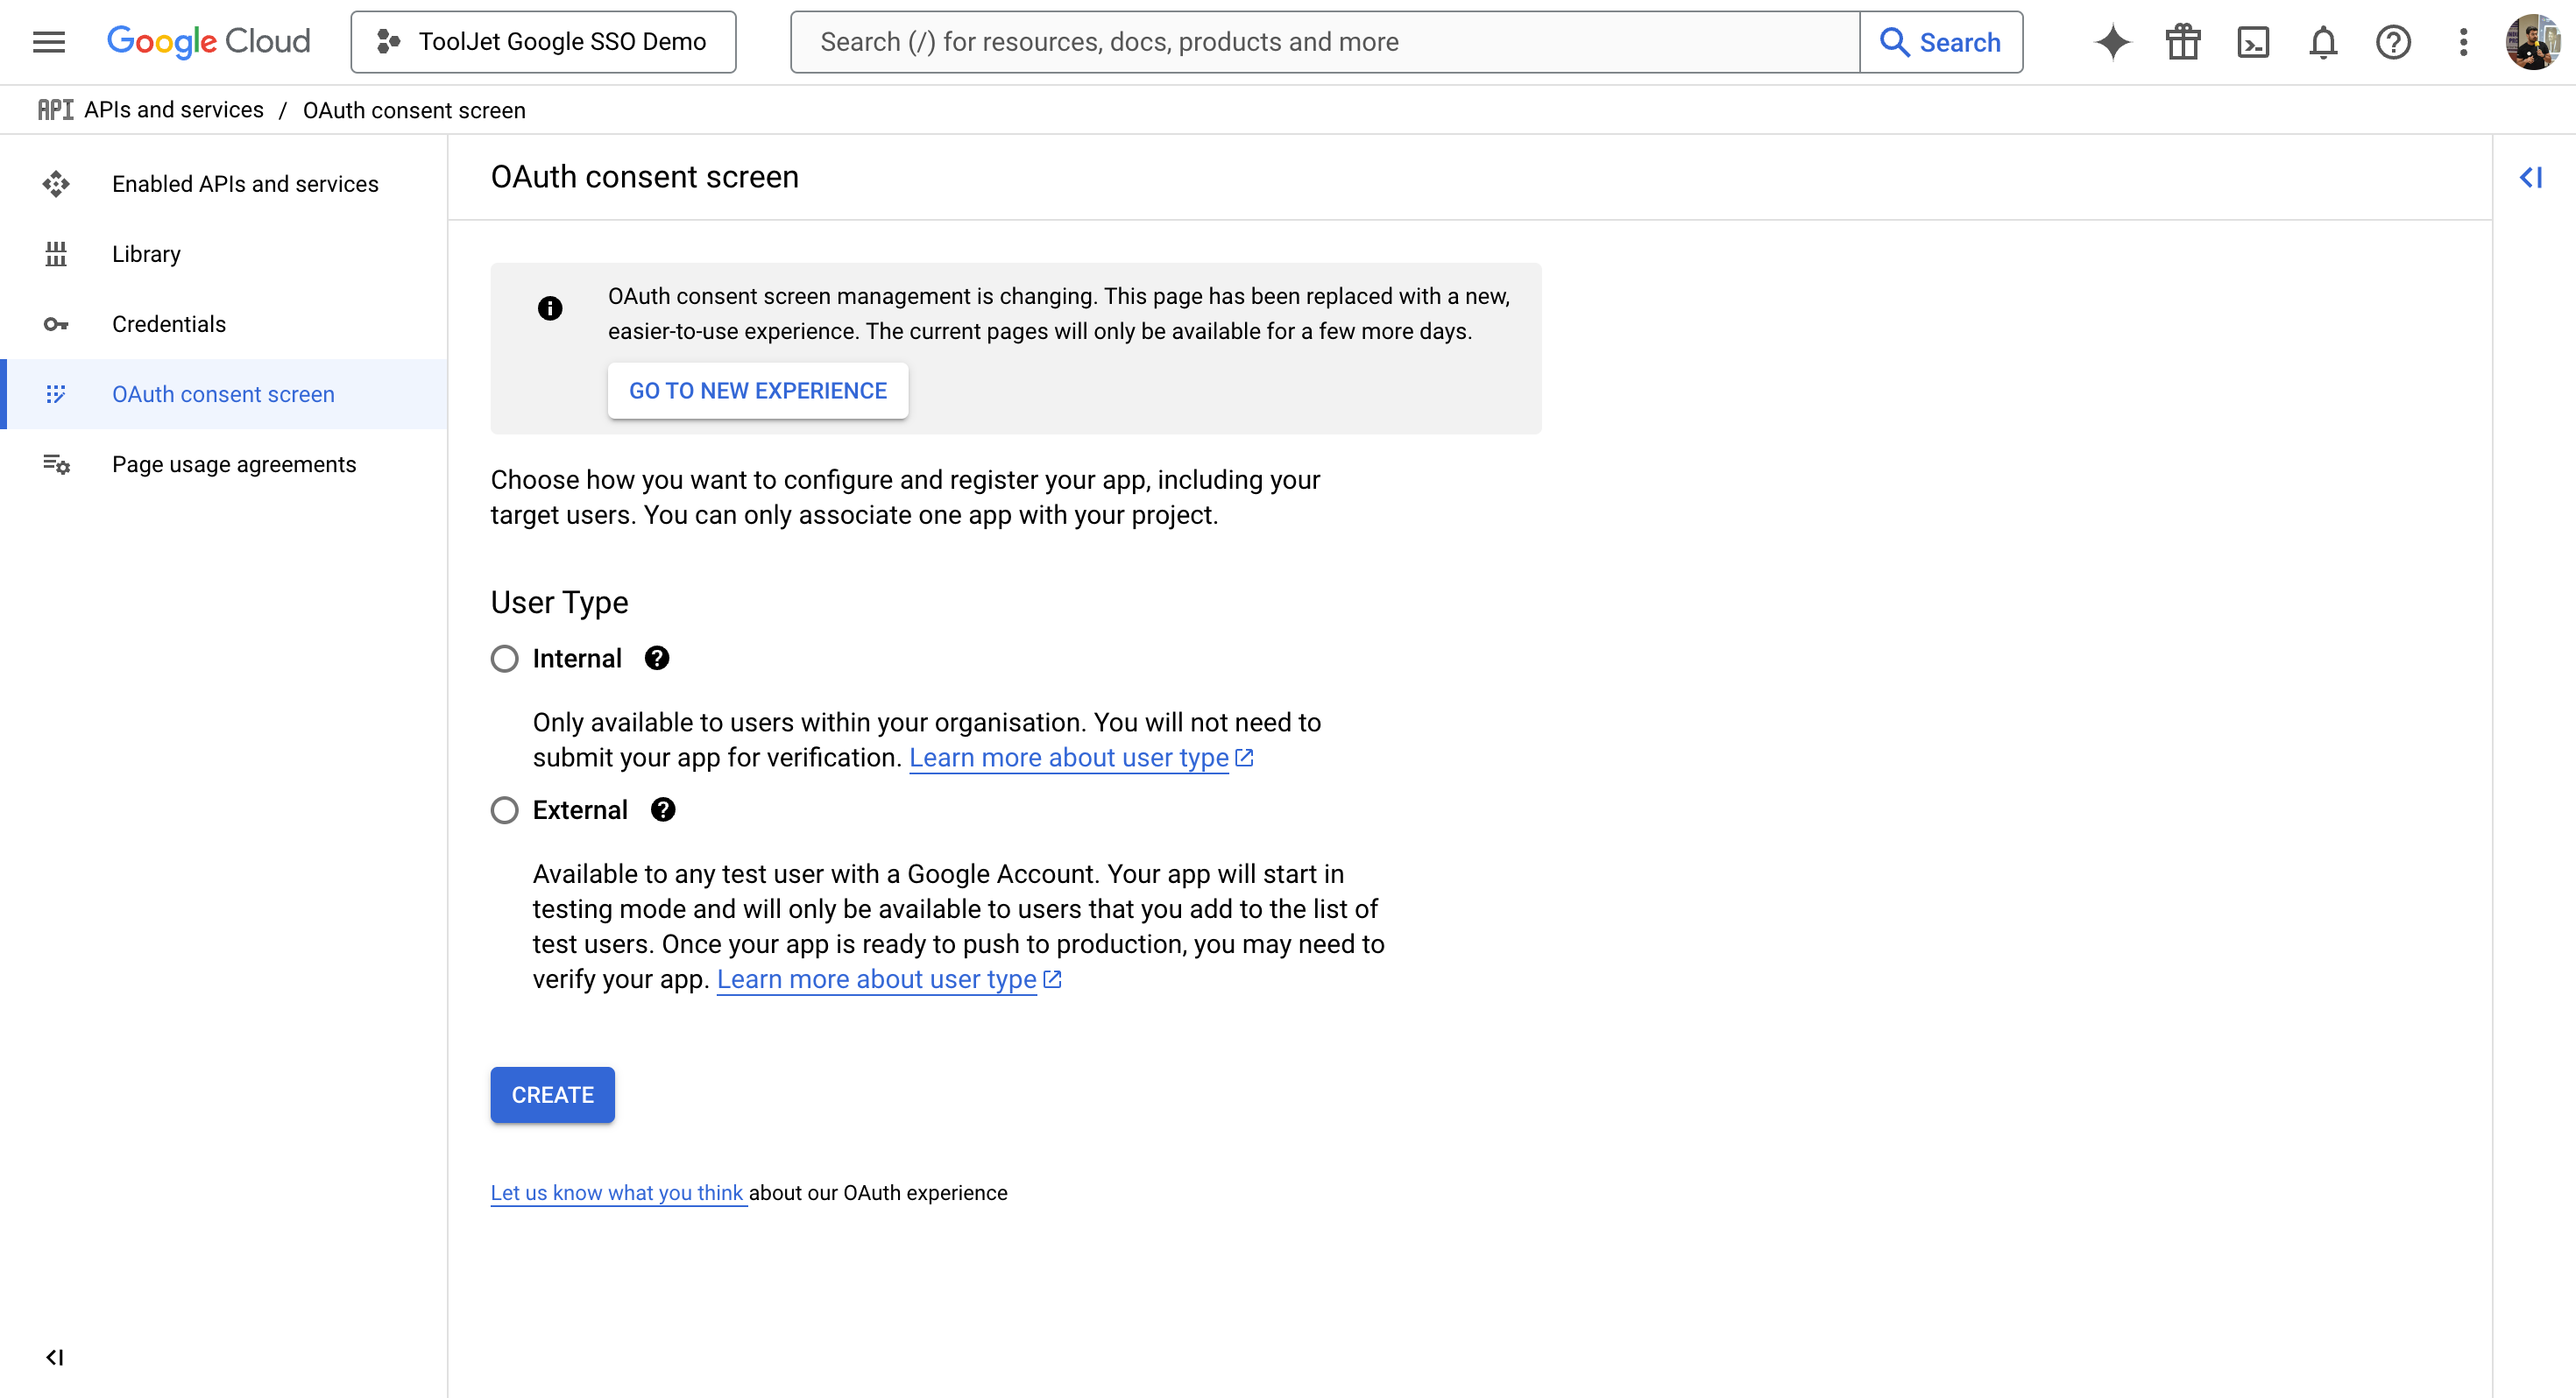
-
You'll be led to an app registration page, fill out the required details and click on SAVE AND CONTINUE button at the bottom.
-
On the second page you can set OAuth scopes. Select ADD OR REMOVE SCOPES and add the scopes userinfo.email and userinfo.profile as shown in the image. This will allow ToolJet to store the email and name of the user who is signing in. Click on SAVE AND CONTINUE.

-
Go to Credentials tab, click on + CREATE CREDENTIAL and select OAuth client ID. Select Application type and give a name, under Authorised JavaScript origins, set the domain on which ToolJet is hosted and under Authorized redirect URIs, enter the Redirect URL which was generated in ToolJet's Google SSO settings.
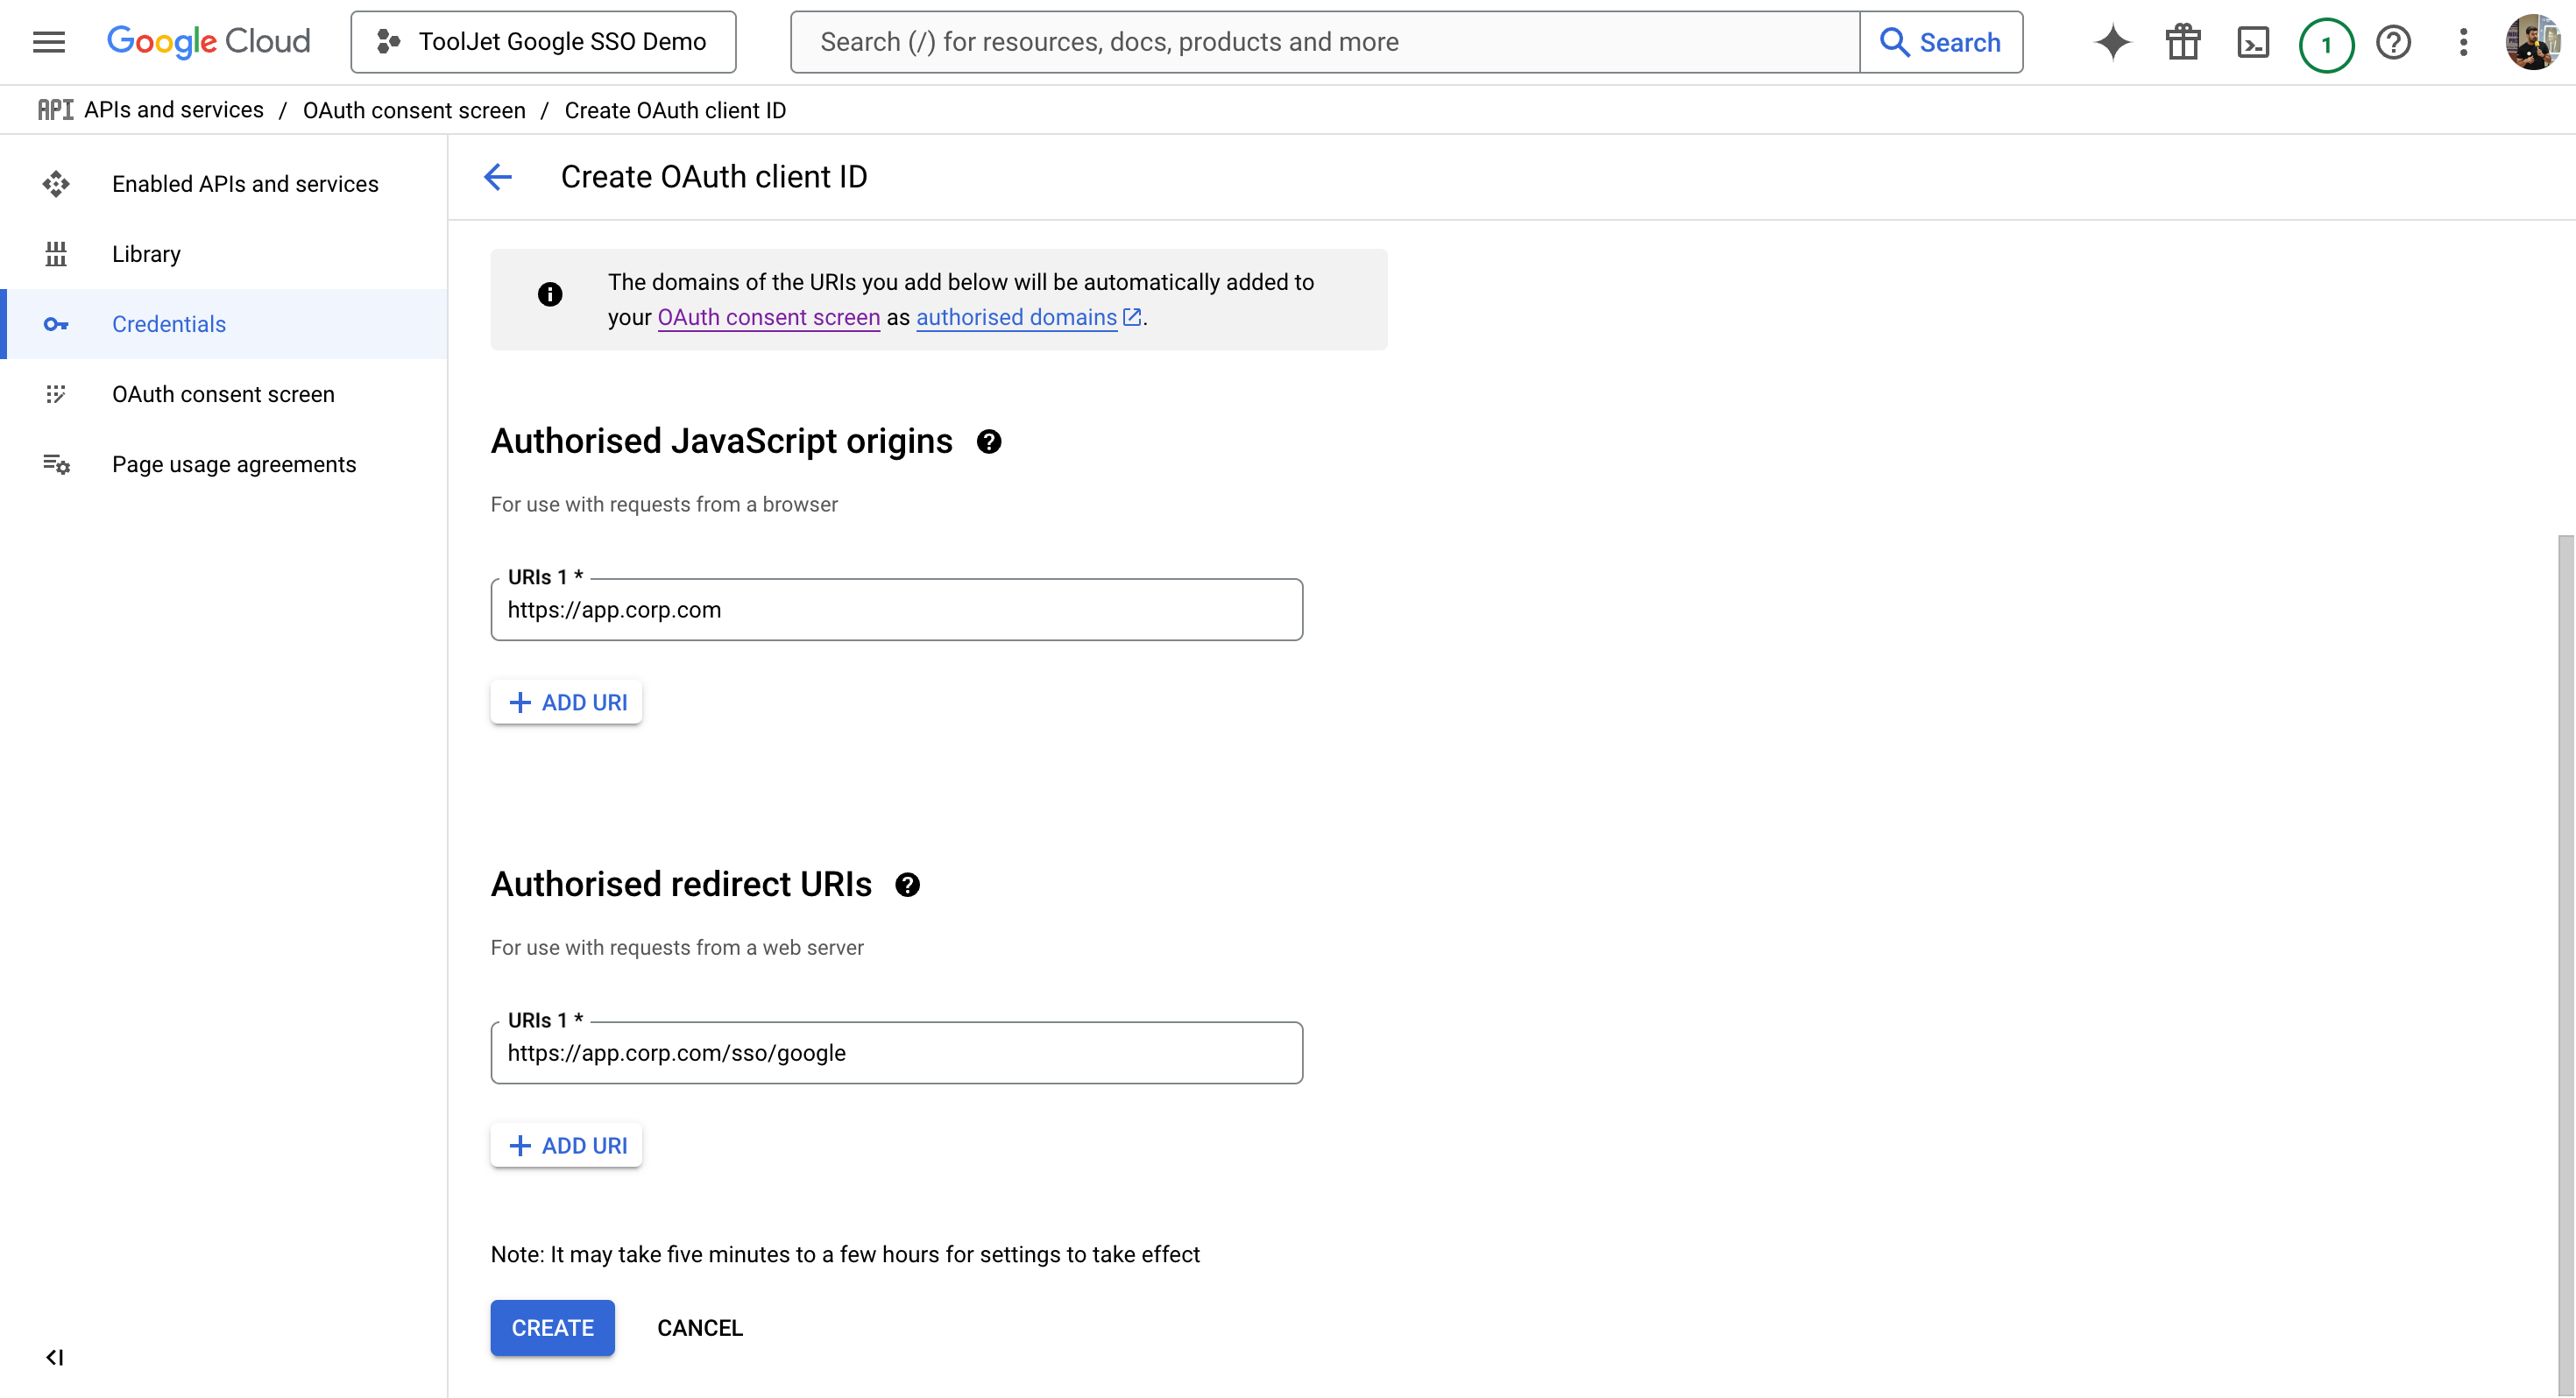
-
Click on Create and copy the Client ID.
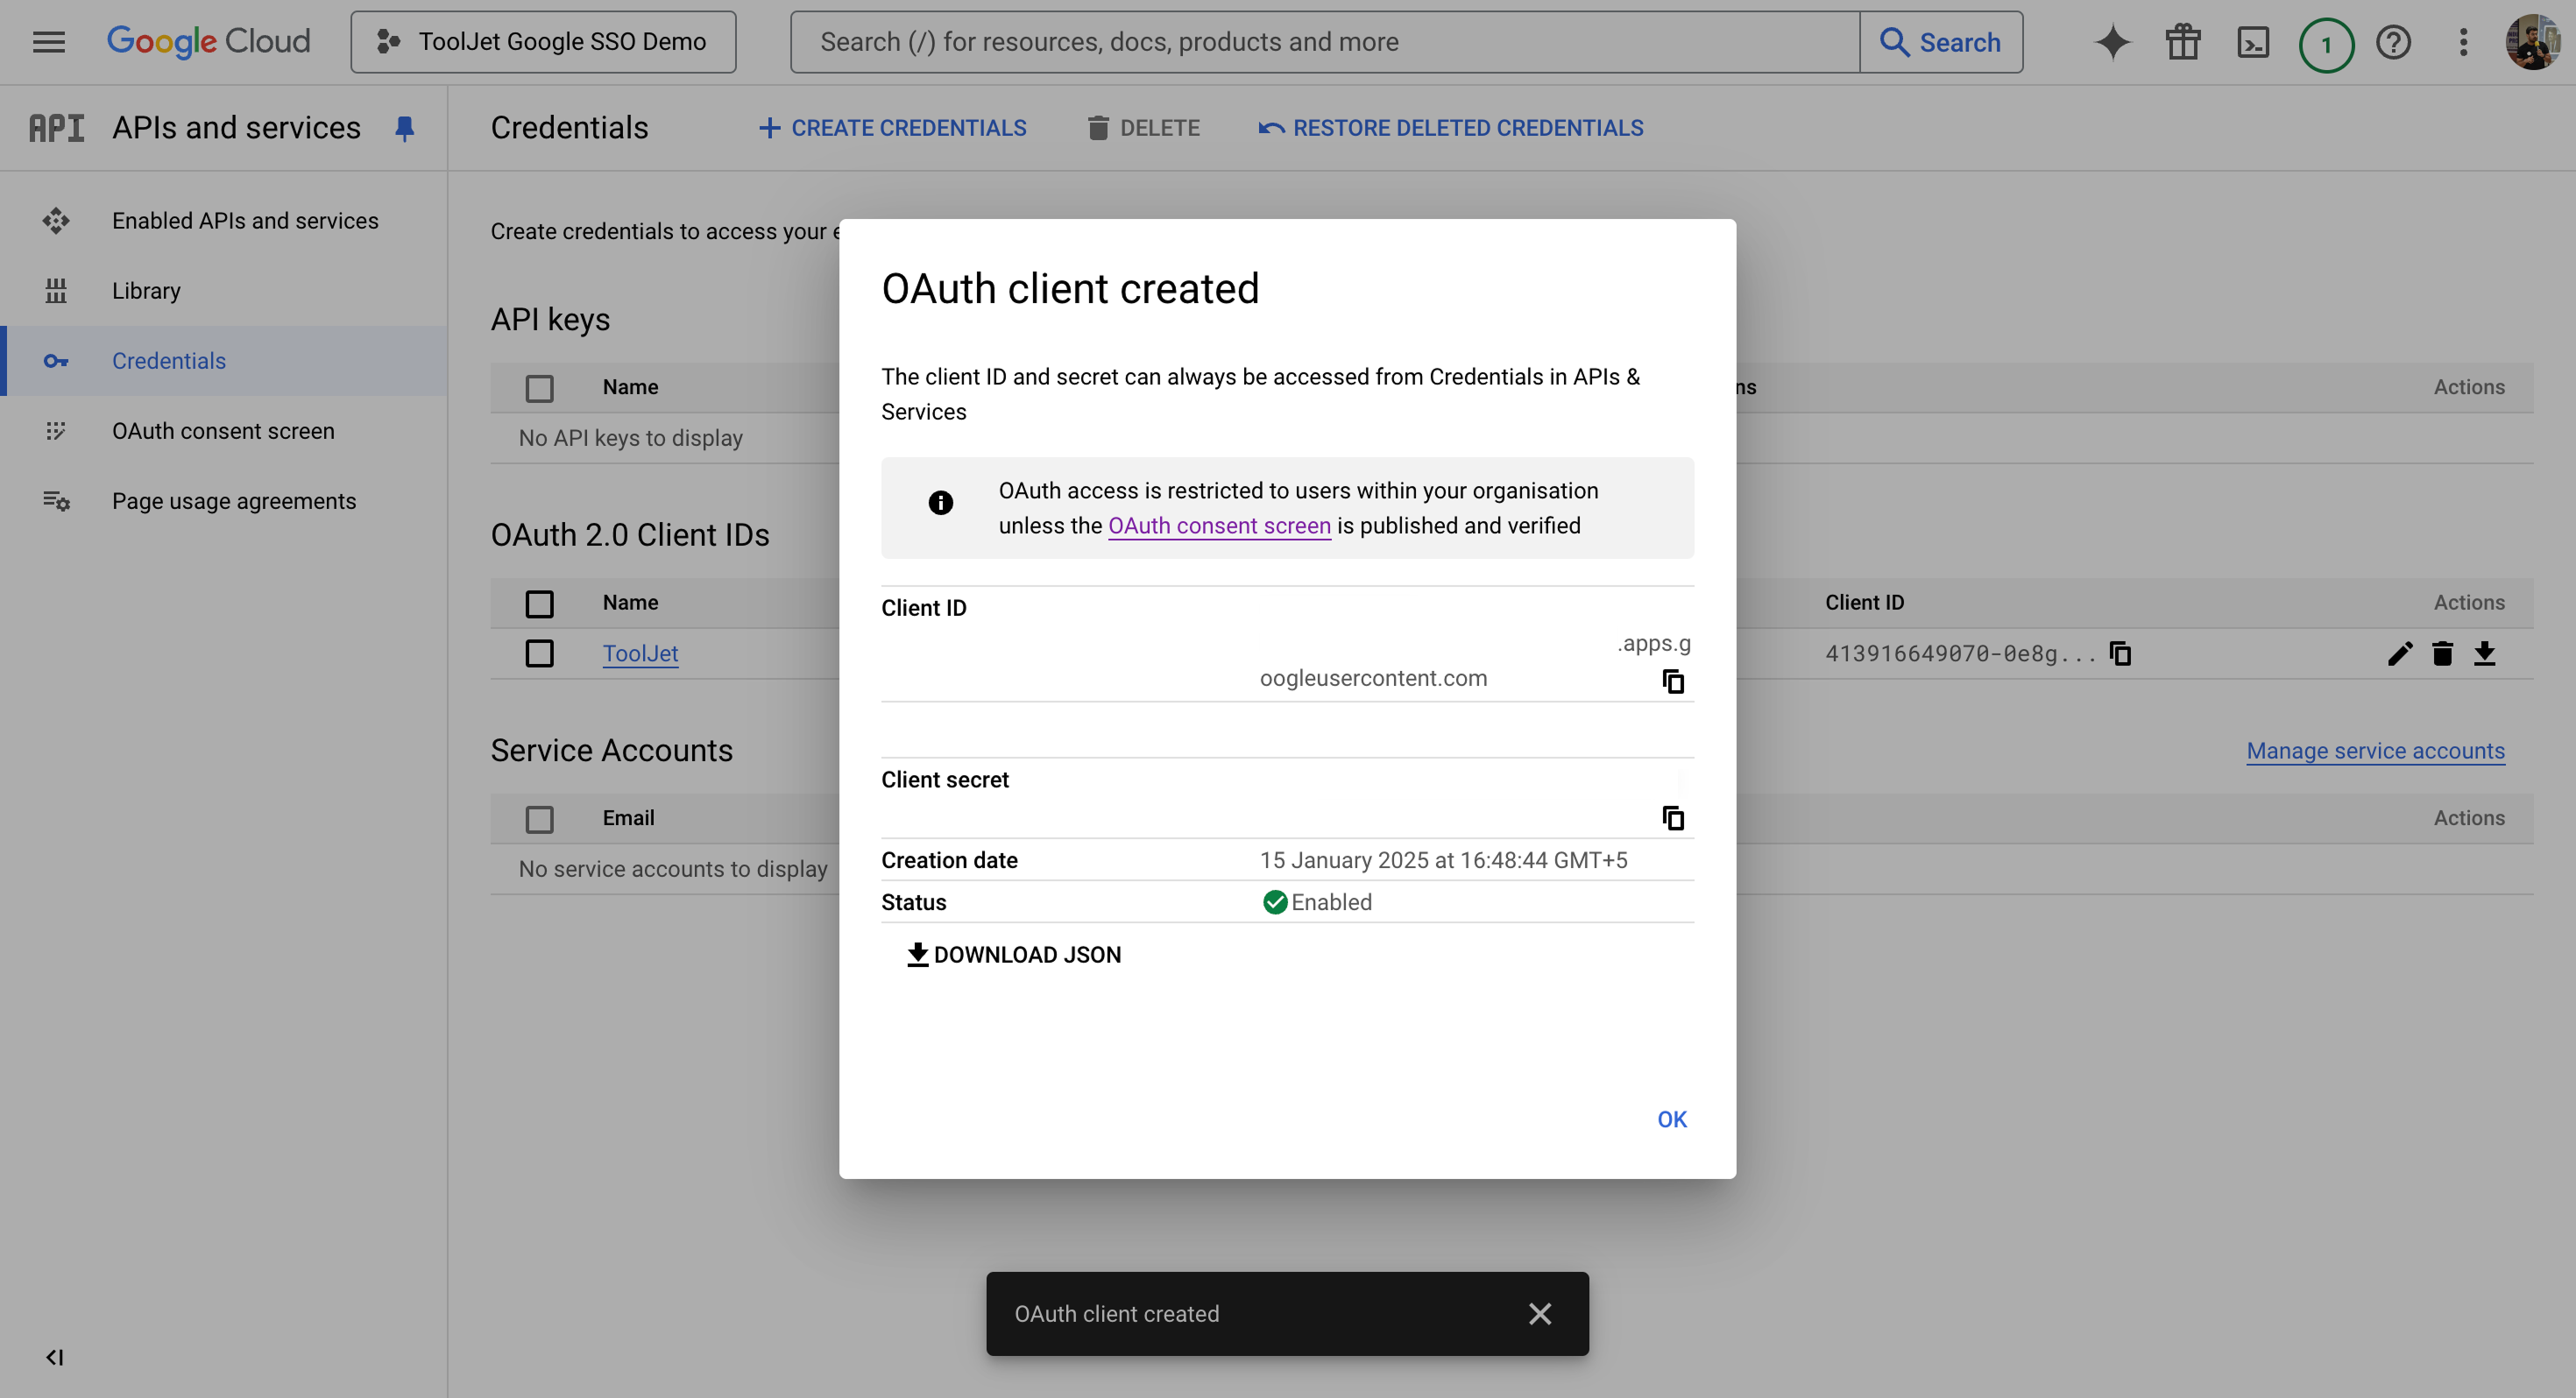
-
Configure the Client ID in ToolJet's Google SSO settings.
