Access Control
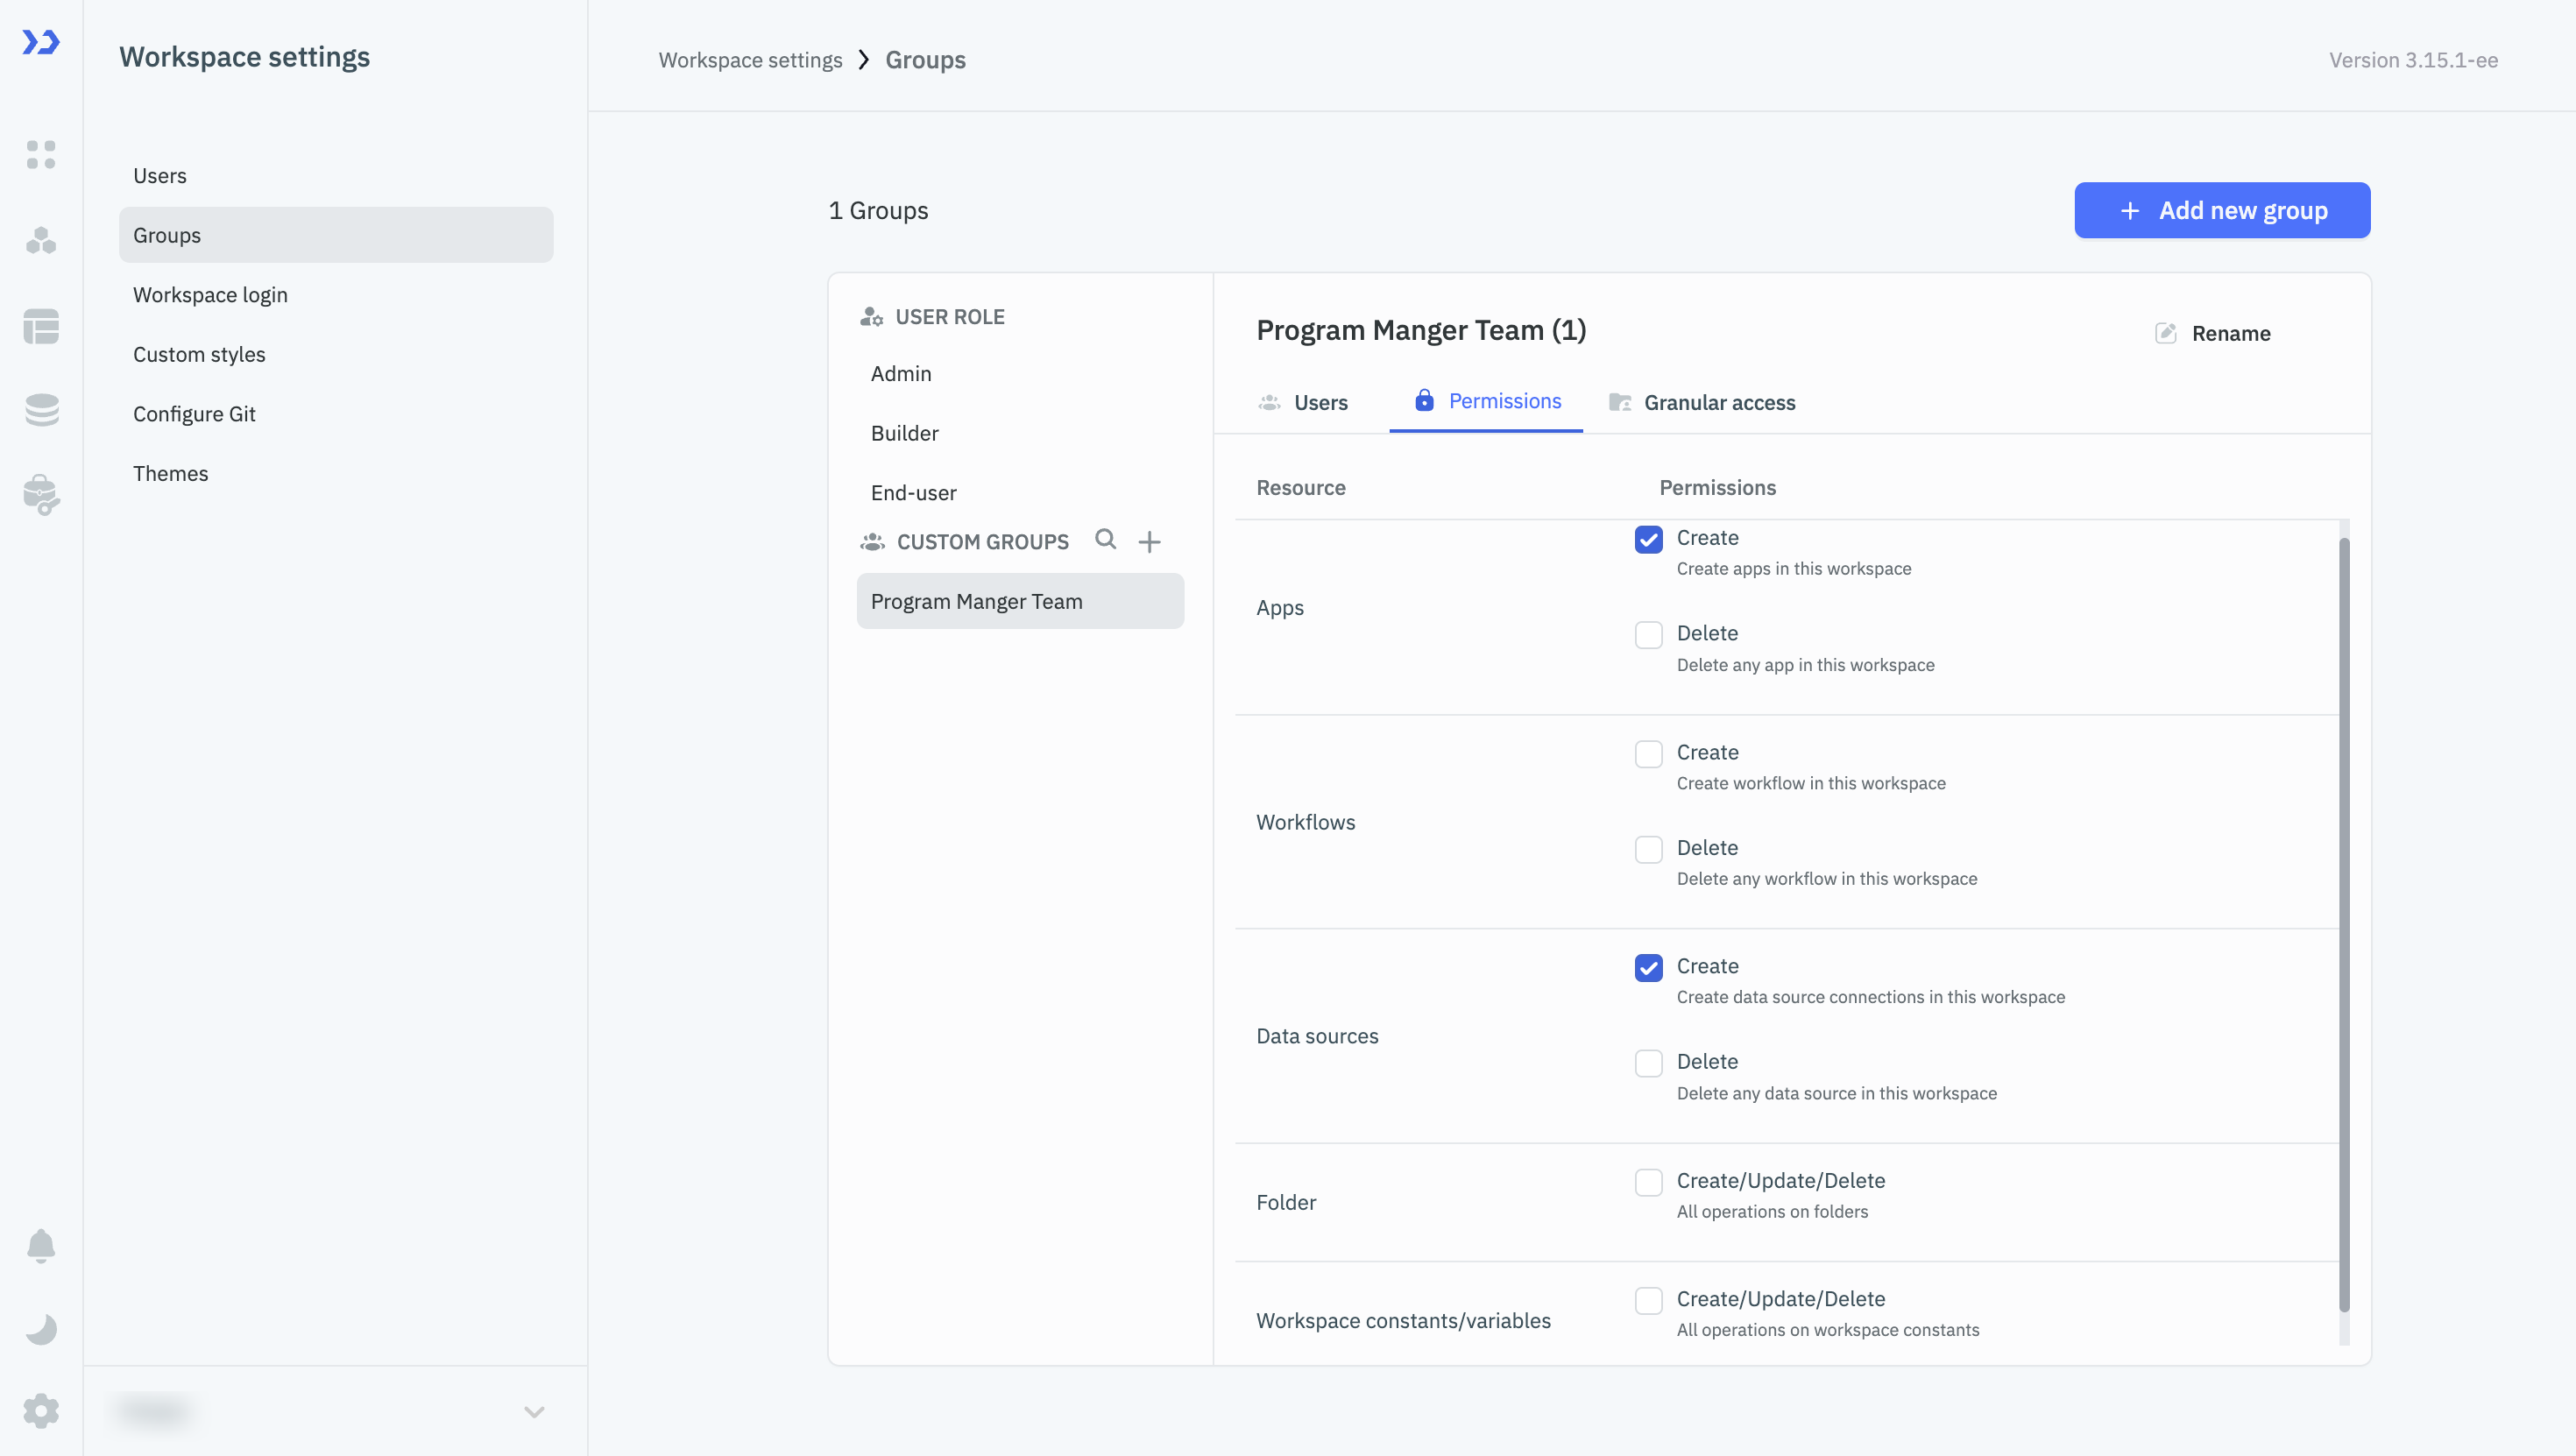
ToolJet enables you to manage access control by configuring permissions like create and delete. Access control can be applied to all of your resources such as apps, data sources and workflows. Additionally, ToolJet supports granular access control, allowing you to configure permissions for individual resources to ensure precise and secure management.
Permissions
The following permissions can be configured for the given resources:
| Resource | Permission | Description |
|---|---|---|
| Apps | Create | Allows users of the group to create new applications within the workspace. |
| Delete | Allows users of the group to delete applications from the workspace. | |
| Promote | Allows users of the group to promote the applications from one environment to the other. | |
| Release | Allows users of the group to release the applications from the production environment. | |
| Data sources | Create | Allows users of the group to add new data sources in the workspace. |
| Delete | Allows users of the group to remove data sources from the workspace. | |
| Folder | Create/Update/Delete | Allows users of the group to create, update, or delete folders to organize resources. |
| Workspace constants/variables | Create/Update/Delete | Allows users of the group to define, modify, or remove constants and variables used across the workspace. |
| Workflows | Create | Allows users of the group to create new workflows within the workspace. |
| Delete | Allows users of the group to delete workflows from the workspace. |
To configure view or edit access, please refer to Granular Access Control.
If a user has the create permission and creates a resource, the user becomes the owner of that resource and has all the permissions related to it by default.
For example, if a user creates a data source A, then by default, the user will have the configure and build access for data source A.
Configuring Permissions
Role Required: Admin
-
Click on the settings icon (⚙️) on the bottom left of your dashboard.
-
Go to Workspace Settings > Groups.
(Example URL -https://app.corp.com/nexus/workspace-settings/groups) -
Select the group to configure permissions.
-
Switch to the Permissions tab and configure the required permissions.

Granular Access Control
In ToolJet, you can set granular level access control for apps and data sources, by configuring permissions like view access or edit access, to manage who can interact with the resources in your workspace. You can apply permissions either to all resources (e.g., all apps or all data sources) or to specific, selected resources, offering flexibility and precision in managing access.
To configure Granular Access Control, you need to create custom groups. Refer to custom groups guide for more information.
Apps
-
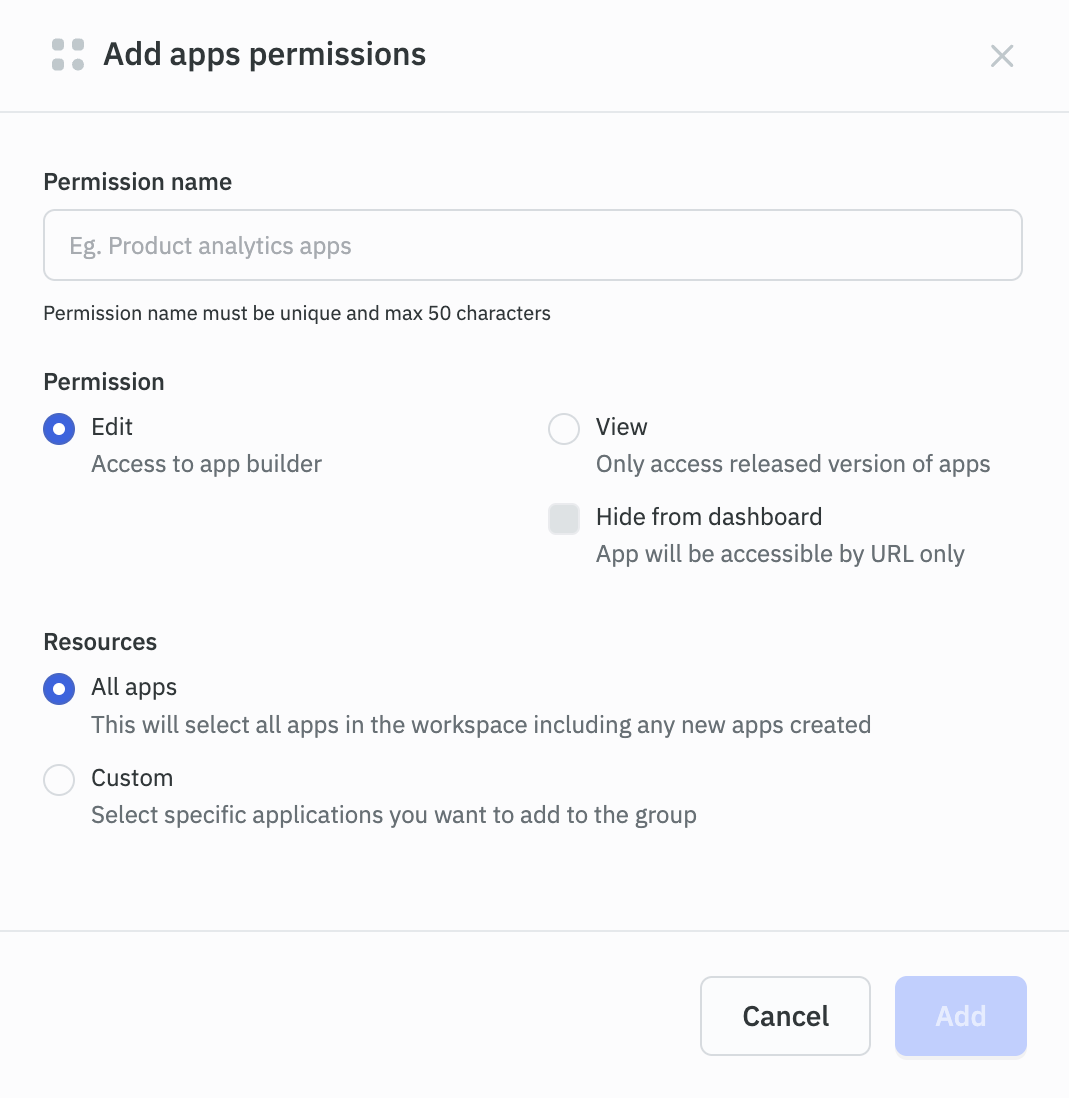
Edit: Grants edit access to the selected apps. With this access, users can build or edit the apps they are granted access to. This permission should be assigned to builders or developers.
-
View: With View access, users can preview the application in the development and staging environments, and access the released version in the production environment. This access level does not allow users to edit or modify the application. It is best suited for end users, testers, or consumers who only need to review or use the app.
-
Hide from dashboard: Hides the selected apps from the dashboard, making them accessible only via URL for users with view access. While the users with edit access can always see the app on the dashboard.
-
All apps: Provides the selected access (Edit or View) to all the apps in the workspace, including any newly created apps.
-
Custom: Provide the selected access (Edit or View) only to the specified apps.

Data Sources
-
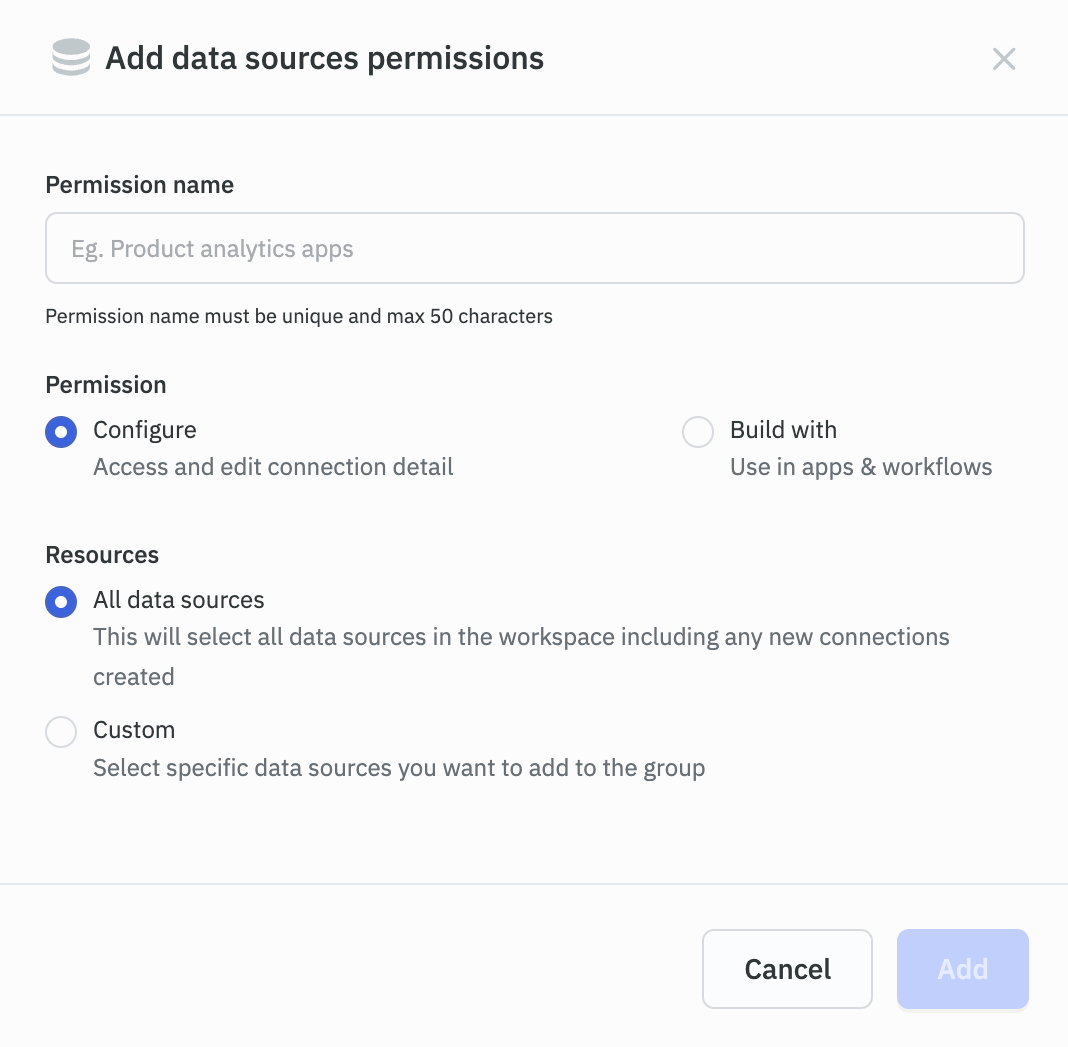
Configure: Users in the group can access and edit the configuration details of the selected data sources. This permission should be given to the admin users who needs to configure the data source.
-
Build with: Users in the group can use the selected data sources in apps and workflows to create queries. This permission should be given to the builders or developers who will create the queries for the apps or workflows.
-
All data sources: Provides the selected access (Configure or Build with) to all the data sources in the workspace, including any newly created data source.
-
Custom: Provide the selected access (Configure or Build with) only to the specified data sources.

Workflows
- Build: Users in this group can build or edit the workflows they are granted access to.
- Execute: Users in this group can run/execute the selected workflows. This access does not allow users to edit or make changes to the workflows.
- All workflows: Provides the selected access (Build or Execute) to all the workflows in the workspace, including any newly created workflows.
- Custom: Provide the selected access (Build or Execute) only to the specified workflows.

Configuring Granular Access Permission
Role Required: Admin
-
Click on the settings icon (⚙️) on the bottom left of your dashboard.
-
Go to Workspace Settings > Groups.
(Example URL -https://app.corp.com/nexus/workspace-settings/groups) -
Select the group to configure granular access permissions.
-
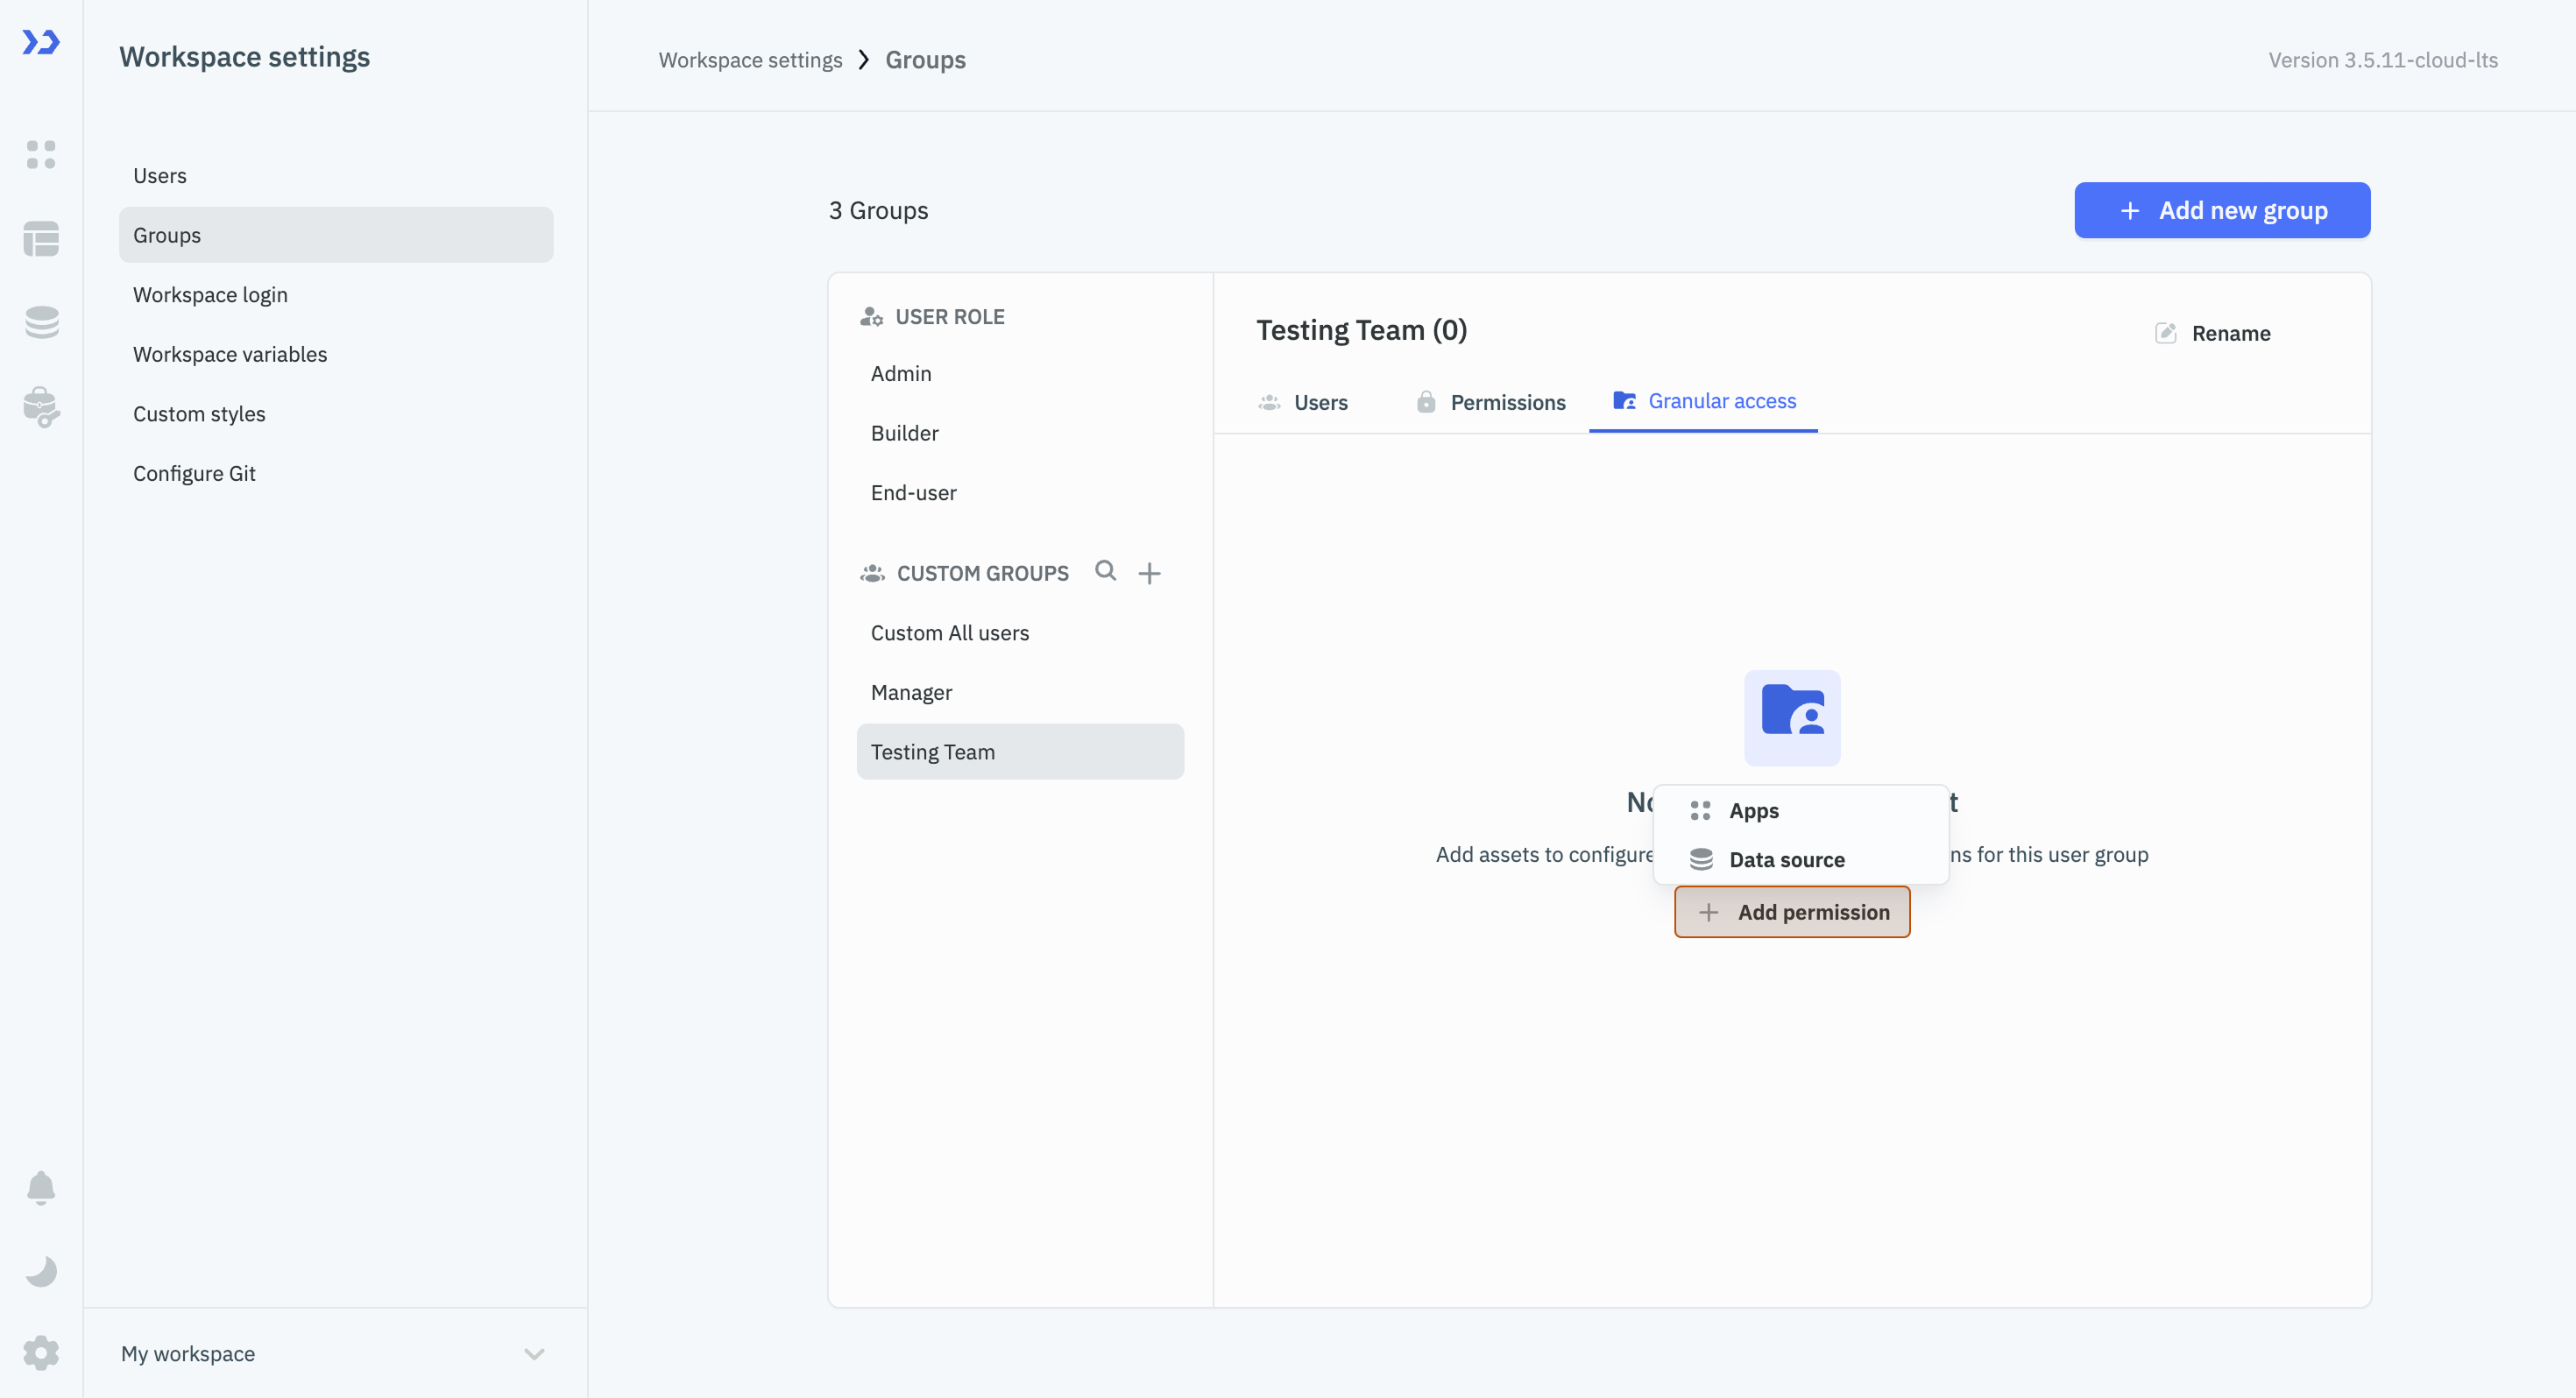
Switch to the Granular access tab and click on + Add permission button.
-
Select the resource (Apps/Data source) based on requirement. Give a name for the permission, configure required permission and click on Add at the bottom of the modal.
