Workspaces
Workspaces are collaborative environments that enable teams to build, customize, and deploy applications, as well as manage data, workflows, and permissions. It helps you organize your organization's apps based on hierarchy or departments, making them easier to manage. For example, if your organization has departments, you can create separate workspaces for each to isolate apps or limit access to particular set of users or developers.
Workspace contains applications, data sources, users (admins, developers, or builders, end users), access and permission settings, and more. You can also set different login configurations for each workspace. You can have multiple workspaces within an instance.
Workspace Creation
Role required - Workspace Admin
To create a new workspace,
- Open the workspace dropdown at the bottom left on dashboard (Example URL -
https://app.corp.com/<workspace-slug>) - Select Add a new workspace.
- Fill in the workspace name and slug in the modal.
- Click Create workspace.

Editing Workspaces
Role required - Workspace Admin
To edit a workspace,
- Open the workspace dropdown at the bottom left on dashboard (Example URL -
https://app.corp.com/<workspace-slug>) - Hover over the current workspace in the dropdown menu.
- Click the edit icon to modify the workspace name or slug.
- Save the changes, and the updates will reflect immediately across the platform.
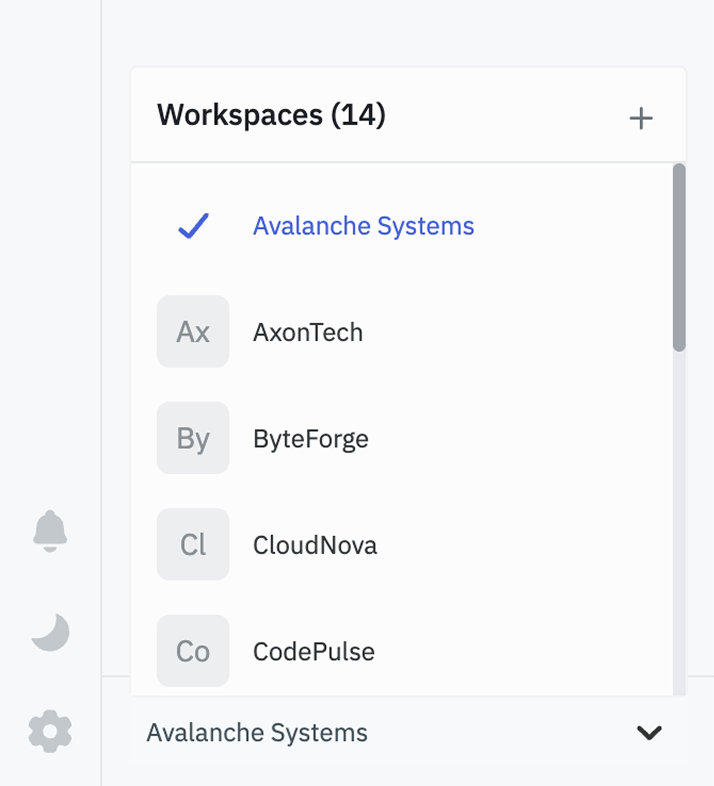
Switching Workspaces
To switch between the workspaces,
- Open the workspace dropdown at the bottom left on dashboard (Example URL -
https://app.corp.com/<workspace-slug>) - Select the desired workspace from the list to switch instantly.
Archiving Workspaces
Role required - Super Admin
-
This feature is available only for self-hosted users, and only Super Admin can archive workspaces. A Super Admin is the user who has full access to all the Workspaces, Users, and Groups of an instance
-
To archive a workspace, at least one active workspace must exist in the instance.
-
Impact
- The apps within the archived workspace will no longer be accessible through the URL.
- Users without access to any active workspace will be logged out.
-
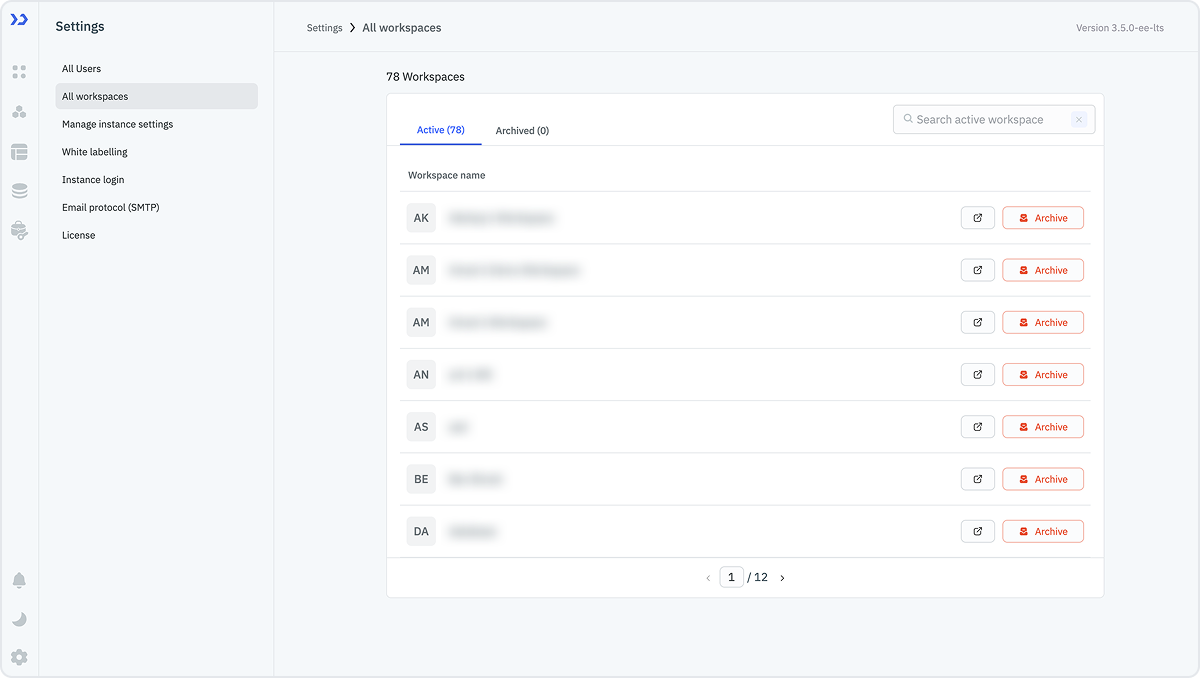
To archive a workspace:
- Go to Settings > All Workspaces. ( Example URL -
https://app.corp.com/instance-settings/all-workspaces) - A table listing all workspaces will appear.
- Click the Archive button to open a confirmation modal. Once you confirm, the selected workspace will be archived.
Unarchive Workspace
Role required - Super Admin
- To unarchive a workspace:
- Go to Settings > All Workspaces. ( Example URL -
https://app.corp.com/instance-settings/all-workspaces) - A table displaying all workspaces will appear. Click on the Archived tab to view archived workspaces.
- Click the Unarchive button to unarchive the selected workspace.
Default Workspace
Role required - Super Admin
Default workspace in ToolJet simplifies team onboarding. When configured, new users can sign up through the main company (instance) URL and get added to the default workspace. This eliminates the need to share & maintain long workspace URLs for single-workspace set ups.
To set up a default workspace for your instance, configure the TOOLJET_DEFAULT_WORKSPACE_URL environment variable.
| Variable | Description |
|---|---|
| TOOLJET_DEFAULT_WORKSPACE_URL | The default workspace URL. (e.g.,https://app.corp.com/workspace ) |
When configuring login settings for your instance, make sure to enable the Enable Signup option. Once enabled, you can share your instance URL (e.g., https://app.corp.com) for inviting users to sign up.
Be sure to share the complete instance URL, whether it’s a subdomain, subpath, or a full custom domain. Anyone who signs up using this link will be added to the default workspace.
The ability to configure the default workspace from the UI is coming soon!
Workspace Admin
- A Workspace has a three predefined roles, Admins, Builders and Endusers with predefined permissions. Checkout the users and groups docs for more details.
- The user who creates a workspace is automatically assigned as its Admin.
- An Admin can:
- Manage users, groups, data and apps within each workspace.
- Configure authentication methods for their workspaces.
Admin user has access to all the permission at workspace level, while an end user can only view and use the released apps they are given access to and permissions can be configured for a builder.
| Permission | Admin | Builder | End User |
|---|---|---|---|
| App | ✅ | Configurable | ❌ |
| Data sources | ✅ | Configurable | ❌ |
| Folder | ✅ | Configurable | ❌ |
| Workspace constants/variables | ✅ | Configurable | ❌ |
FAQ
Q. Can applications and workspace settings be shared between workspaces?
No, applications and workspace settings cannot be shared directly between workspaces. Each workspace operates independently, maintaining its own applications and configurations. However, you can export an application from one workspace and import it into another. For more details, refer to the Import and Export Applications documentation.
Q. Do users have access to all workspaces by default?
No, users need to be invited to a specific workspace to access the apps and data within that workspace. Refer to invite users documentation for more details