Example Configuration
In this guide, you'll learn how to migrate applications using GitSync in a multi-instance ToolJet setup through a practical example.
Vertex Solutions, a company building internal applications with ToolJet, has three ToolJet instances for development, staging, and production environments. They have configured Gitsync in all the three instances with GitHub by following the setup instructions given in the GitSync documentation.
Creating the App
The company wants to create an Inventory Management System. A developer starts by clicking Create New App on the dashboard. In the modal that appears, they enter the app name and select the Commit changes checkbox to save the app to the configured Git repository. Upon clicking Create App, the app will be added to your Git repository with a commit message.

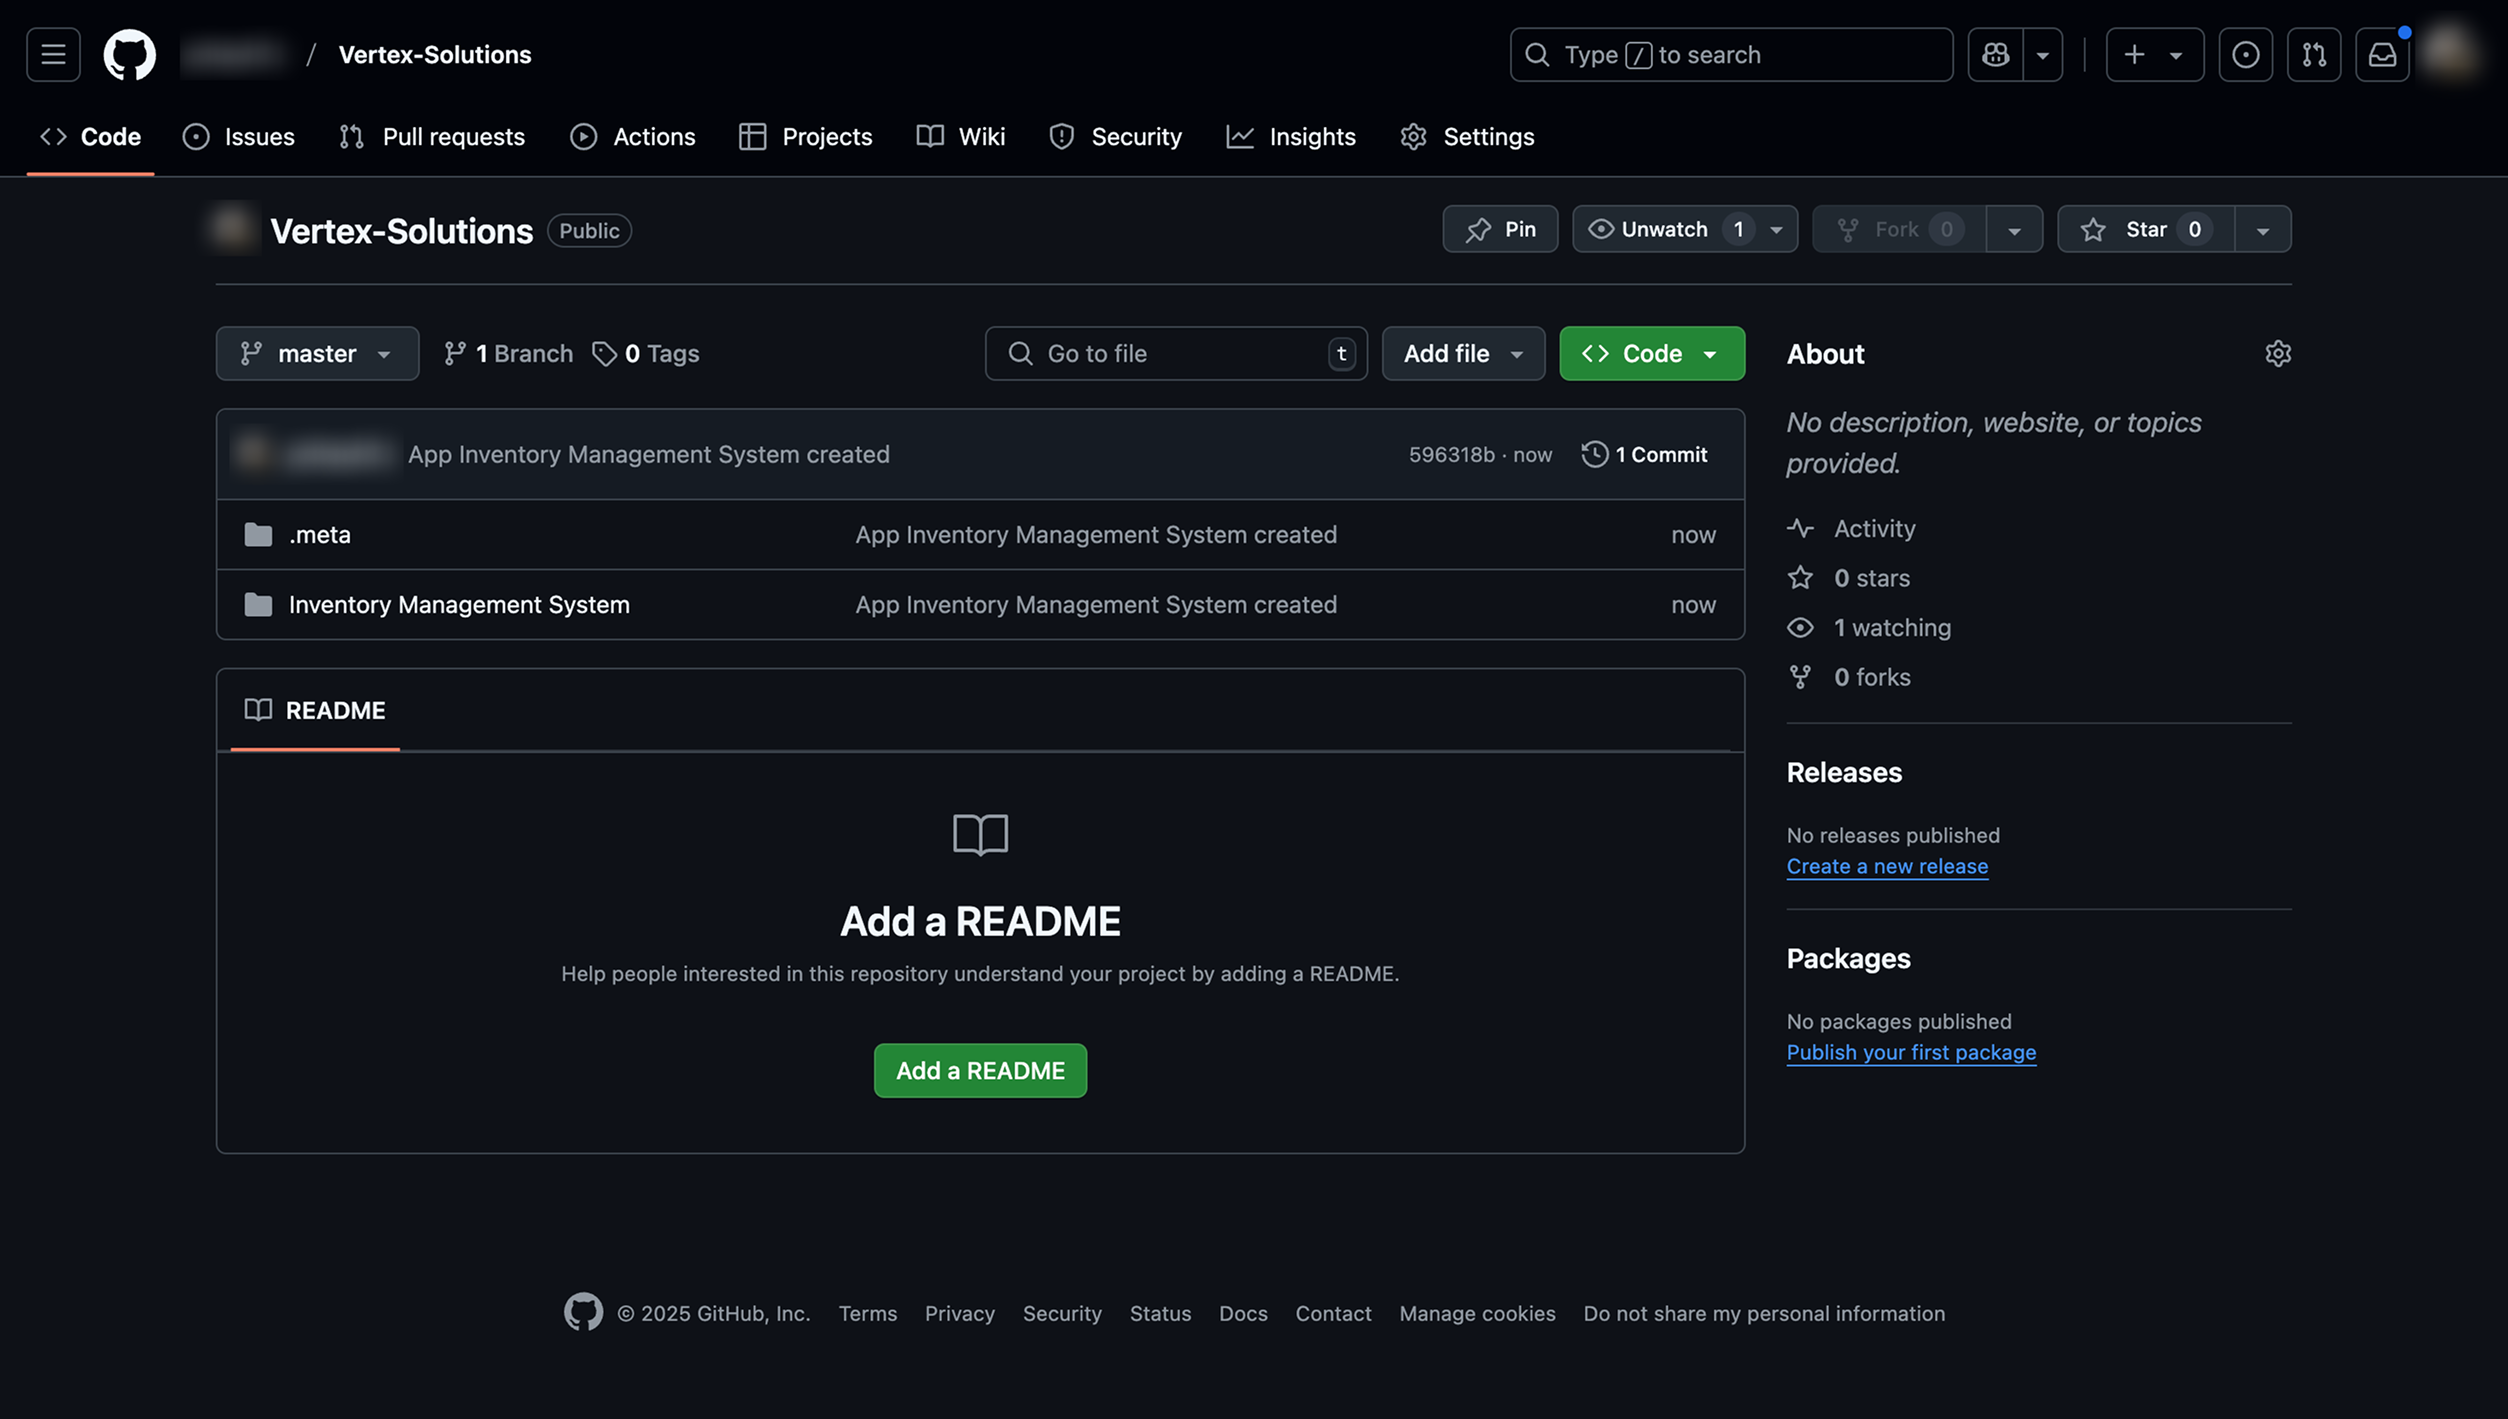
- Developers then build the app in the App Builder by dragging and dropping components and adding relevant queries. Once the changes are complete, they can use the GitSync button in the top bar to push a commit to the Git repository.
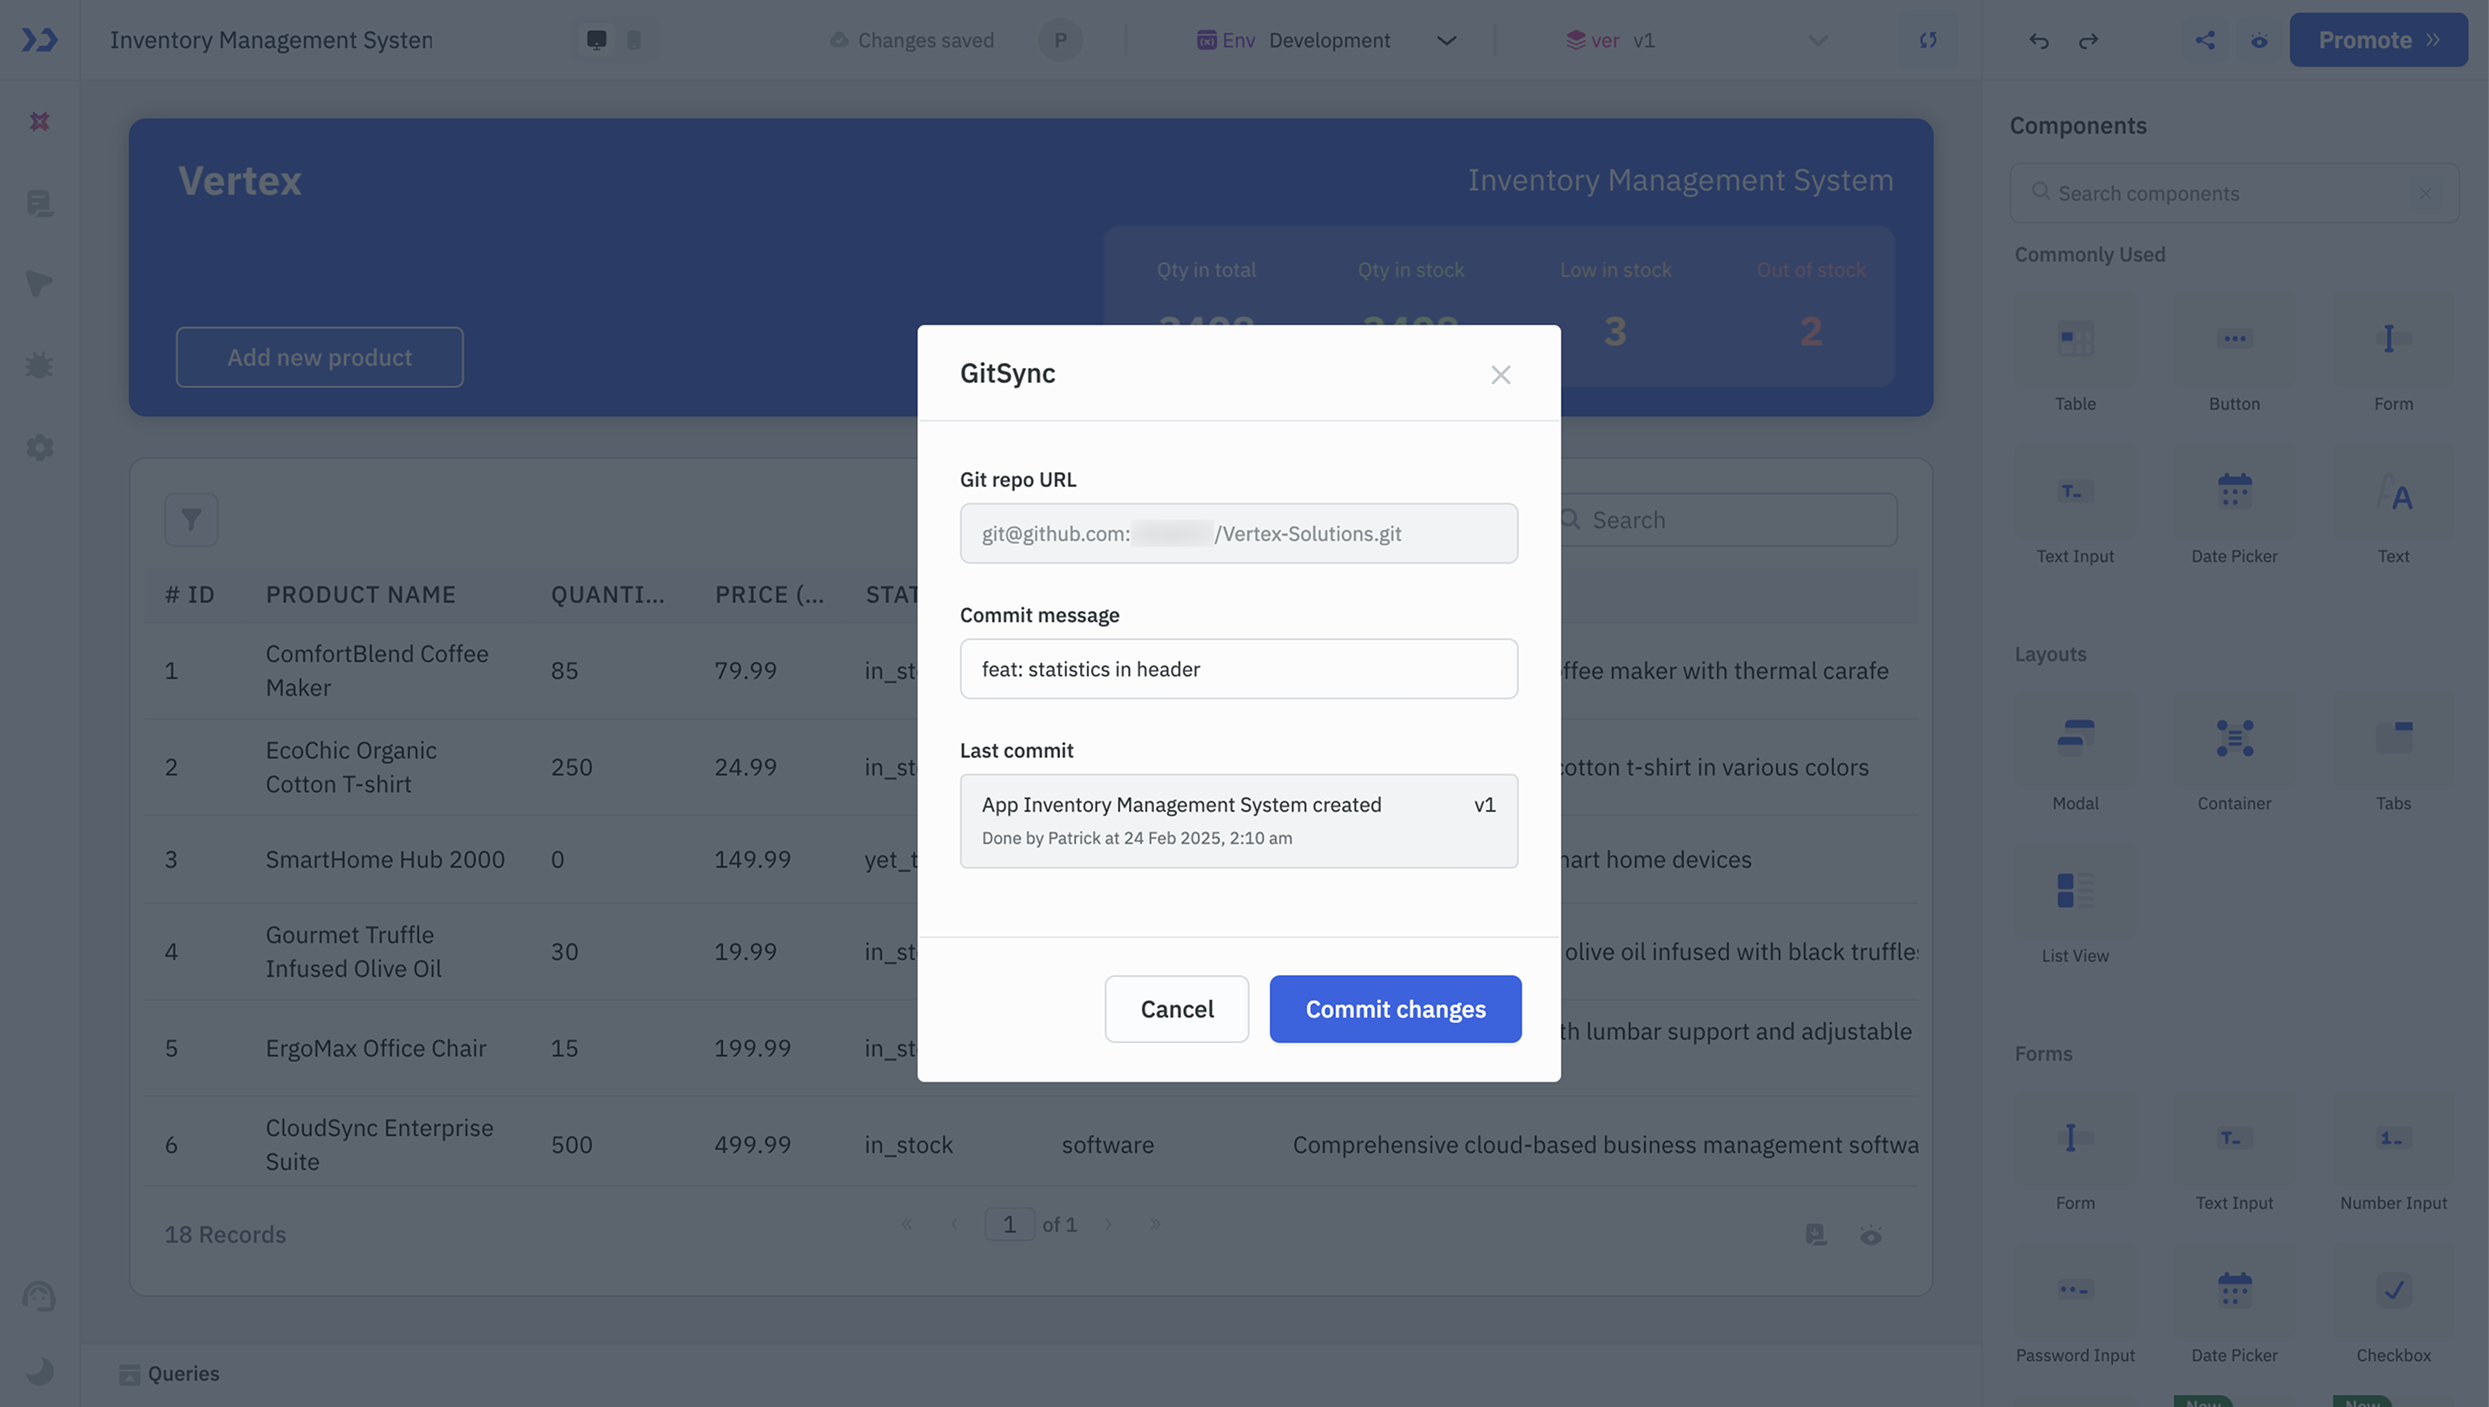
- Once committed, the updates appear in the Git repository, showing the commit message, author, and timestamp.
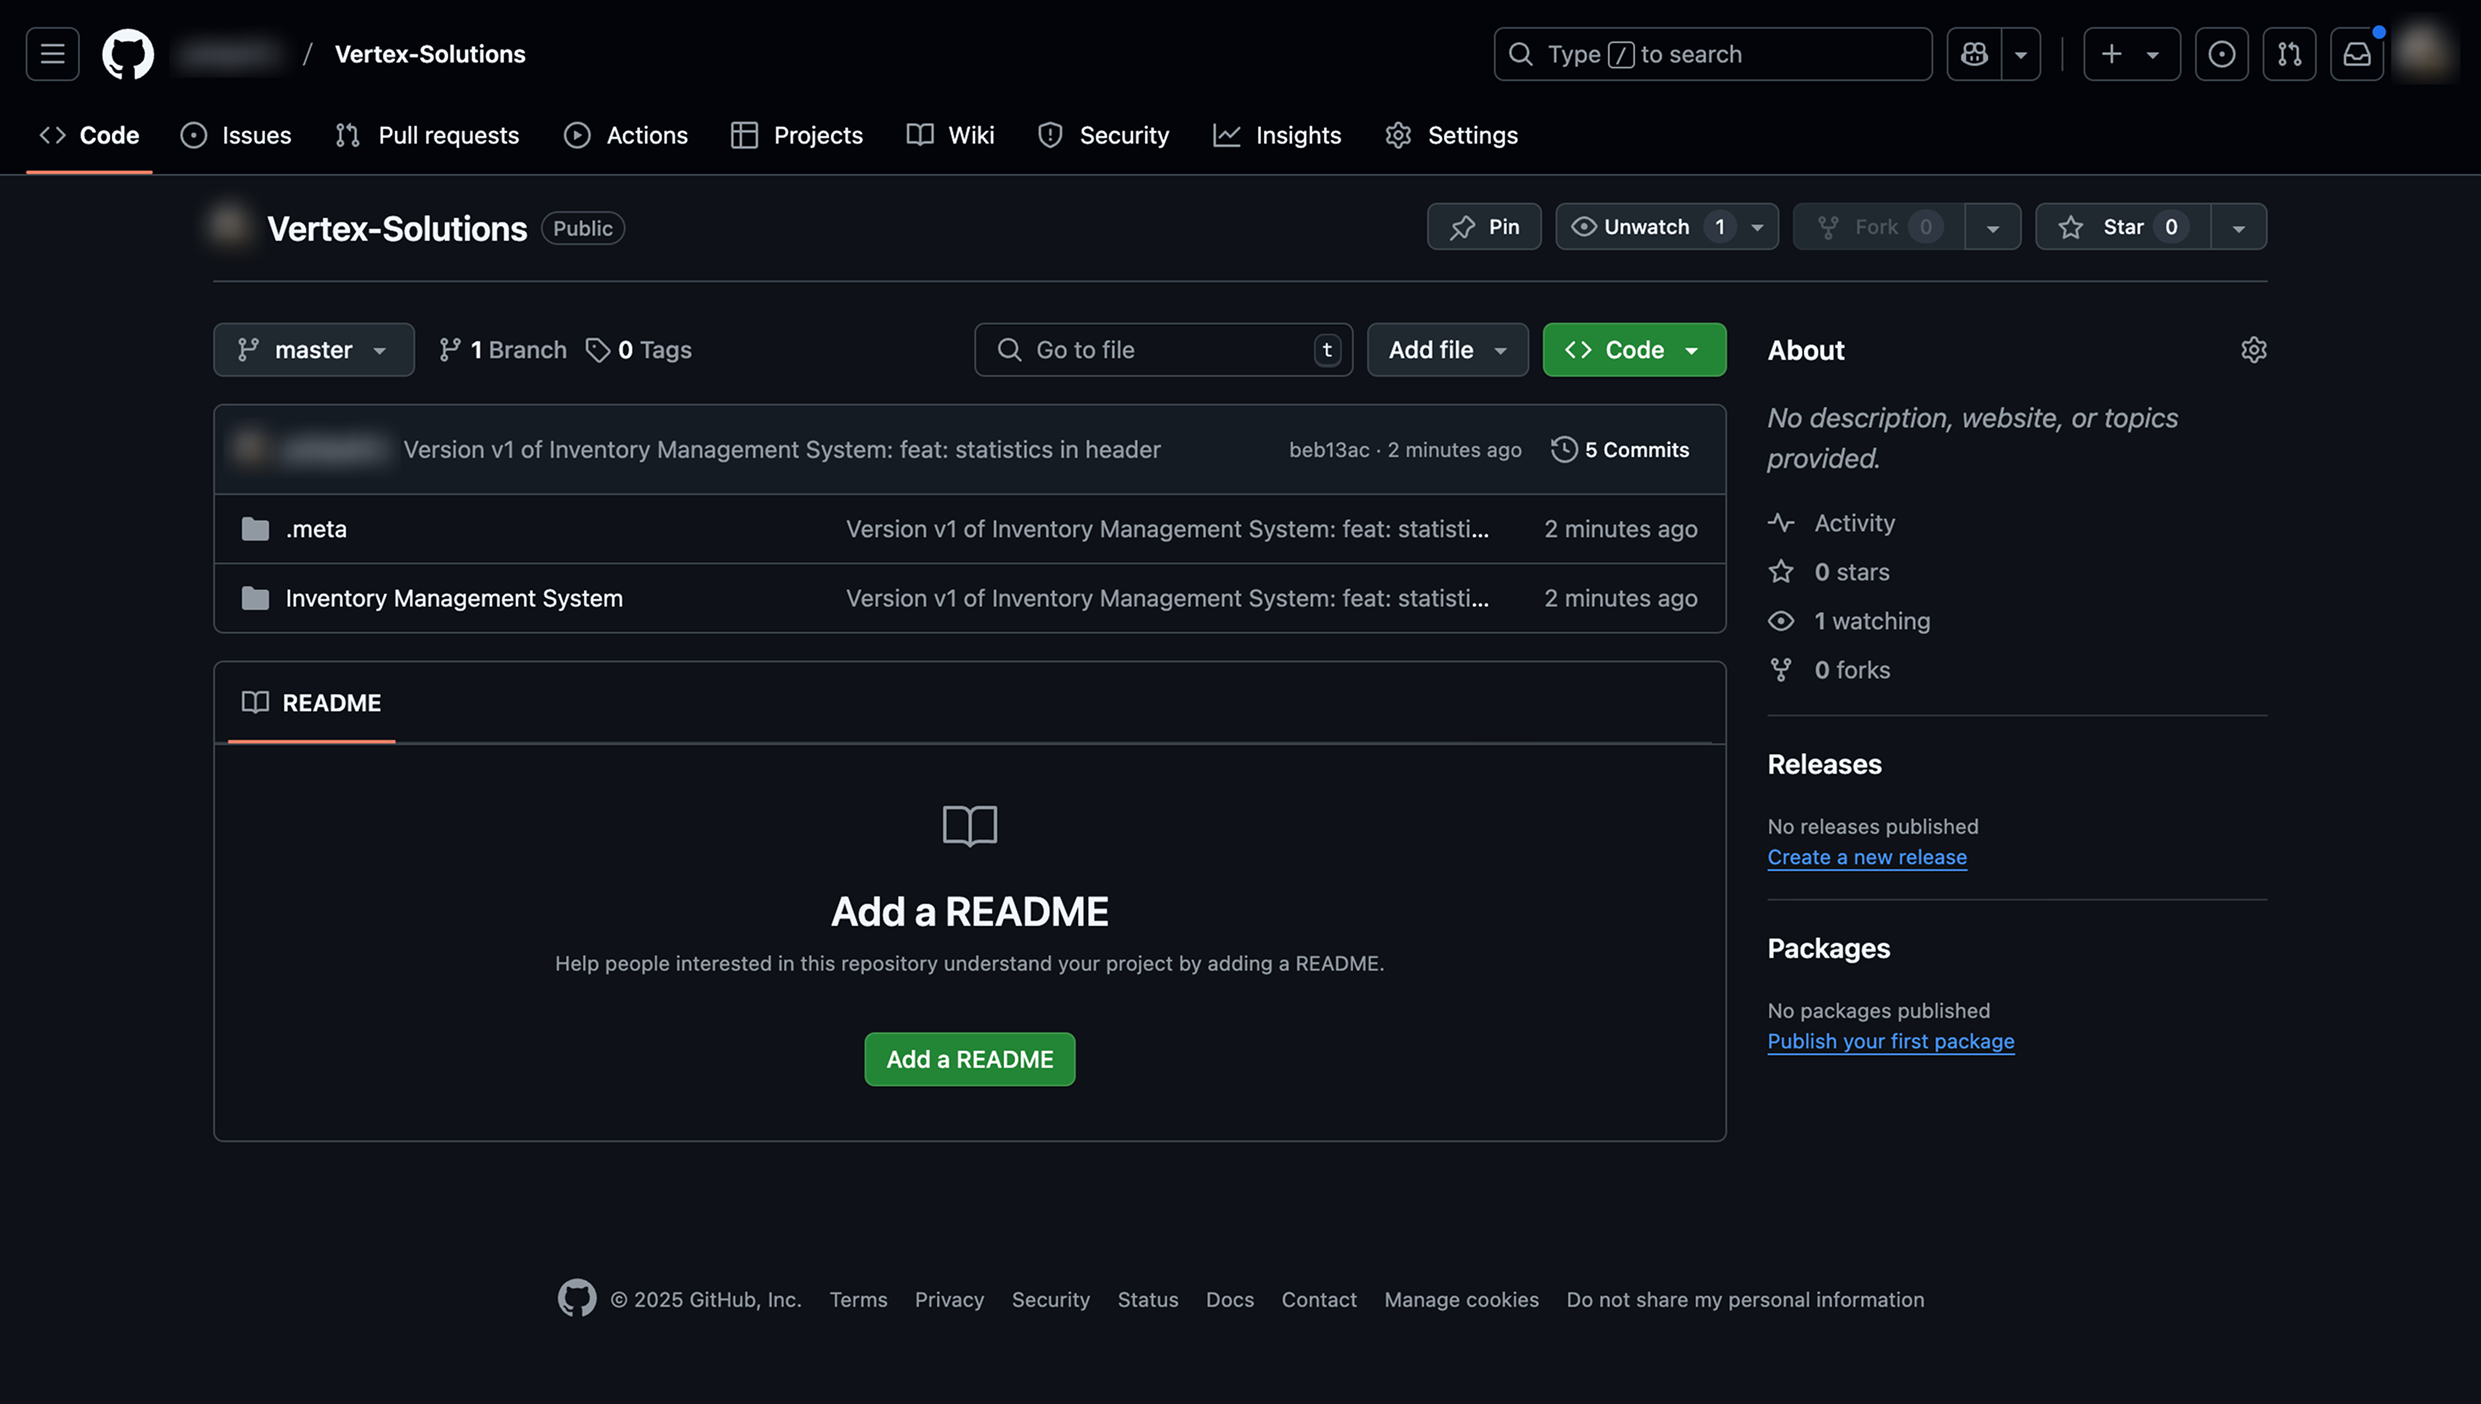
- The development is done and the app is ready to be pulled into the staging instance for testing.
Importing the App in Staging
After configuring GitSync for the staging instance with the same Git repository as the development instance, testers can import the app by following these steps:
-
Navigate to the ToolJet dashboard of the staging instance.
-
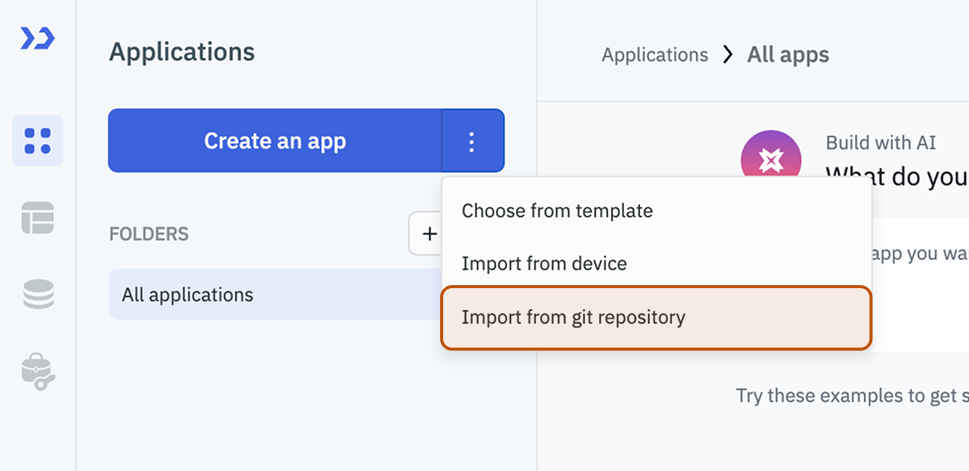
Click on the three dots next to the Create New App button.
-
Select Import from Git Repository to pull the app.
-
Choose the app from the dropdown list. The app name and last commit details appear.
-
Click Import App to import it into the staging instance.
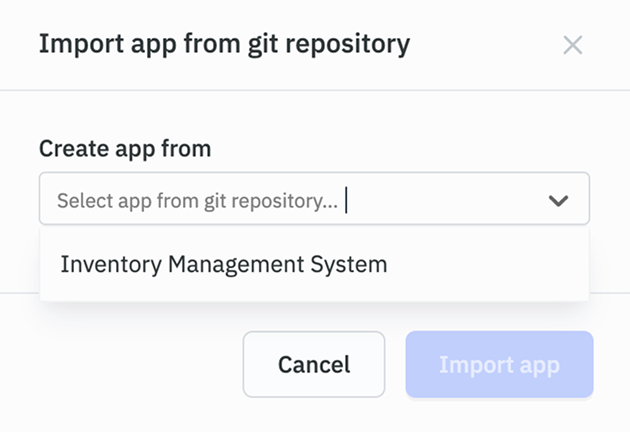
- Once the apps are imported into the staging instance, all data sources are imported as well. However, for security reasons, passwords and secrets in the data source configuration are not included.
- To ensure the app functions properly in the staging instance and can be tested with staging data, users must re-enter these details in the configuration.
- After adding the data source configuration, testers can verify the app's features and functionality. The app will open in view-only mode.
Iterating and Fixing Issues
If testers find bugs or require modifications, developers create a new version in the development instance.
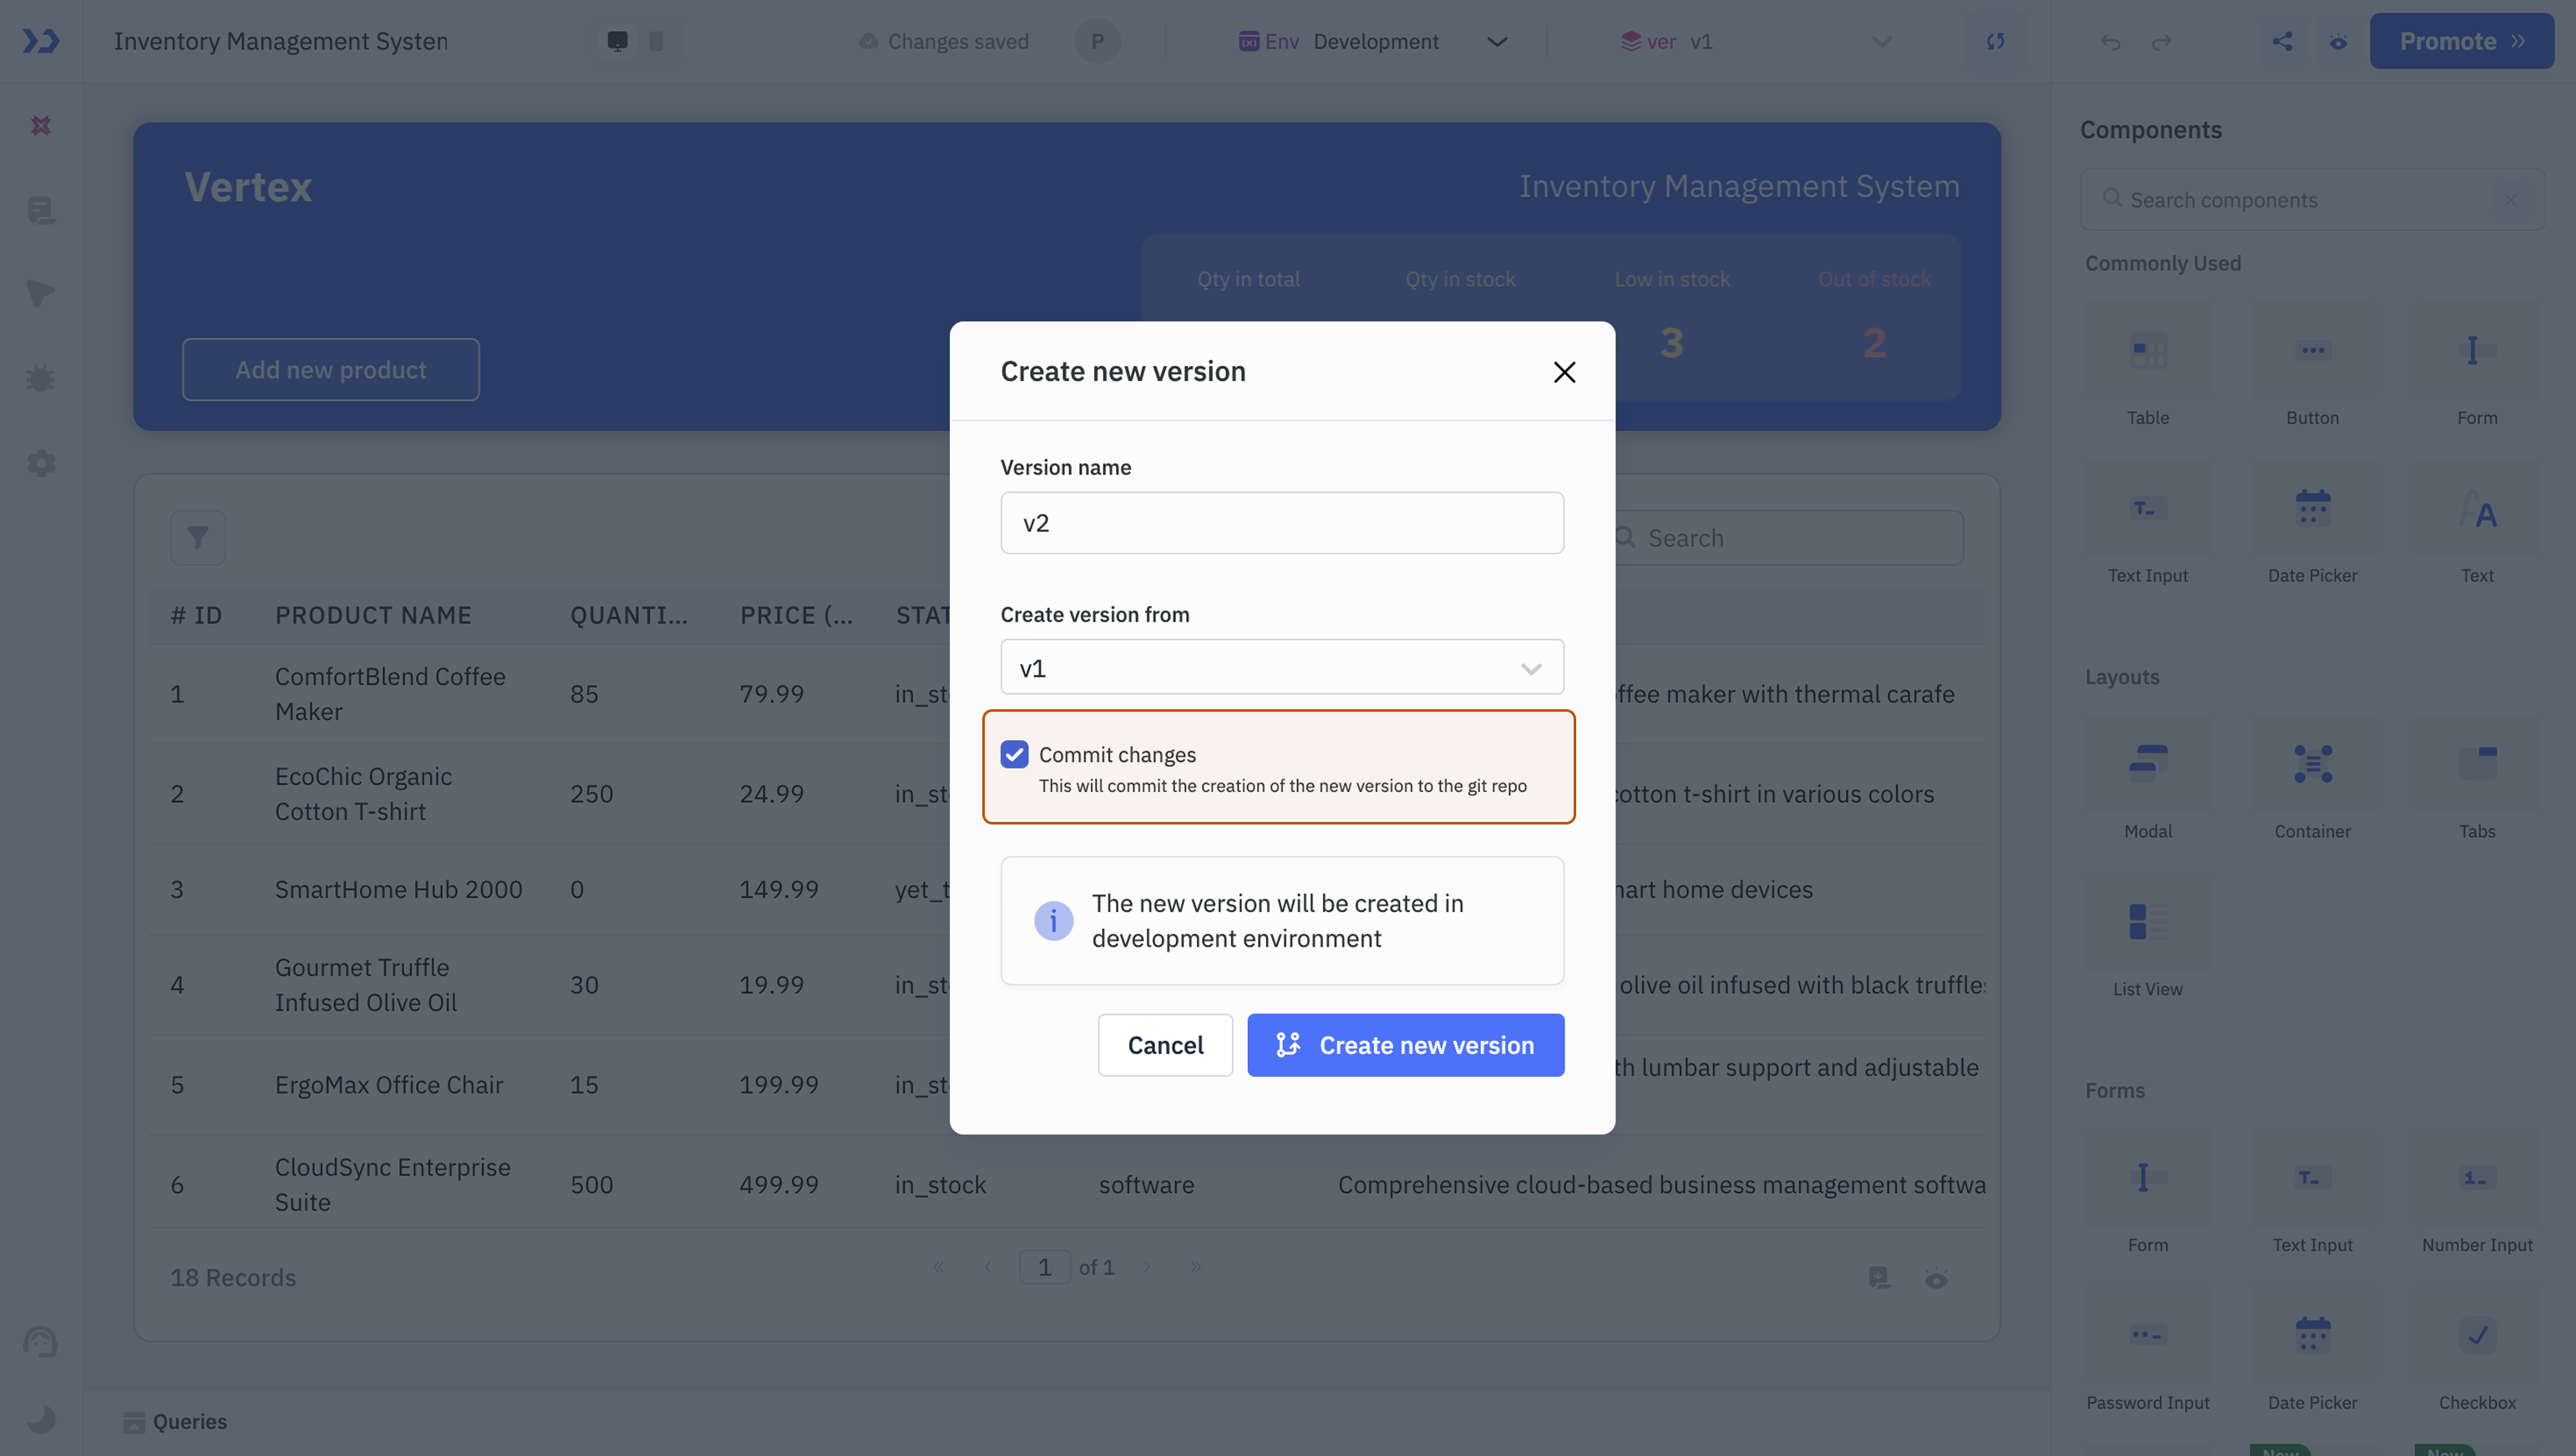
When committing a new version via GitSync:
-
The JSON file inside the app folder is updated with the version name.
-
The meta.json file in the .meta folder is modified with the new version ID and name.
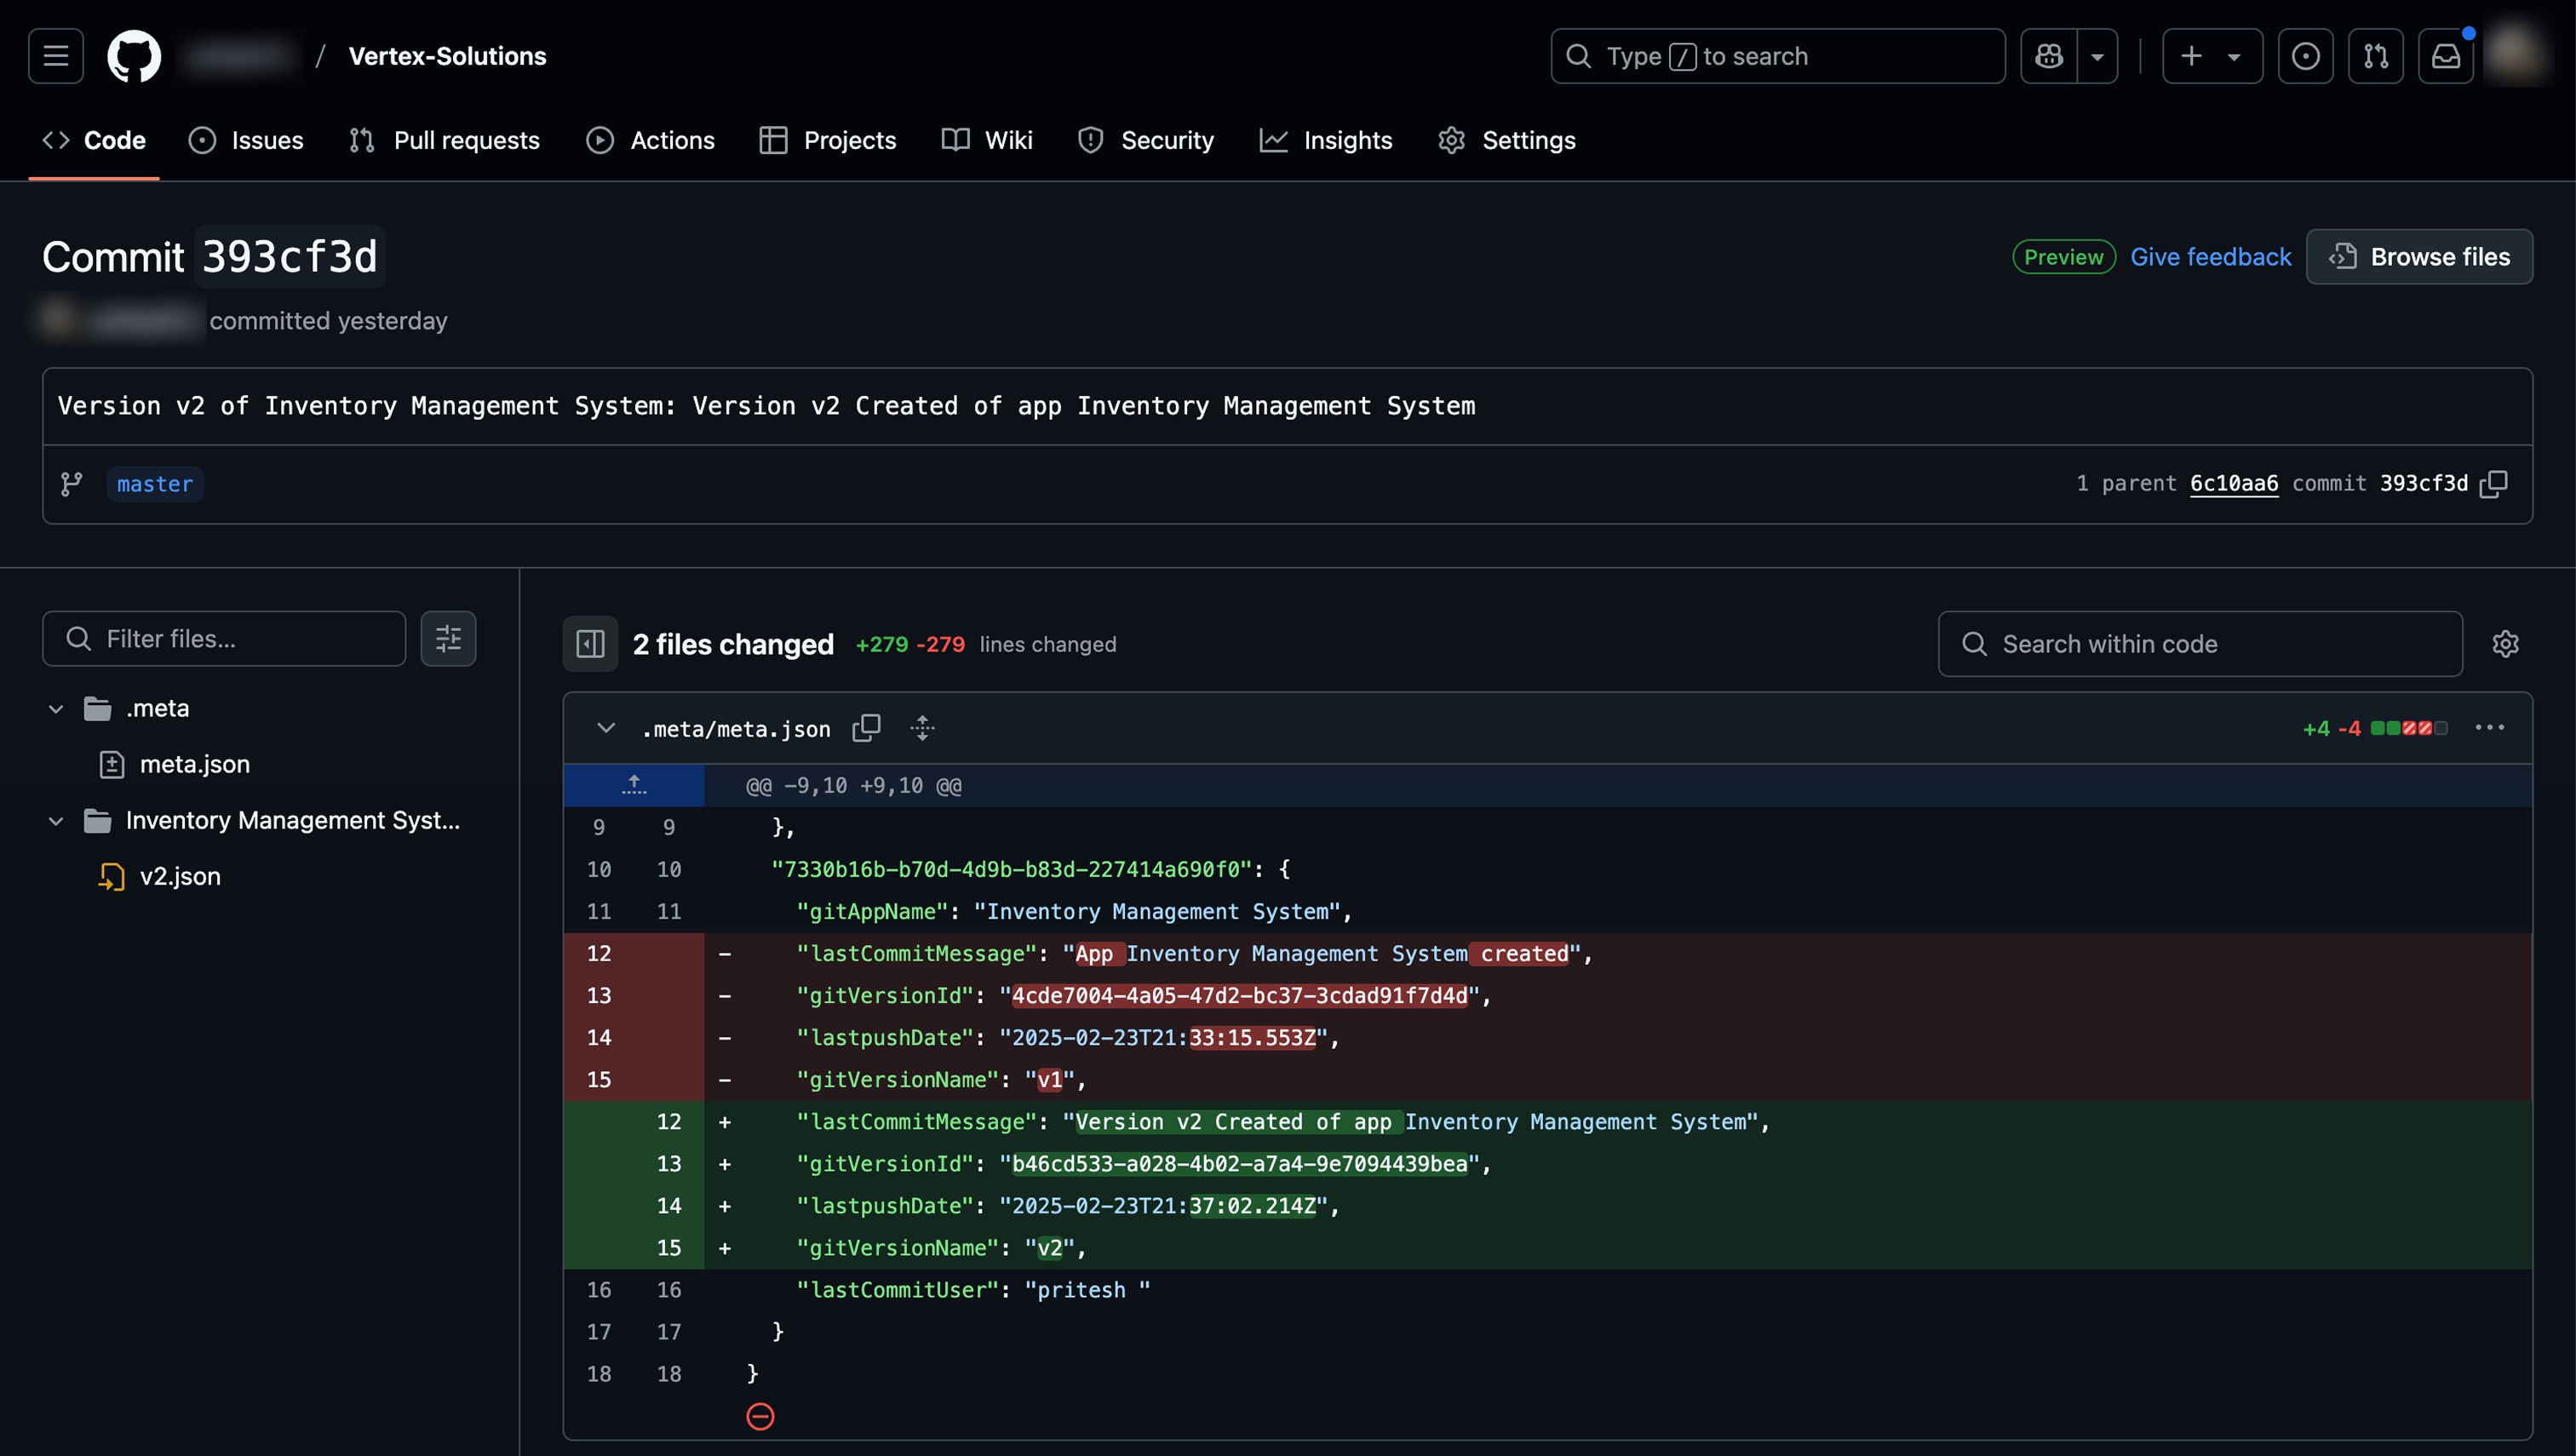
After implementing necessary changes, developers commit the updates to the Git repository.
Pulling Updates in Staging
Testers in the staging instance update the app by:
-
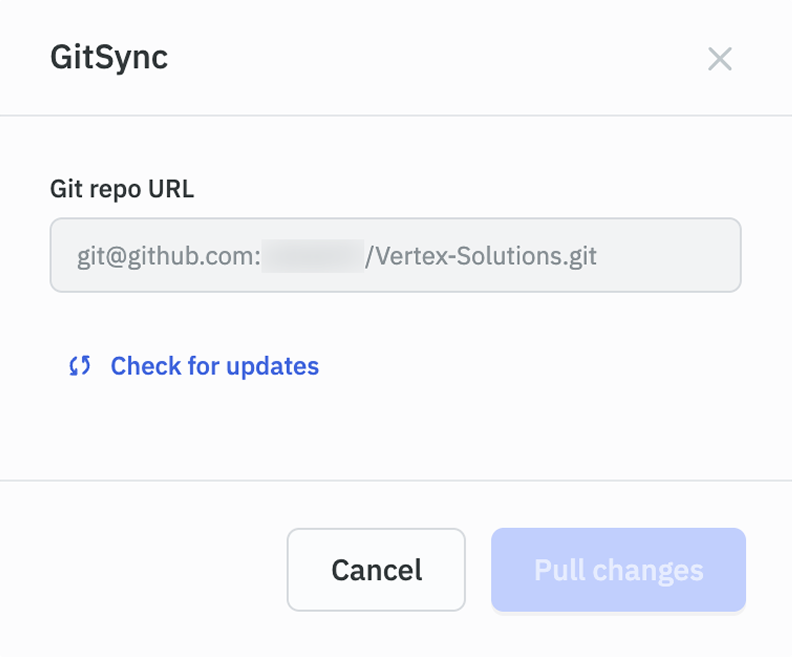
Clicking the GitSync button in the top bar.
-
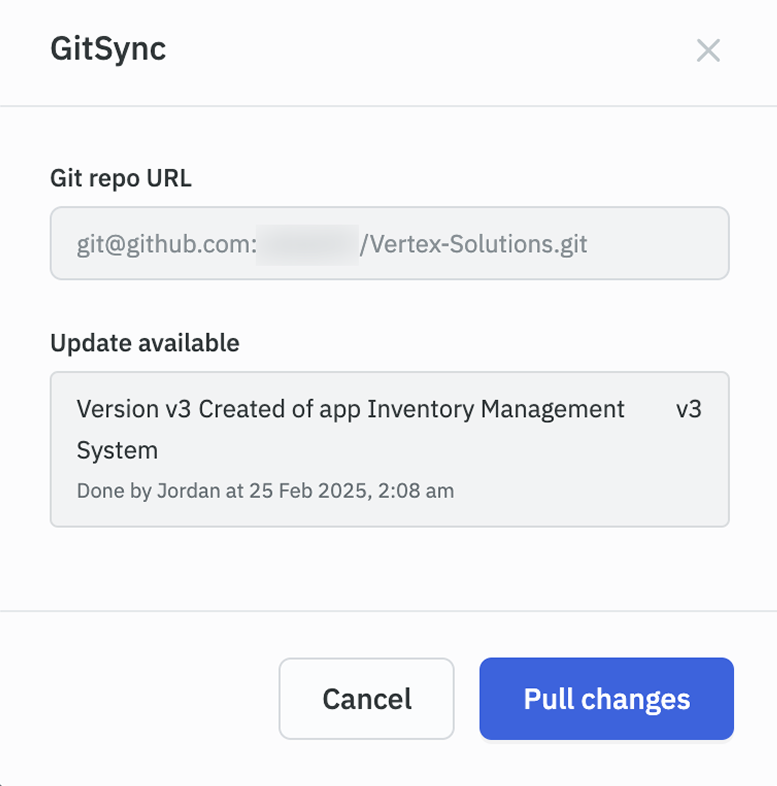
A modal appears with an option to Check for Updates.
-
Clicking Check for Updates fetches the latest changes from the Git repository.
-
Commit details (message, author, date) are displayed.
-
Clicking Pull Changes syncs the latest updates into the staging instance.
Deploying to Production
Once the application passes testing in staging, it is imported into the production instance using the same GitSync process. The application is then released, making it available to end users.