Use Query Parameters
Custom parameters in your queries offer a flexible way to introduce variables without directly modifying query parameters. This guide will walk you through creating, utilizing, and calling queries with custom parameters.
Adding Custom Parameters
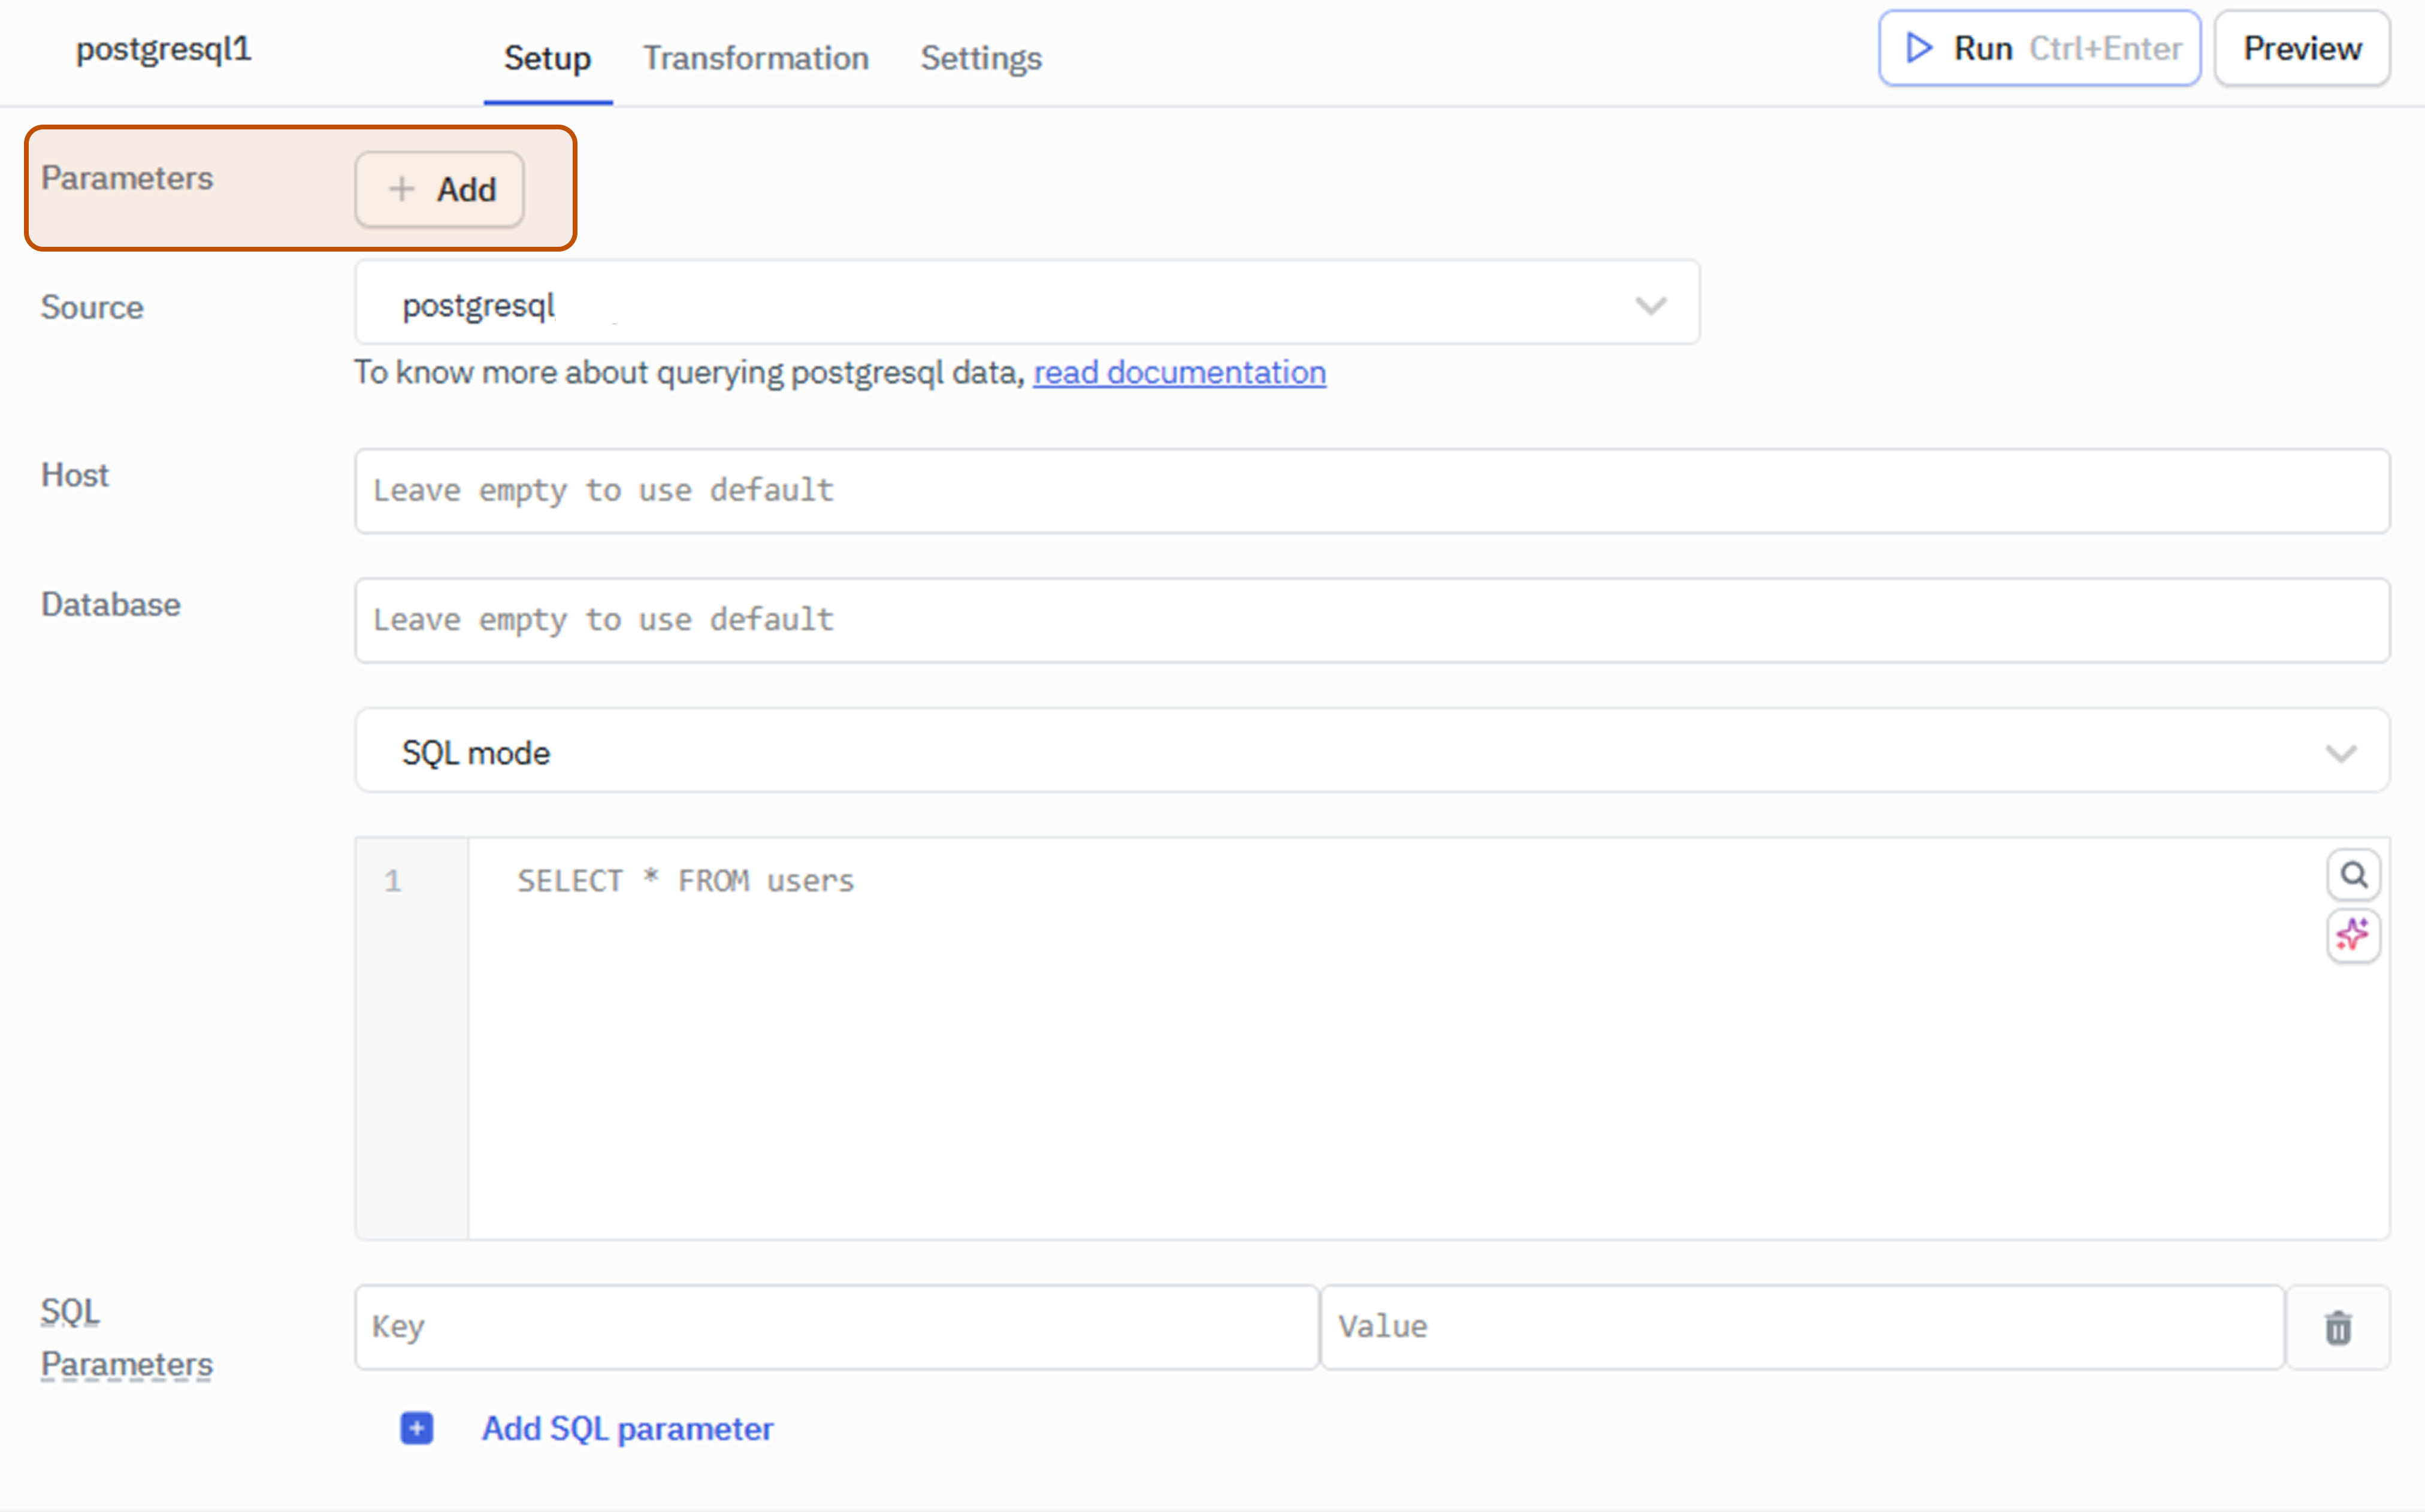
- Open the query panel and select the query you want to add custom parameters to.
- Navigate to the Parameters section in the top bar.
- Click the + button to add a custom parameter.
- For each parameter, specify:
- Name: Identifier for the parameter.
- Default value: A constant string, number, or object.
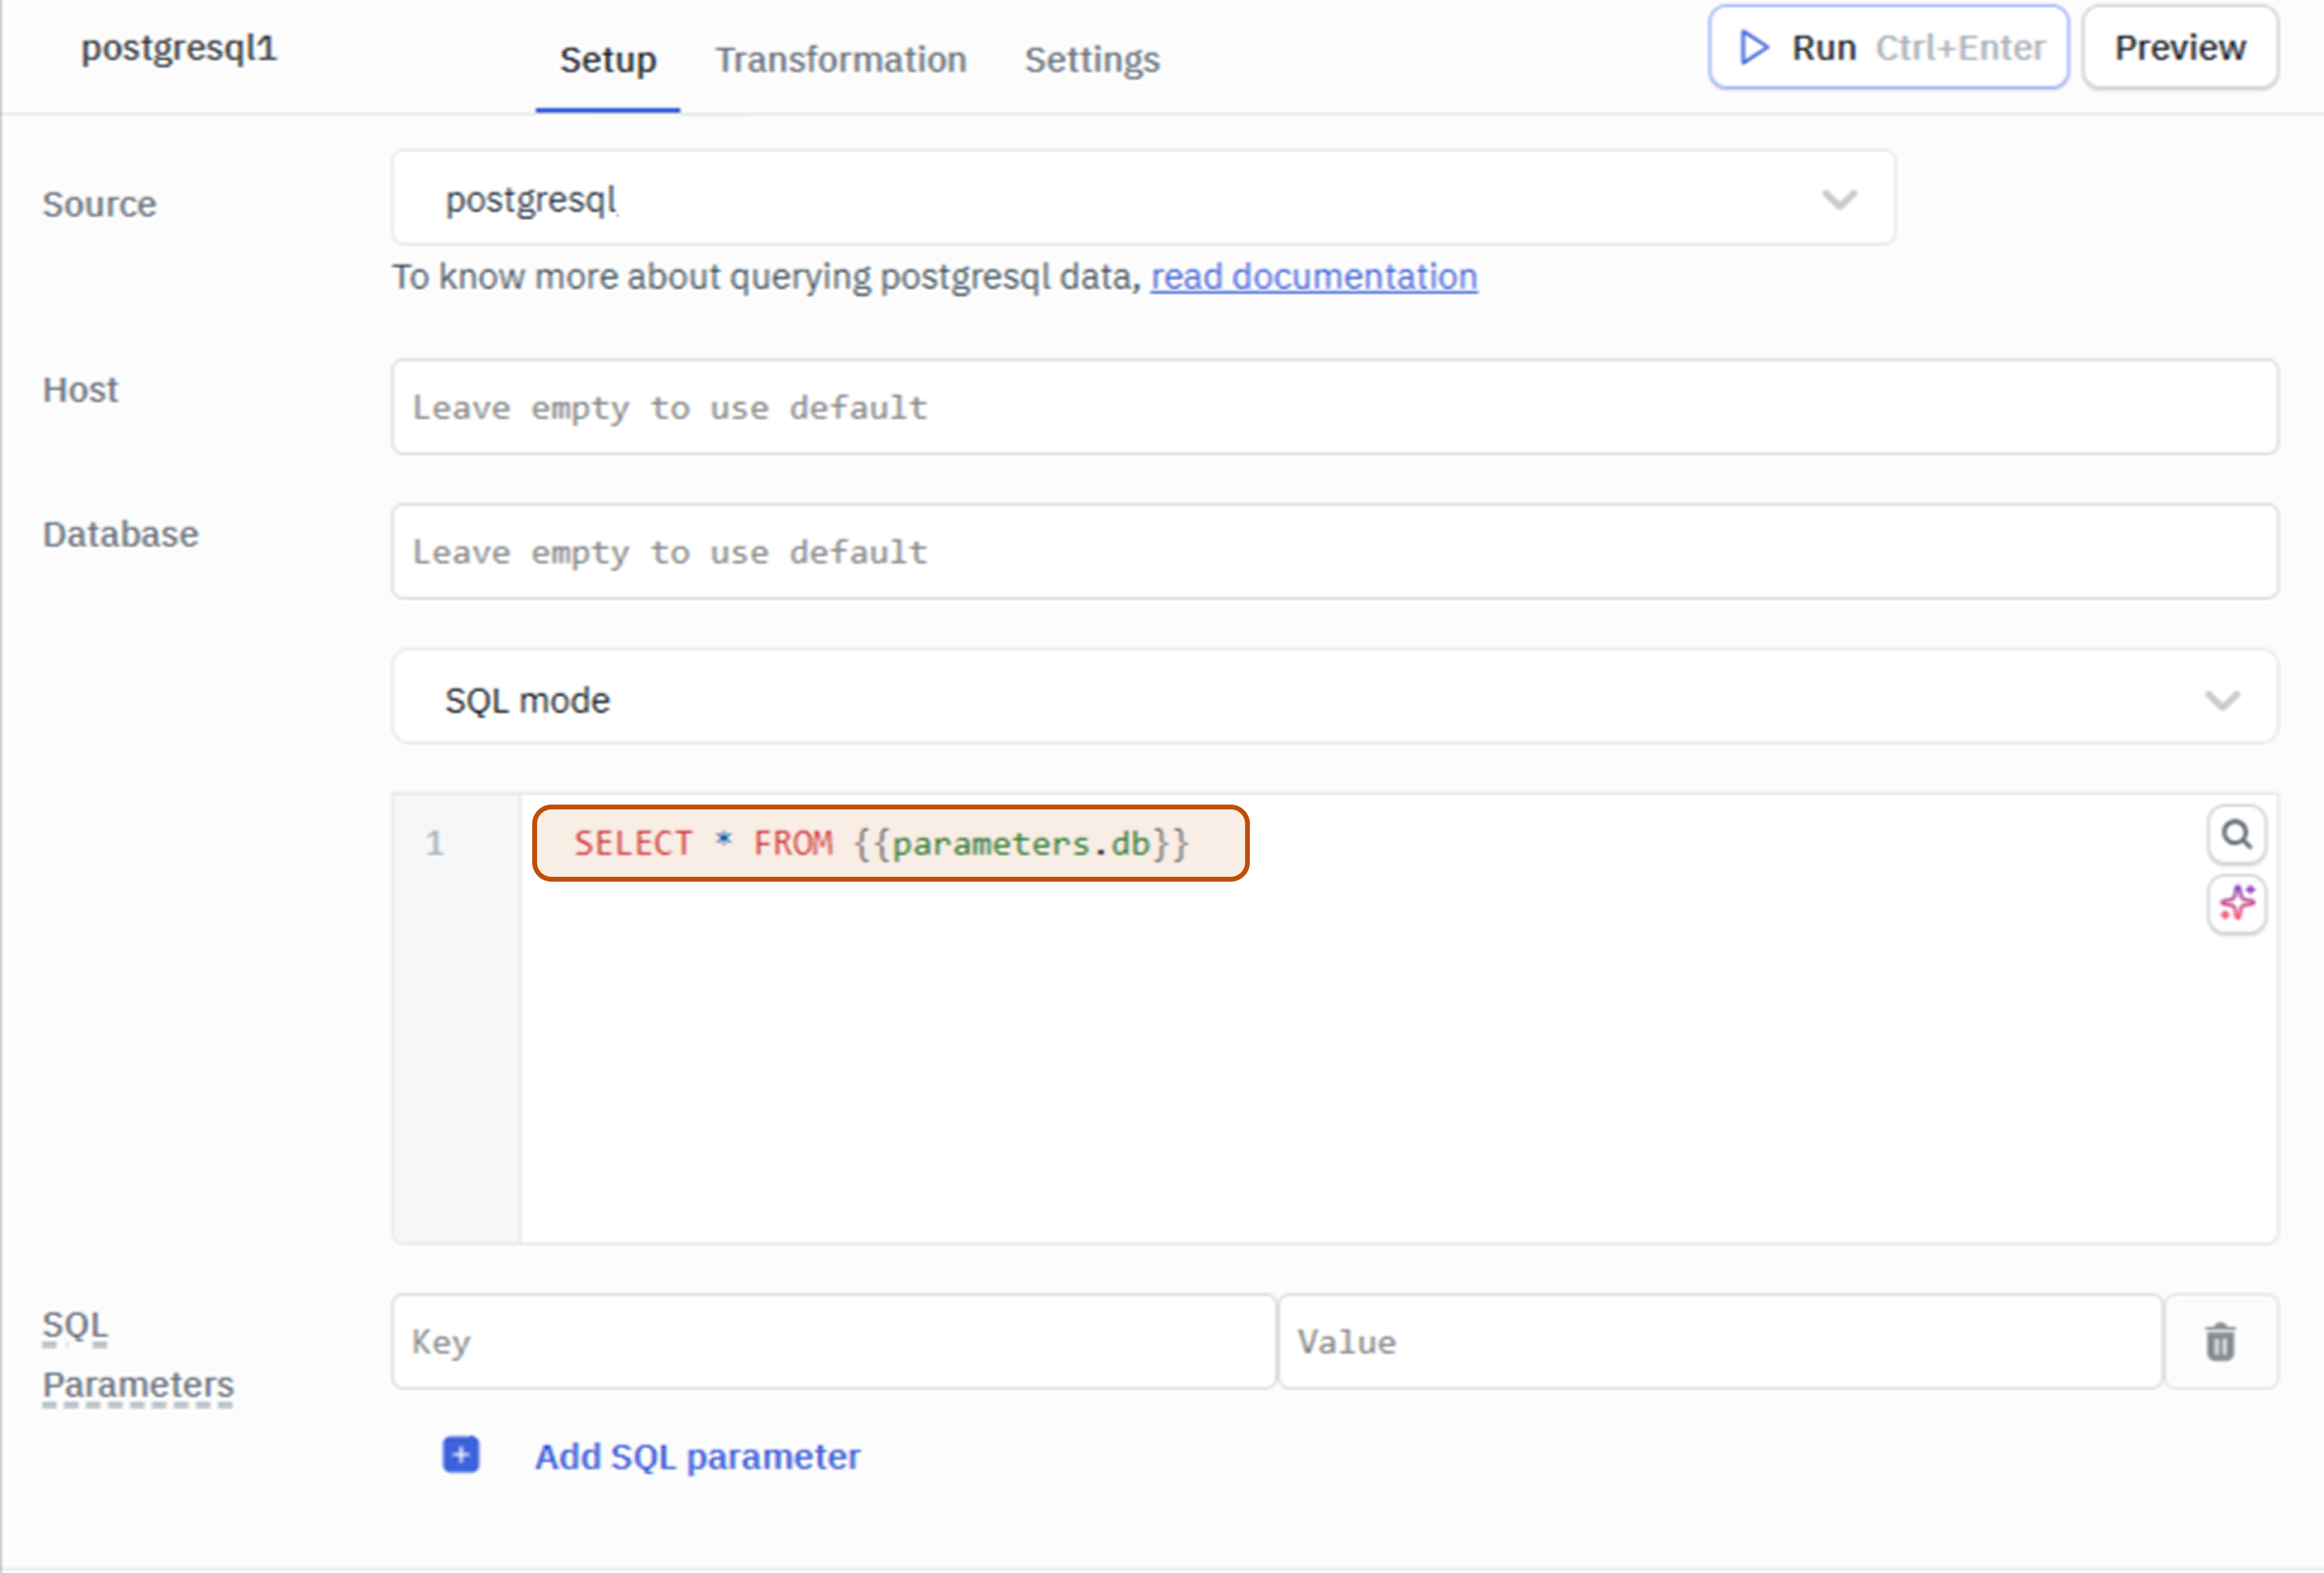
Syntax for Utilizing Parameters
Use parameters.<identifier> in your query to employ custom parameters. Note that parameters can only be used within the query where they are defined.
Example: Create Row in ToolJetDB with Custom Parameters
Let's assume we have a ToolJetDB table with the following columns: name, email, and contact. We will create a new row in the table using custom parameters.
-
Create a new ToolJetDB query, select a table from the dropdown and select the
Create Rowoperation. -
Add the following parameters:
- name:
nameand value:Shubh - name:
emailand value:[email protected] - name:
contactand value:1234567890
- name:
-
Add the columns to the query and use the custom parameters to set the values.
Column Value name {{parameters.name}}email {{parameters.email}}contact {{parameters.contact}}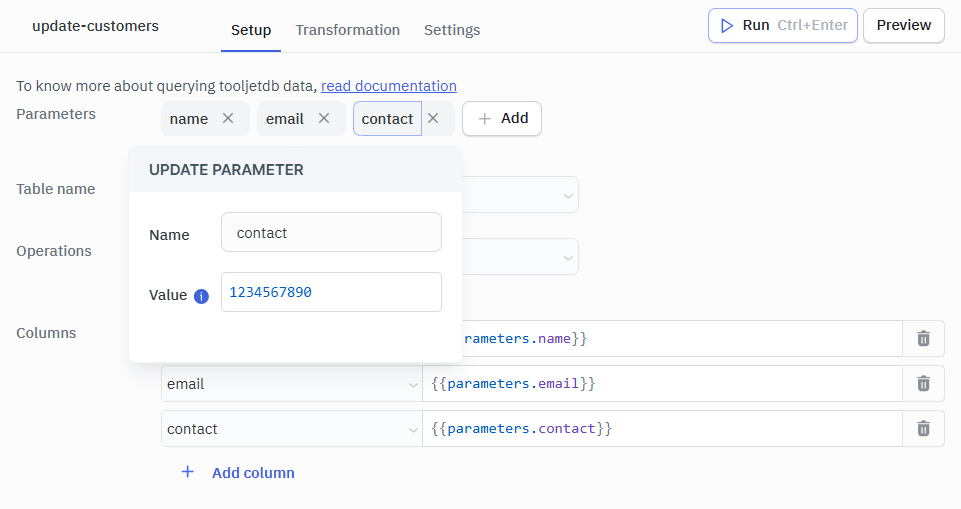
-
Finally, execute the query to create a new row in the ToolJetDB table with the values provided in the custom parameters.
Example: Providing Custom Parameters Using Events
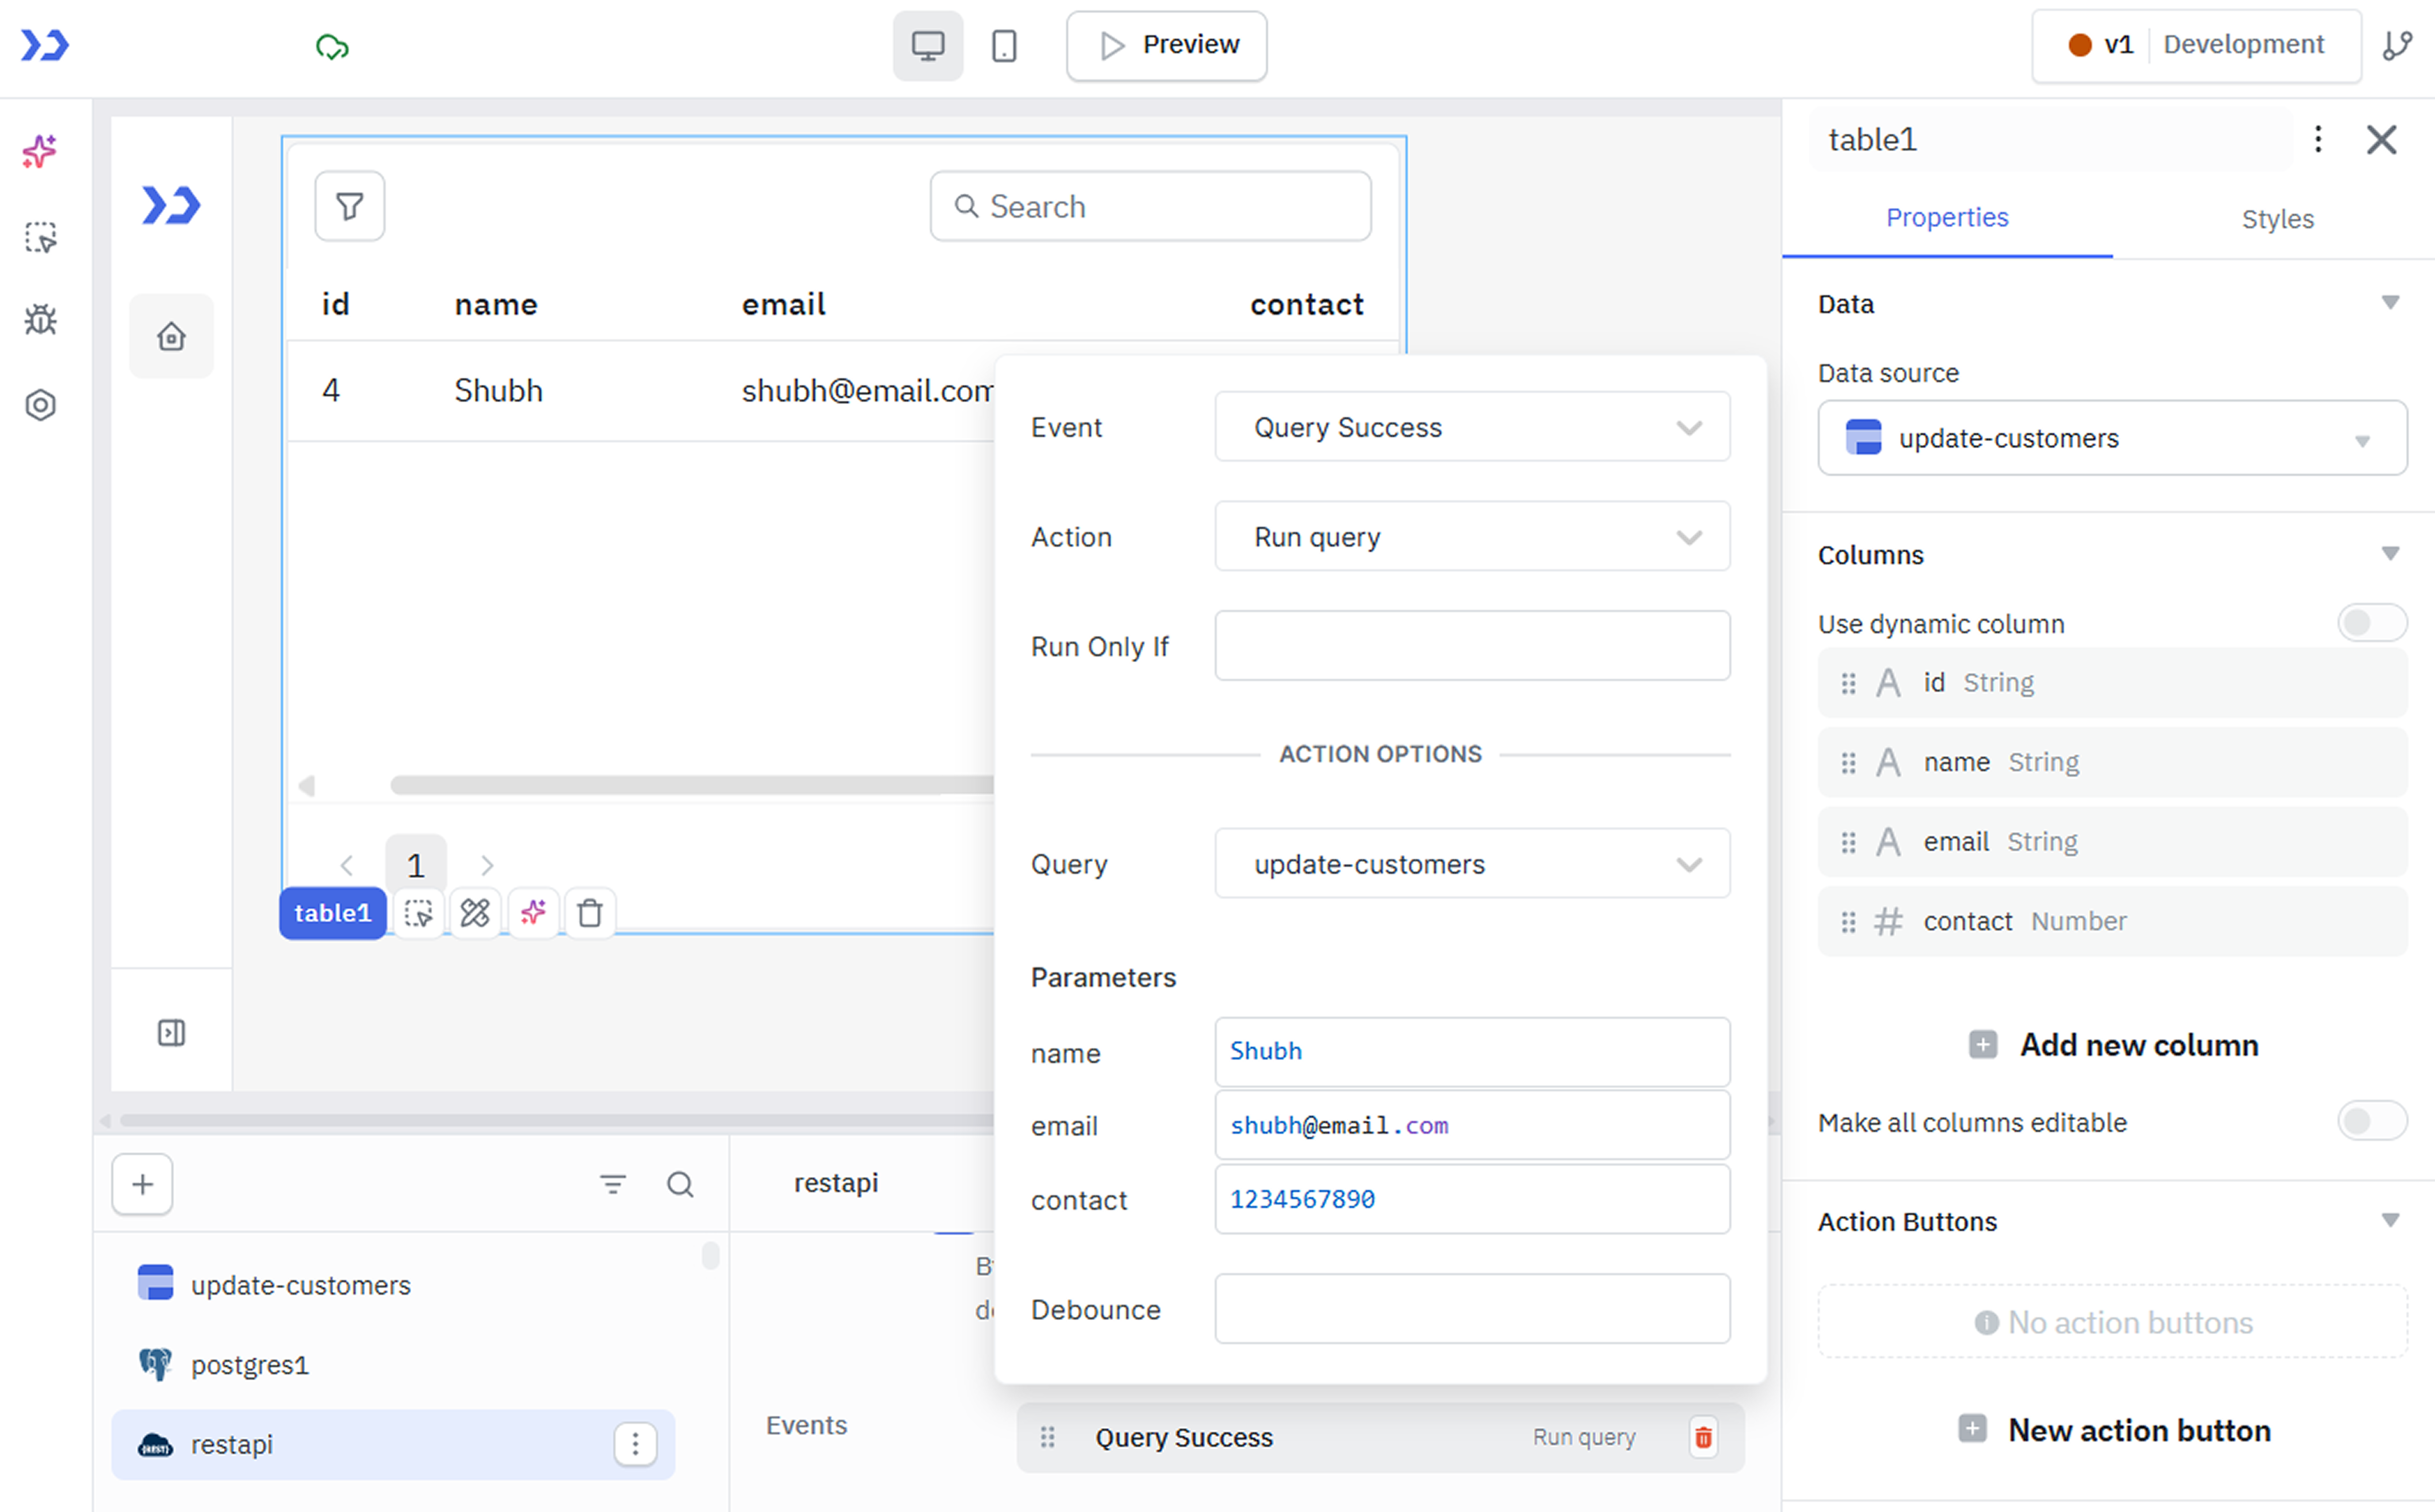
In this example, we will demonstrate how to use custom parameters in a query by providing values from an event. We will use execute a REST API query and on its success, we will execute the ToolJetDB query to create a new row with the response data.
-
Create a REST API Query:
- Method:
GET - URL:
https://reqres.in/api/users?page=2
- Method:
-
Add a Success Event:
- Name:
onSuccess - Action:
Run Query - Query:
update-customers - Parameters: The parameters that you have added to the query will automatically be available in the event.
- name:
{{queries.get-user-data.data.data[0].name}}This will use the name from the first record of the response data. - email:
{{queries.get-user-data.data.data[0].email}}This will use the email from the first record of the response data. - contact:
1234567890provided as a constant value just for demonstration.
- name:
- Name:
-
Execute the REST API query and observe the new row created in the ToolJetDB table.
Note: You can also use parameters in JavaScript queries. Learn more about JS Query Parameter.
Running Queries with Callbacks
When running a query programmatically using queries.<queryName>.run(), you can pass an optional second argument with onSuccess and onFailure callbacks to handle the result inline — without wiring up separate event handlers.
Syntax:
queries.<queryName>.run(
  { param1: value1, param2: value2 },  // parameters (first argument)
  {                                     // options (second argument, optional)
    onSuccess: (data) => {
      // runs when the query completes successfully
      // 'data' contains the query result
    },
    onFailure: (error) => {
      // runs when the query fails
      // 'error' contains error information
    }
  }
)
Both onSuccess and onFailure are optional — include only the ones you need.
Example:
queries.submitOrder.run(
  { orderId: components.orderTable.selectedRow.id },
  {
    onSuccess: (data) => {
      actions.showAlert('success', `Order ${data.orderId} submitted`);
      queries.refreshOrders.run();
    },
    onFailure: (error) => {
      actions.showAlert('error', 'Submission failed — please try again');
    }
  }
);
If no parameters are needed, pass an empty object or omit the first argument entirely and pass only the options:
queries.fetchReport.run({}, {
  onSuccess: (data) => components.reportViewer.setData(data)
});